How to Paint Unfinished Cabinets
Here’s your guide to painting raw, unfinished oak wood cabinets from Lowe’s, The Home Depot, or any other hardware store. If you have been looking for the best way to finish unfinished wood cabinets, this project is for you!
A couple of months ago, we updated the laundry room, one of our most significant makeovers to date. It was one of those projects which had a few other sub-projects in itself. And although it was overwhelming, it was so worth it!
One of those sub-projects was painting three unfinished oak cabinets we purchased at our local Lowe’s. My original thought was to paint the existing cabinets; however, we realized we could not salvage them when we took them off the walls.
Would you like to save this?
So, follow this tutorial to paint cabinets if and only if you are purchasing raw and unfinished wood cabinets such as these oak cabinets I bought. If you are painting pre-finished kitchen cabinets, I highly recommend this tutorial from my friend Tasha at Kaleidoscope Living.
This post may contain affiliate links for your convenience. For more information, please read my Affiliate Disclosure.
What You Need to Paint Unfinished Cabinets
For our project, we needed three unfinished cabinets. We purchased one double (36 x 30 inch) cabinet and one single (18 x 30 inch) cabinet. They’re listed as kitchen cabinets on the Lowe’s website. Always doble check dimensions and ensure you purchase the right size cabinets for your space.
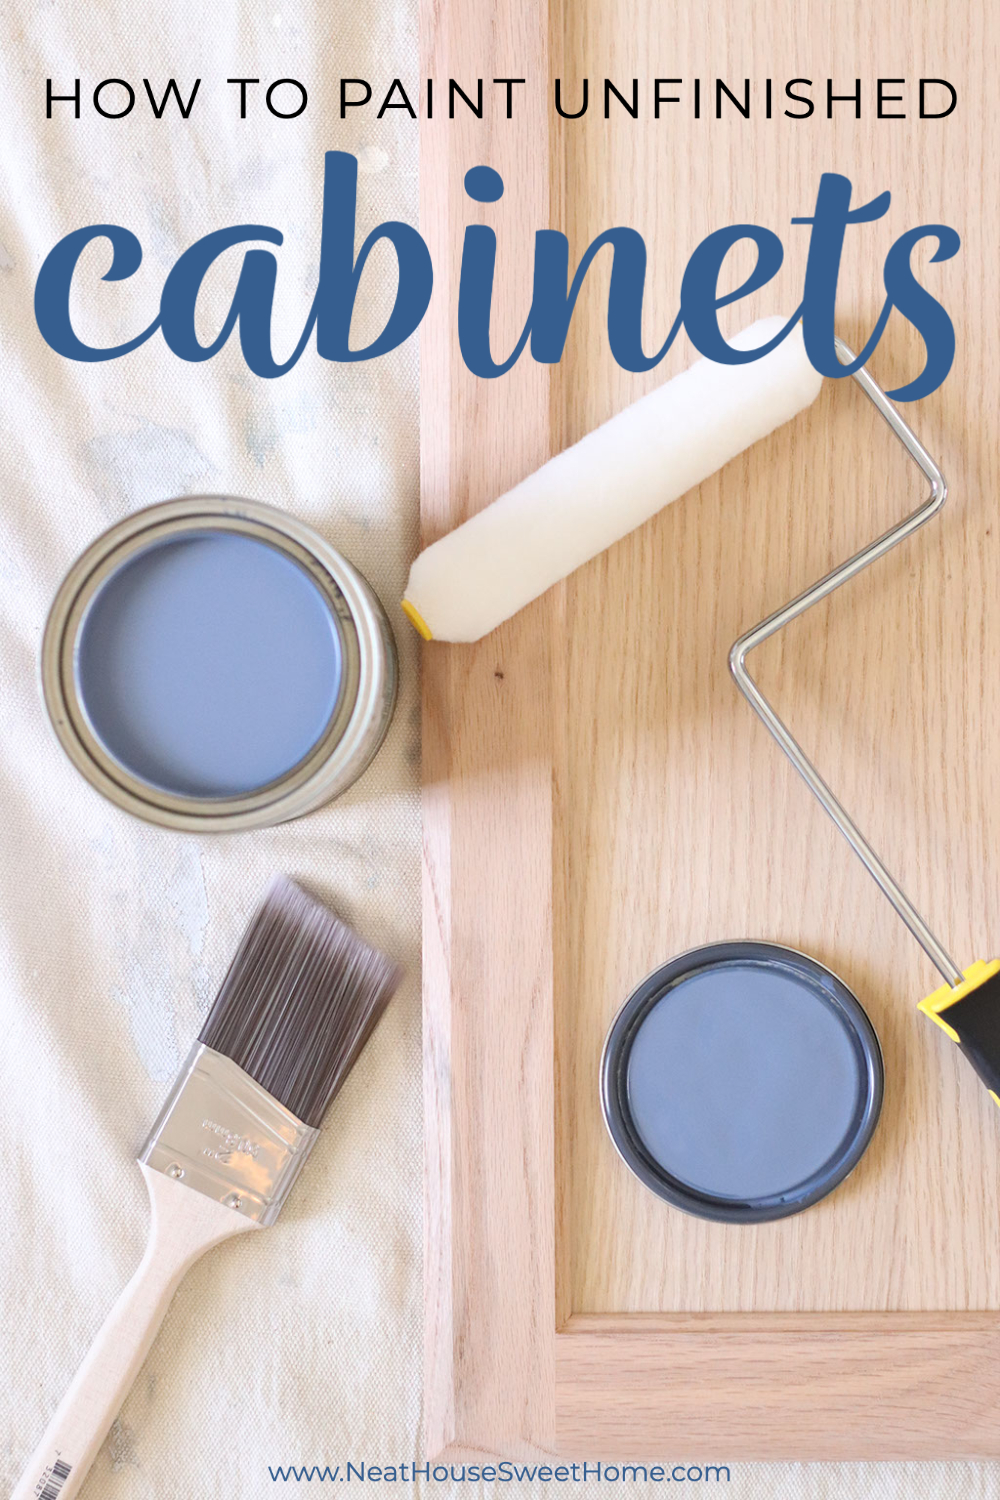
Materials
- Unfinished oak double cabinet
- Unfinished oak single cabinet
- Cabinet end panel – Optional. Needed if the end of the cabinet is exposed.
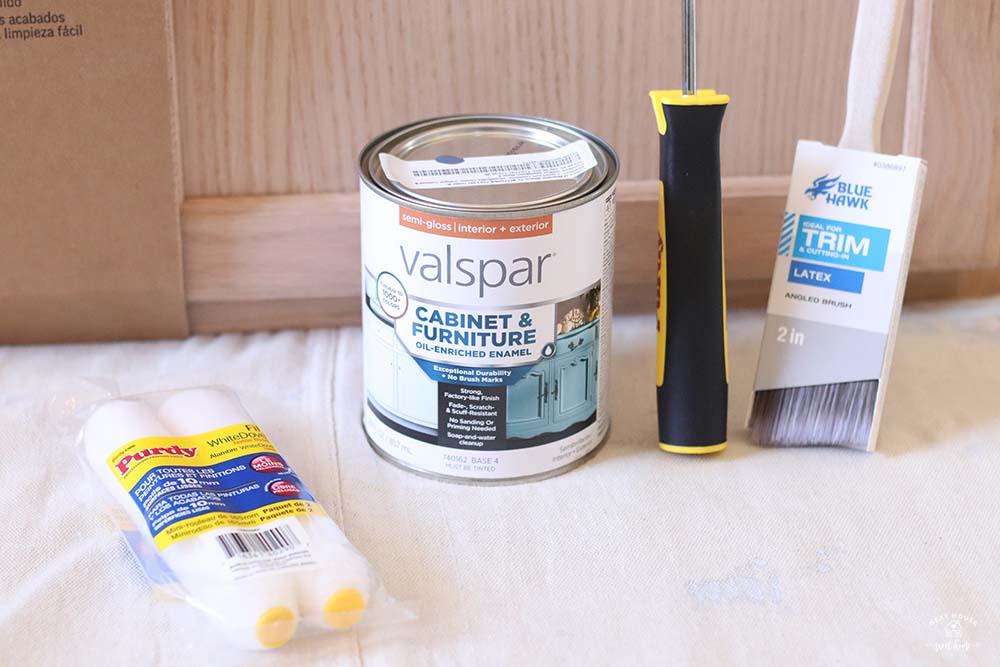
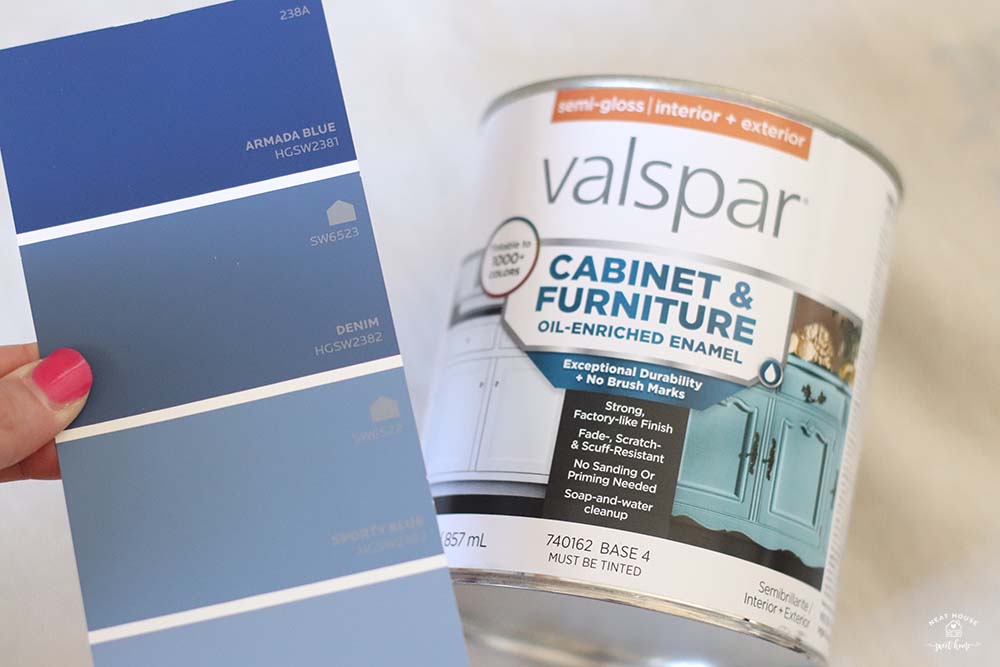
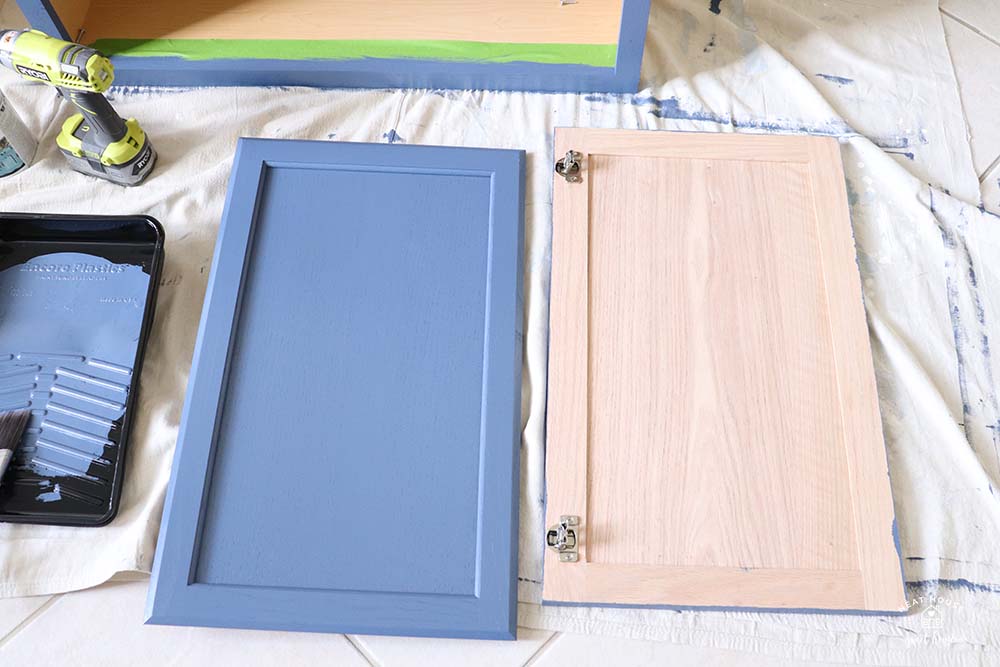
- Cabinet and furniture paint – I used Valspar oil-enriched enamel, semi-gloss, tinted in Sherwin Williams HGSW2382 Denim
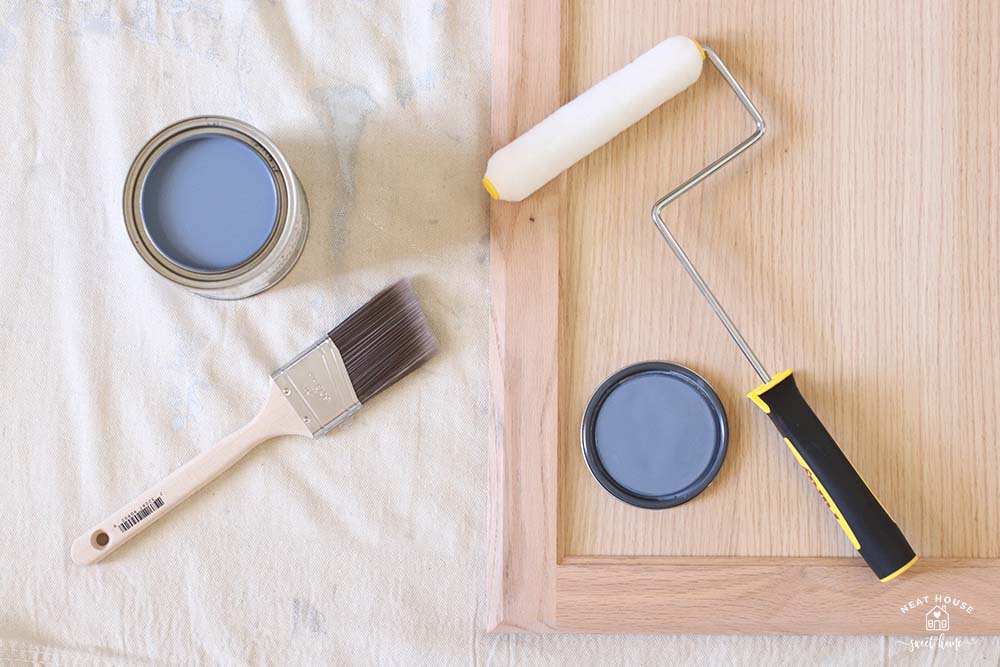
Tools and Supplies
- 6 1/2-inch paint roller frame– and 6 1/2-inch paint roller cover I am a fan of Purdy products ever since we painted our family room.
- 2-inch angled brush
- Paint tray and liners
- Canvas dropcloth – optional but always necessary to cover the surface where you are working.
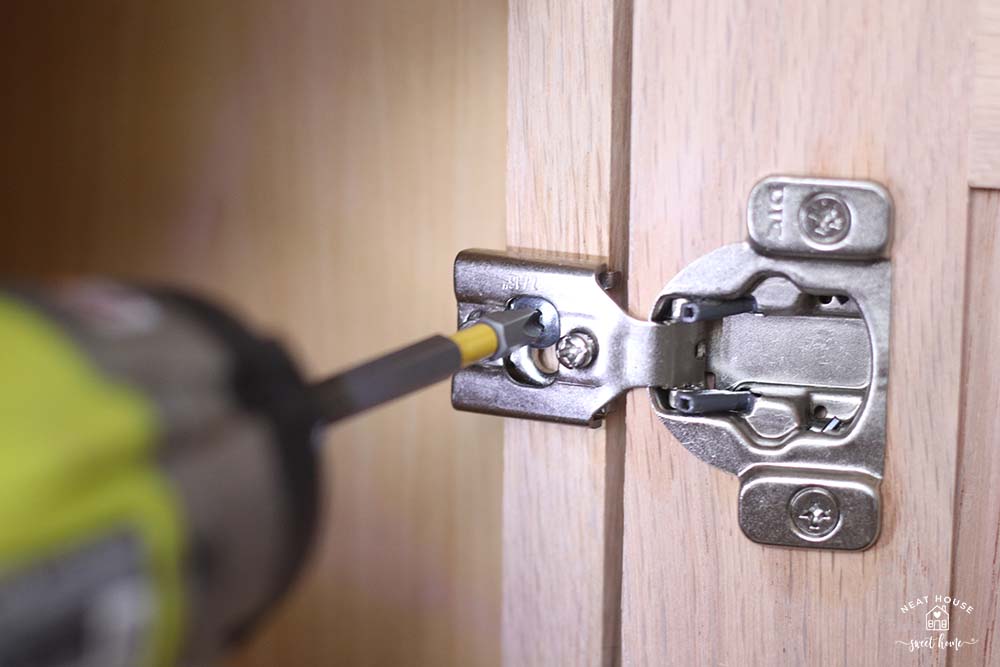
- Battery operated drill or manual screwdriver – to remove the doors.
- Painter’s tape
- Bulldog Adhesion Promoter – Optional. This is for the paint to stick on melamine. Explained below.
- Wood Glue – optional. I used it to attach the end panel to the left unfinished side of the cabinet.
I recommend purchasing all the wood cabinets and end cabinet pieces from the same supplier if necessary. Therefore, I am linking to the unfinished cabinets I bought from Lowe’s, but you can also look for their equivalents at The Home Depot or any other hardware store.
Steps to Paint Unfinished Cabinets
Before explaining the painting process, I have a little disclaimer. Because the left end of our cabinet shows, I had to attach an end cabinet panel to that side. After I glued it, I started painting.
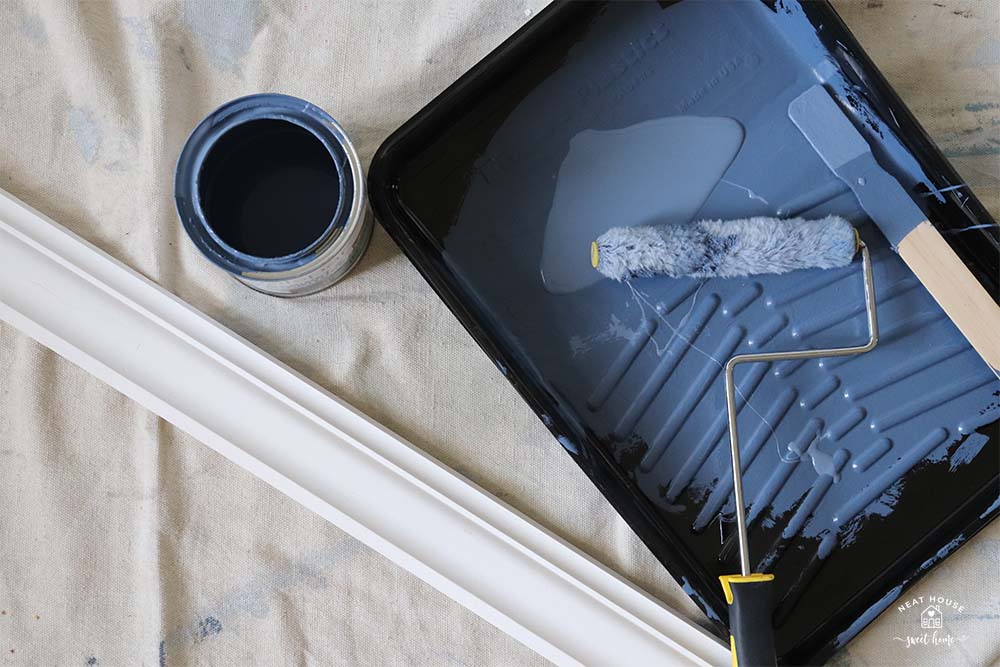
1. Gather Your Supplies
Place the drop cloth on the floor in an open space and gather your supplies. These unfinished wood cabinets from Lowe’s do not need any prep or sanding before painting.

2. Remove the Doors
With a screwdriver, remove the doors from the cabinets and lay them flat on the drop cloth.
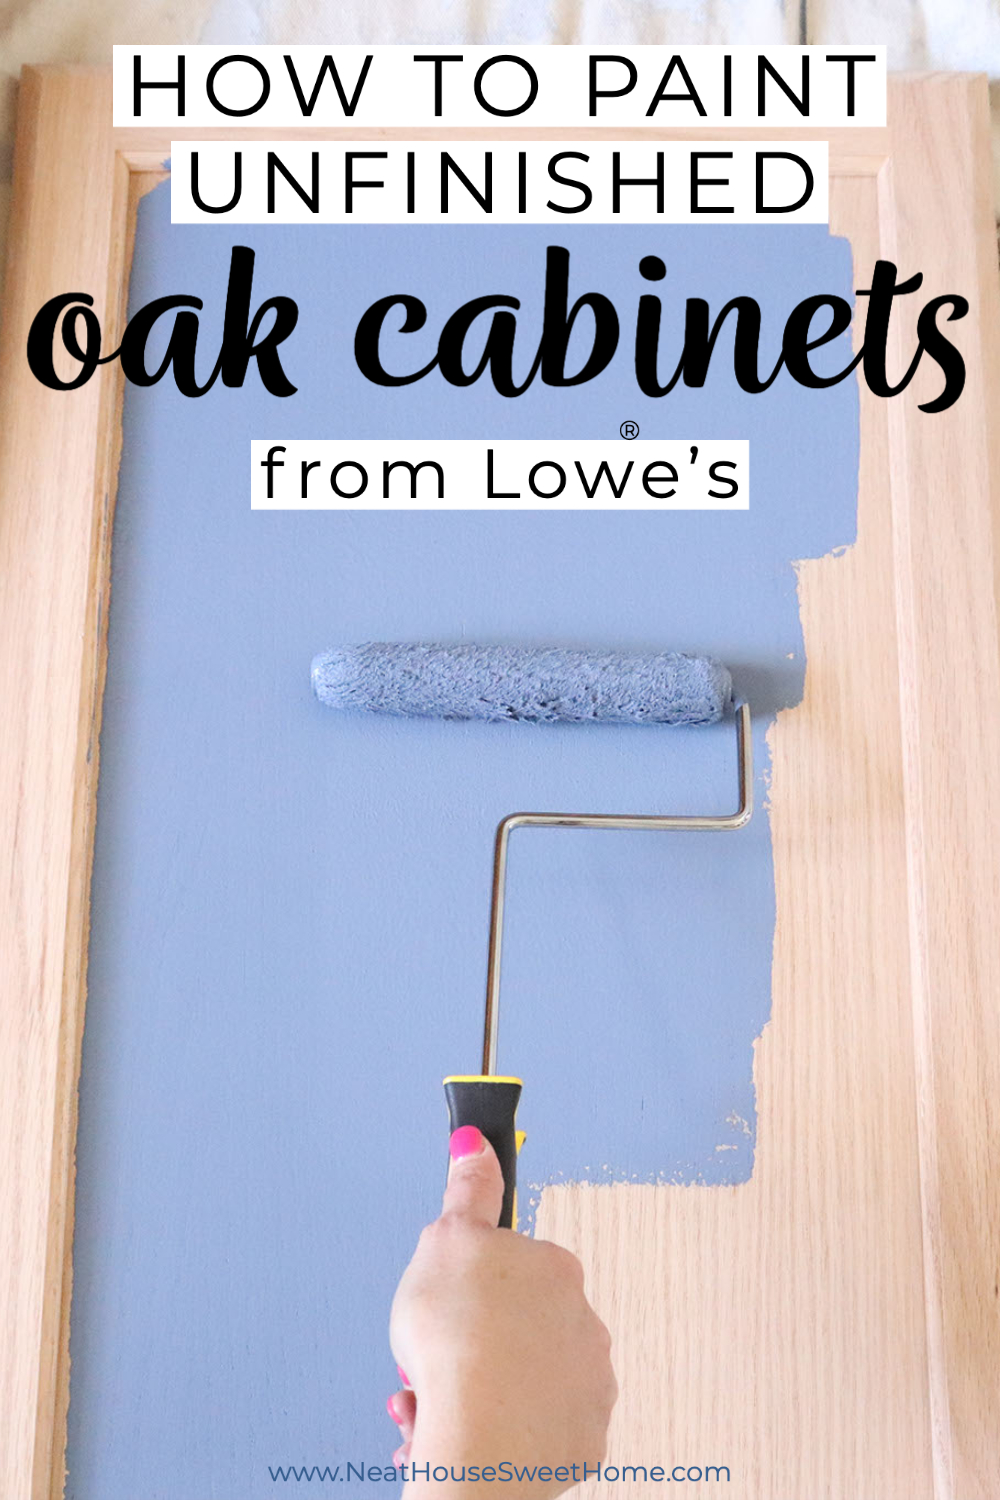
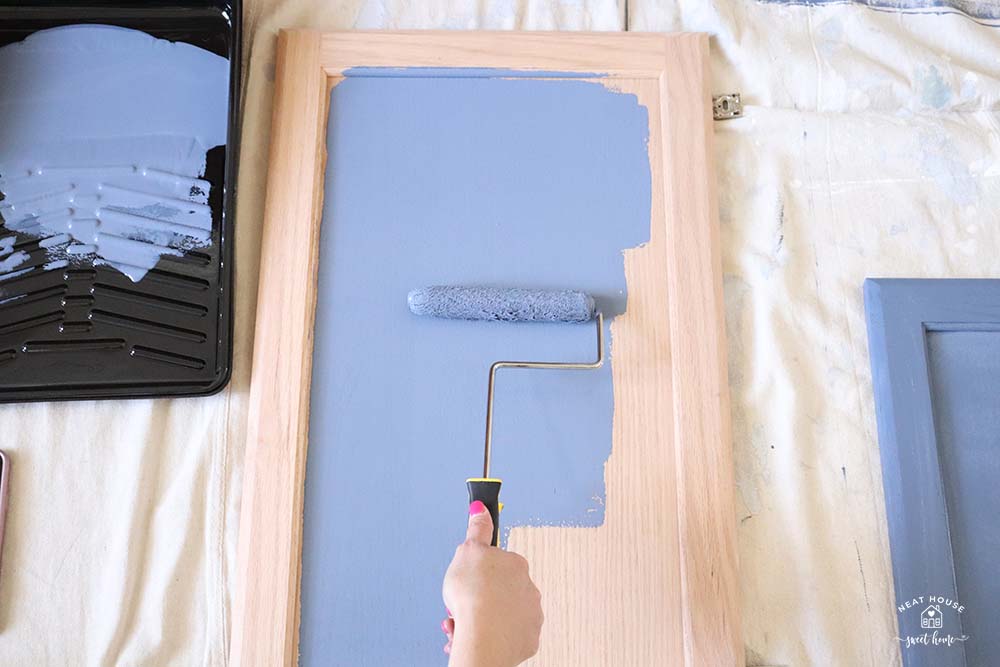
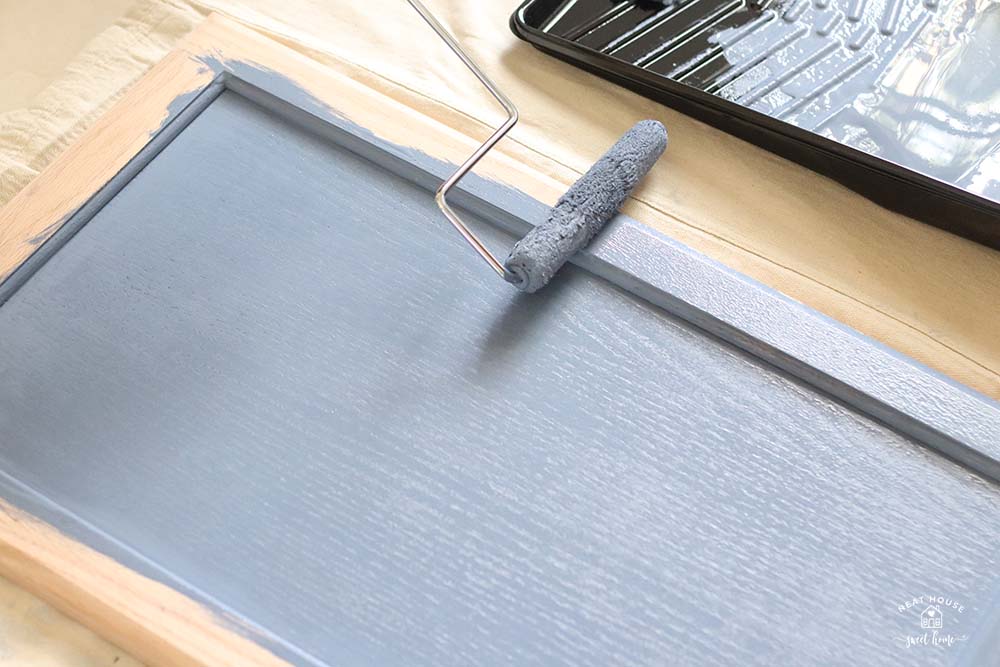
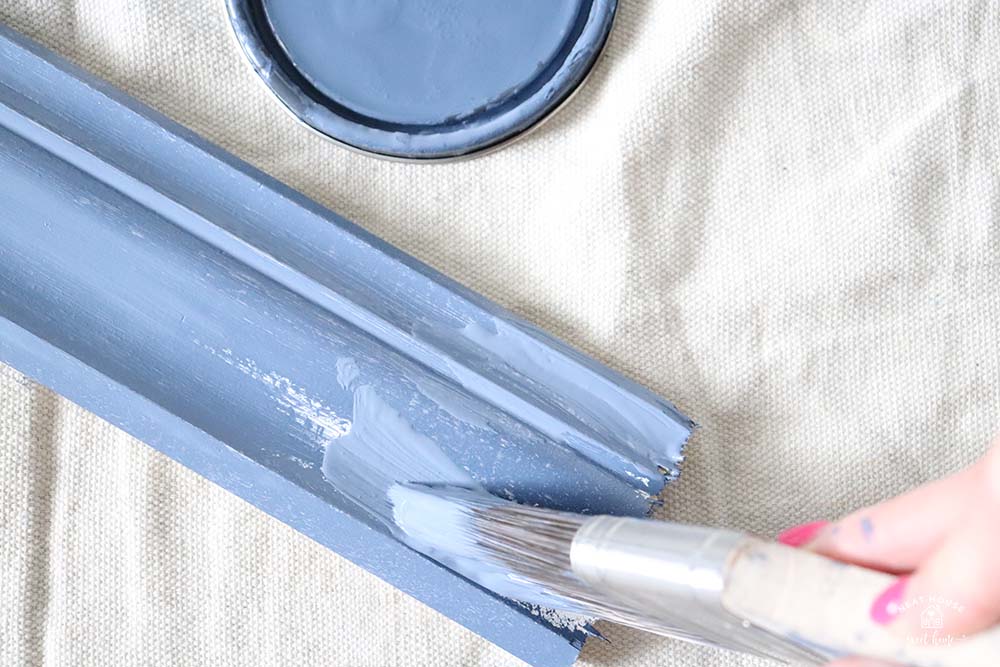
3. Paint the Doors
- Pour some paint into the paint tray, and start painting the doors of your unfinished cabinets.
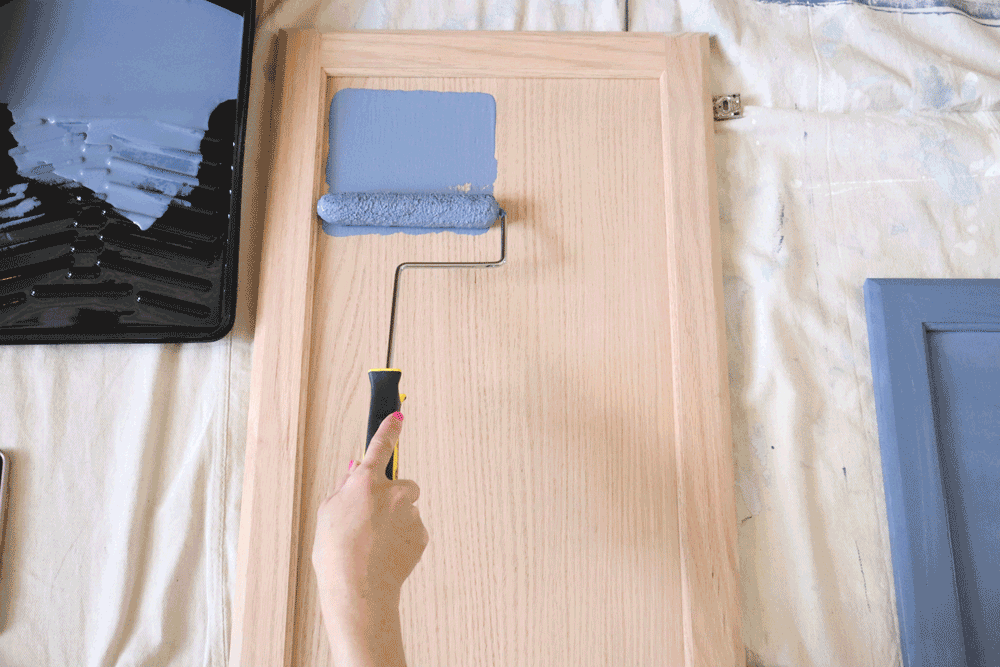
First, I prefer using the paint roller to cover most of the surface, and then I use the paintbrush for details.
- After rolling the paint on most of the surface of the door, use the angled brush to complete all the crevices where the paint roller can’t reach.

There’s no right or wrong way to paint these cabinets. It is straightforward. The cabinet paint runs smoothly over the unfinished surface. Feel free to switch between rolling and brushing until all the surfaces are entirely covered.
Once painted, move the first door aside and paint another piece.
Allow the paint to dry completely (it took about 2 hours inside my air-conditioned home) before turning the doors over to paint the other side.
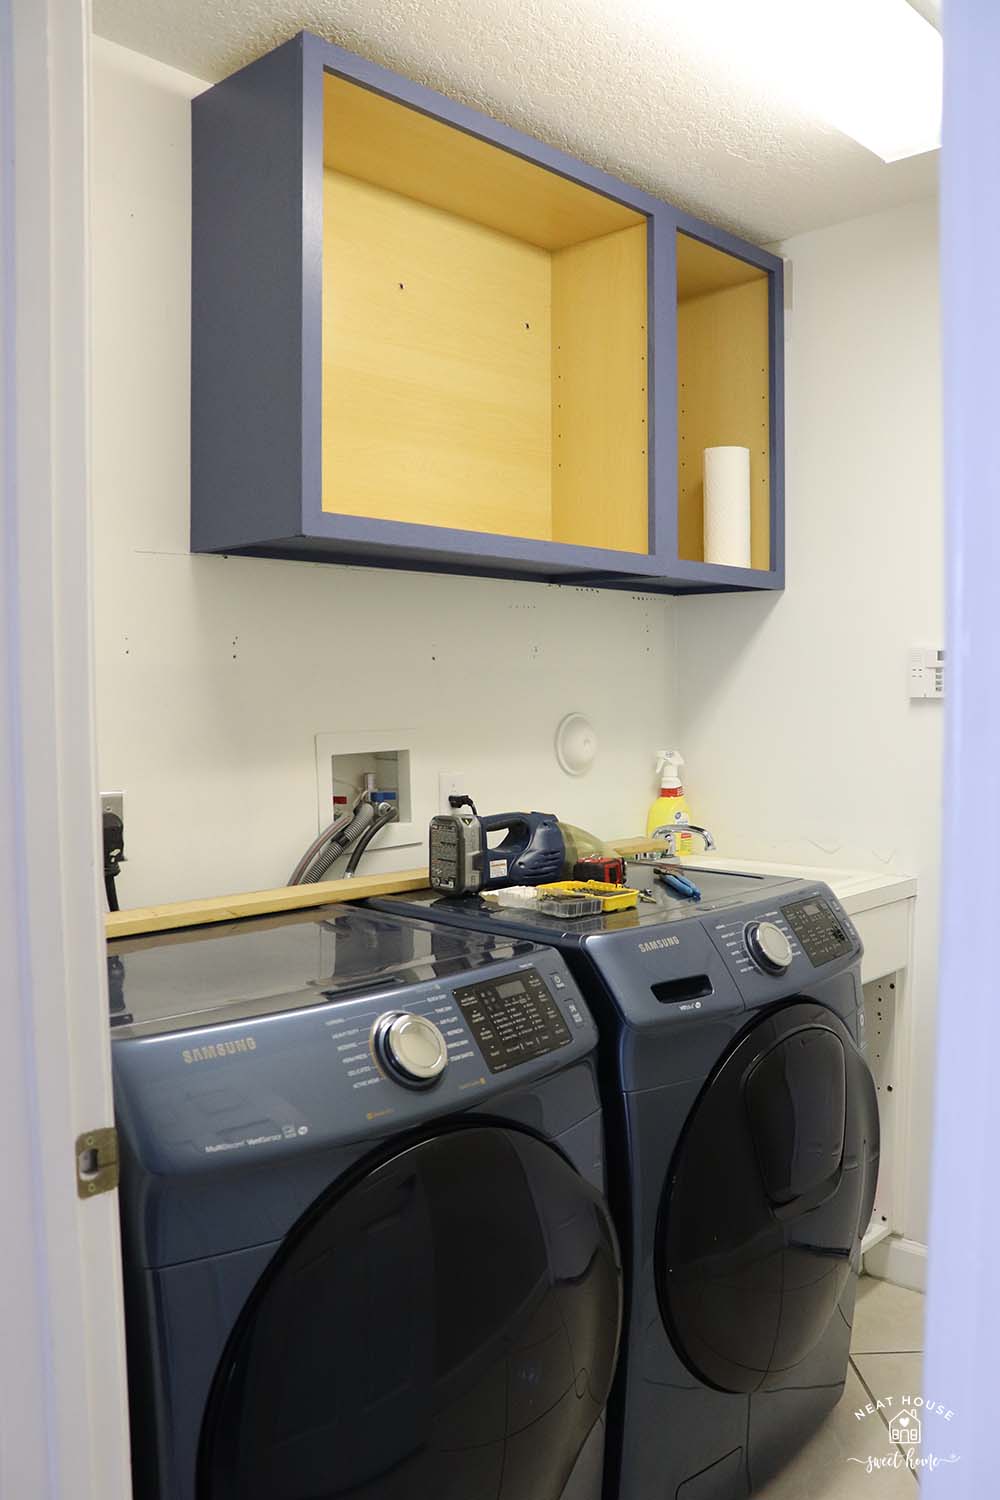
4. Paint The Unfinished Cabinet
It is not necessary to paint the inside of the unfinished cabinets from Lowe’s because they have a melamine finish. The only areas you should paint are the cabinet’s outer wood oak frame (or lip) and the end panel, if you need one.

Use painter’s tape to delineate the border and protect the inside of the cabinet. Use the paintbrush for this step.
Check out my laundry room cabinet organization for a detailed view of the inside. You can see the end panel in the picture below.
5. Optional: Paint The bottom of the Cabinet
To add a shelf over our machines in the laundry room, we had to raise our cabinets almost flushed with the ceiling. And because of that, it was necessary to paint the bottom of the cabinets.
The cabinets are finished underneath with the same melamine that’s inside. You must use an adhesion promoter because the paint does not stick to the melamine finish. I was fascinated by this product, and once I applied it, the paint gripped over the cabinet just as it did on the unfinished areas.
Pro Tip: Spray the adhesion promoter in a well-ventilated area.

Once all the cabinet pieces are dry, you can put the doors back and install the cabinets on the wall.
Optional: Add Crown Molding
As I mentioned before, we raised the cabinets almost flushed with the ceiling. However, we planned on adding crown molding (also from Lowes)for a more refined look. So, I will show you how we installed the crown molding above the cabinets in this step.
First, I painted the primed crown molding and let it dry completely.
After the piece dried, we cut to size the two pieces we needed. One short piece for the left side of the cabinet and one long piece for the front. Here is a detailed tutorial on how to cut and install crown molding.


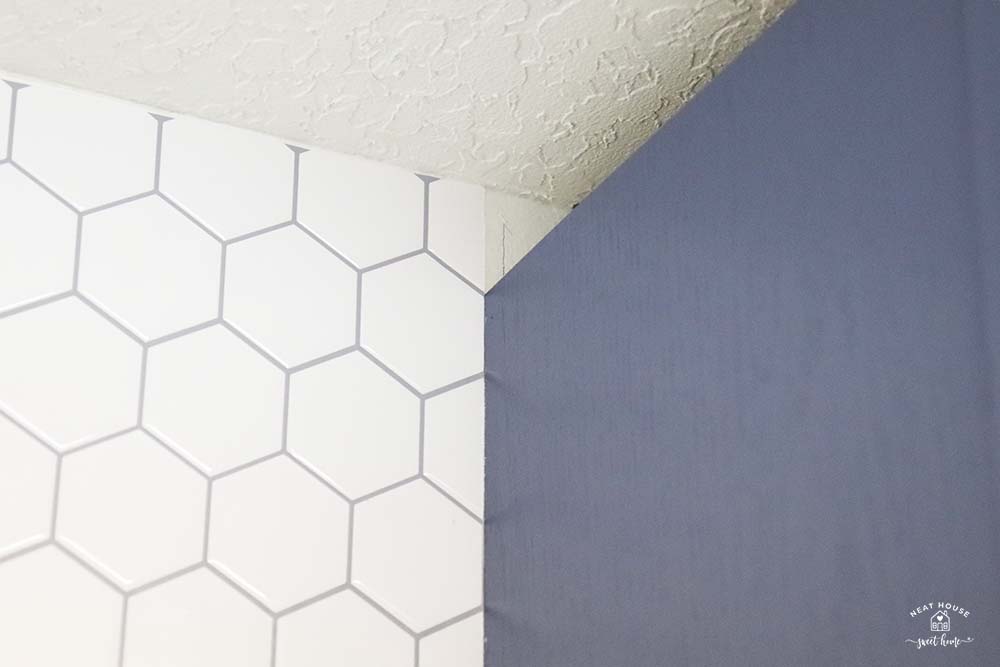
And with that, our painted unfinished cabinets sub-project is done!
Here’s a final look.
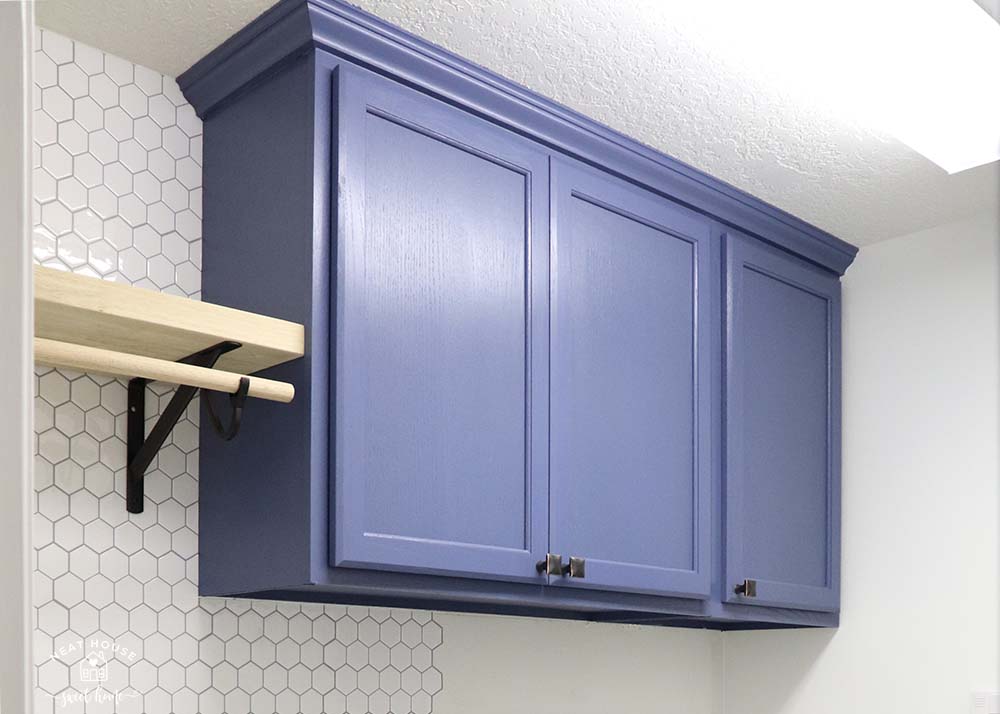
We finished off the cabinets by adding oil-rubbed bronze knobs, also from Lowe’s.
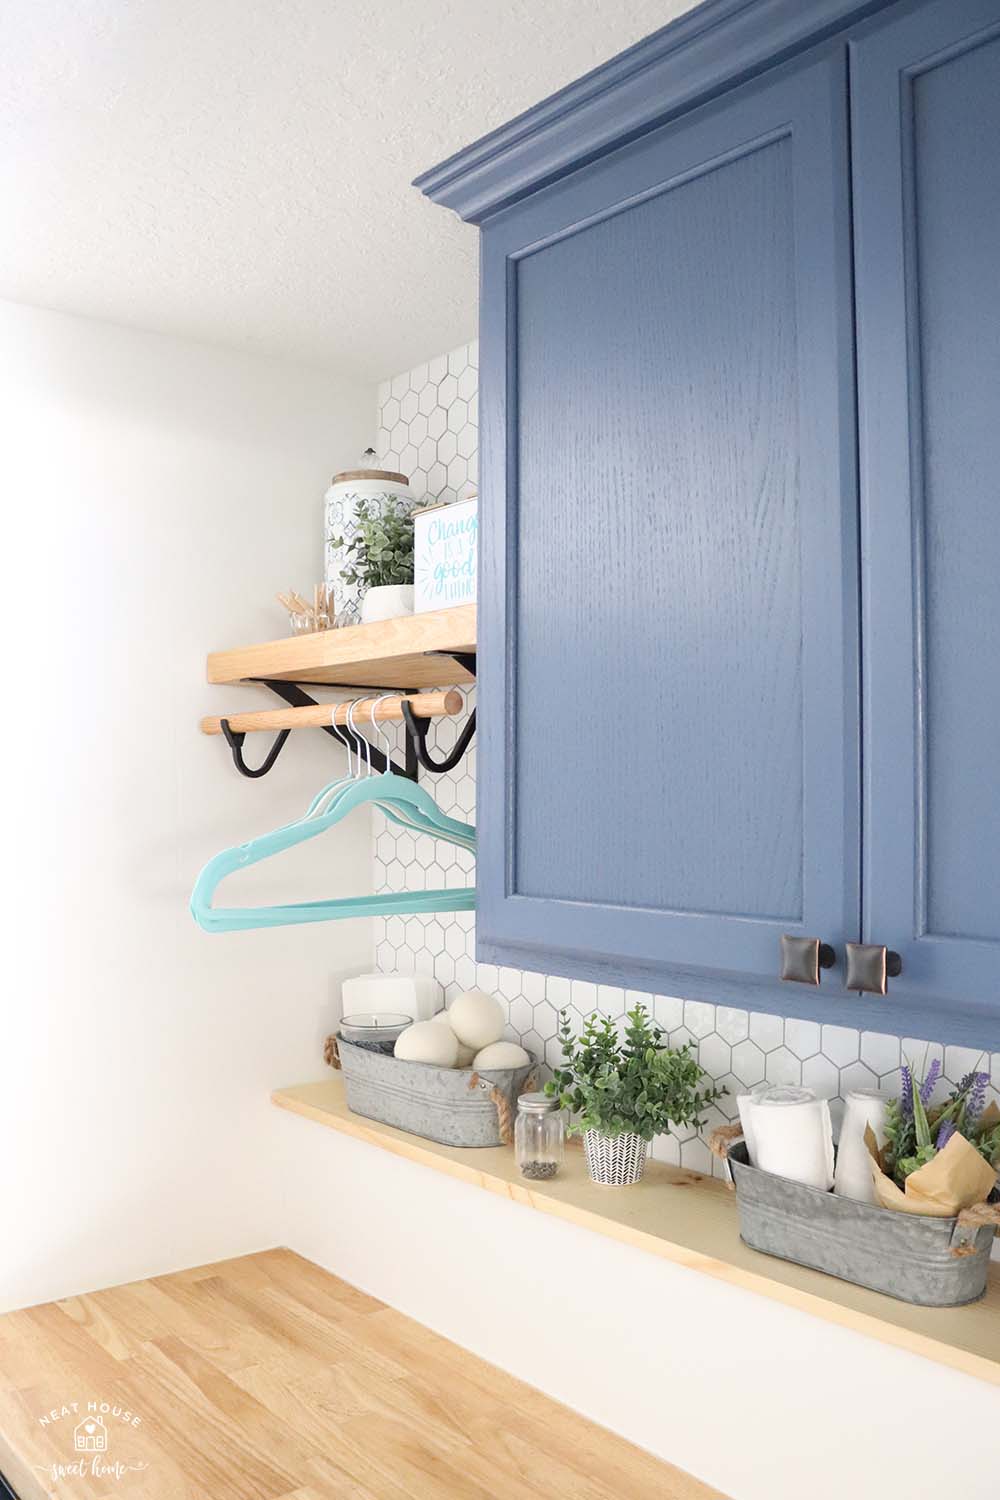
For a full look at this room, check out our Laundry Room Reveal.