French Chic Fireplace Makeover
Our fake fireplace got a makeover, and I am pleased with how it turned out. This faux fireplace was one of our very first online purchases. Yes, it is that old! I remember it was a deal on CSN stores (now, Wayfair), and it was one of the first pieces to enter this home.
Although we live in South Florida and mostly light up the fire pit in our backyard when it gets cold (3 nights out of the year), we love our faux fireplaces. This one fireplace that got the makeover burns gel fuel, so it’s very close to the real deal.
Would you like to save this?
What is Gel Fuel Fake Fireplace
Gel fuel fireplaces burn real flames using cans of gel fuel. This type of fireplace is perfect if you want the warmth of a fire, but do not have a real built-in fireplace with a chimney, at home.
Another great advantage of these fireplaces is that you can move them from room to room. Our fake fireplace has been moved around our home quite a few times.
Faux Fireplace Makeover
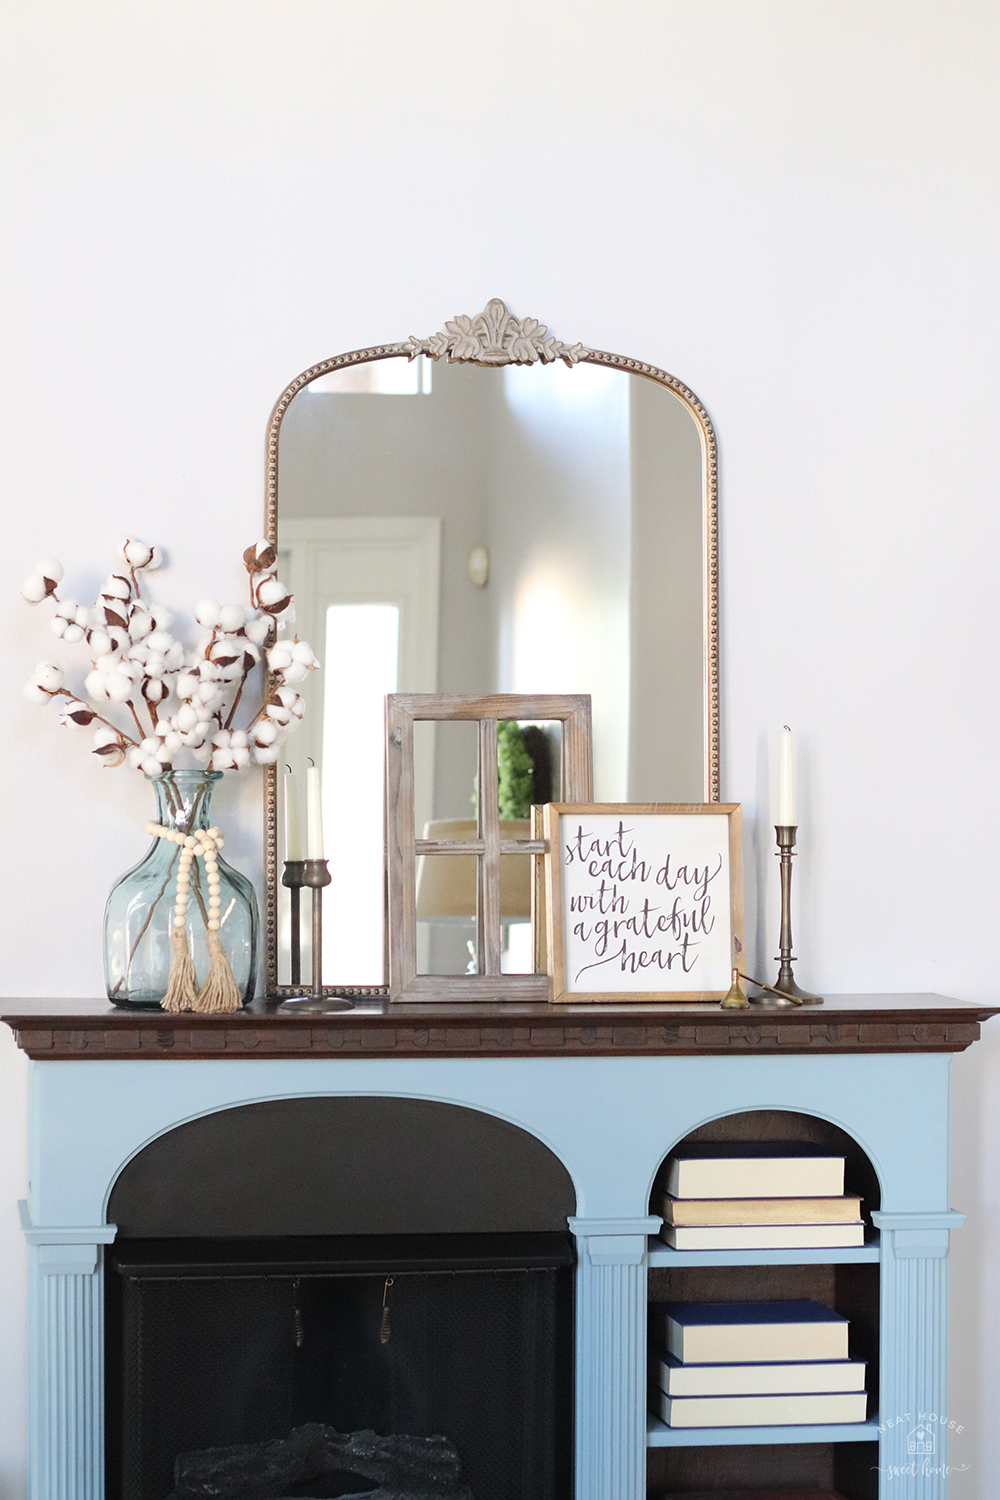
After 14 years of brown over brown, I decided to give this faux fireplace a makeover and painted it in beautiful Champness blue I had leftover from this cabinet’s makeover. In 4 hours, I had a brand-new-to-me fireplace.

Supplies You will need For Fireplace Makeover
For your convenience, here is a list of the supplies I used for our fake fireplace makeover.
This post may contain affiliate links for your convenience. For more information, please read my Affiliate Disclosure.
- Fusion™ Mineral Paint. The color I used is called Champness.
- Gel Stain. I use dark oak for most of my projects. I love the contrast of dark stain with light surfaces.
- Paintbrushes. I love Wooster paintbrushes. This is a good set of 3 for a good price. Keep in mind you will need one for paint, and one for stain. The small 1-inch angled brush is good for painting details and corners.
- Degreaser. I have been loving Mr. Clean Clean Freak lately.
- Lint-free cloth.
Step 1. Clean the furniture
First, if applicable, disassemble your piece and clean it with a mild degreaser. For this fireplace makeover, I removed the shelves, and the actual fireplace insert.
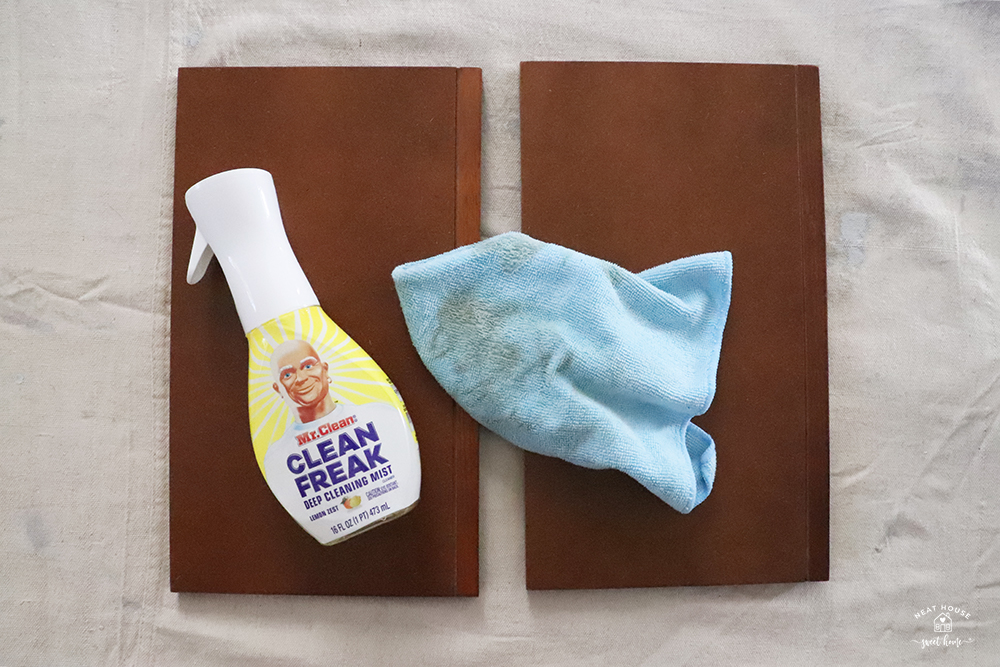
With a lint-free cloth, clean all the surfaces. I use Old English Lemon Oil to condition and protect my wood surfaces. And this scratch cover for dark woods. I used the degreaser to remove all the oil residue before painting the fireplace.
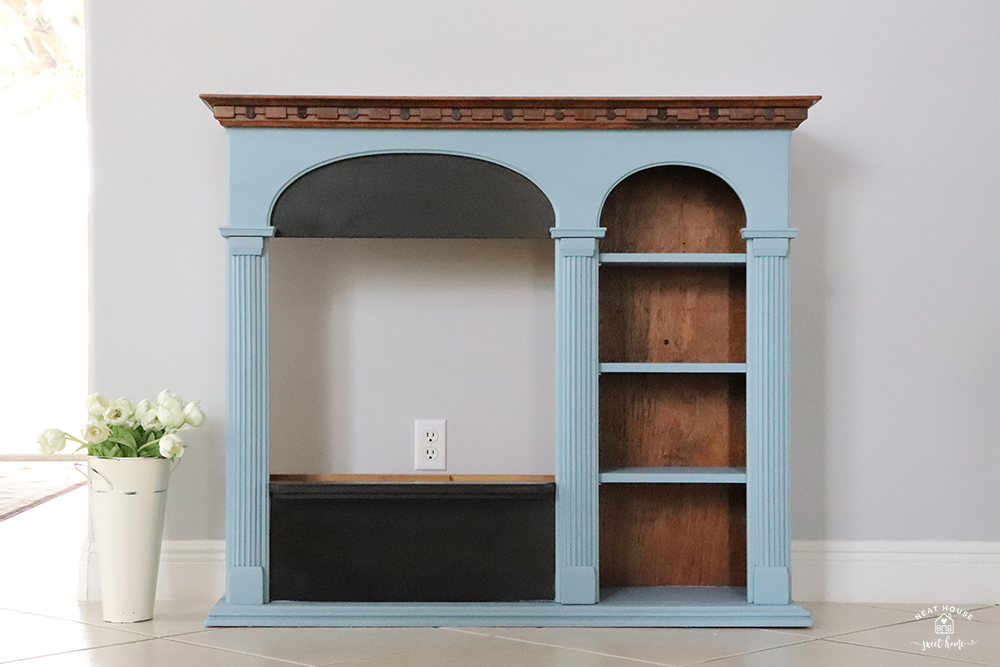
Step 2. Paint the Fireplace
Painting the fireplace is a straightforward process. As you can see in the picture below, the area that I chose to paint, is really small.
I did not take pictures of the actual process of painting the fireplace, but you can see a detailed tutorial on how to use this type of paint in this cabinet makeover.
Initially, I was going to stop the fireplace makeover at this point. However, after painting the fireplace, I realized I was not too fond of the contrast between the wood’s original color and the paint.
The original wood tone was too reddish for my liking. It worked in the past, but not with the Champness blue paint. I personally like dark wood surfaces.
Step 3. Apply Gel Stain
I used gel stain for the first time on an MDF cabinet. The old cabinet was painted, and I had to create a faux wood grain on the top to cover all the design. Since the fireplace mantel is also wood, I decided to try the same gel stain on it. And it worked like a charm.
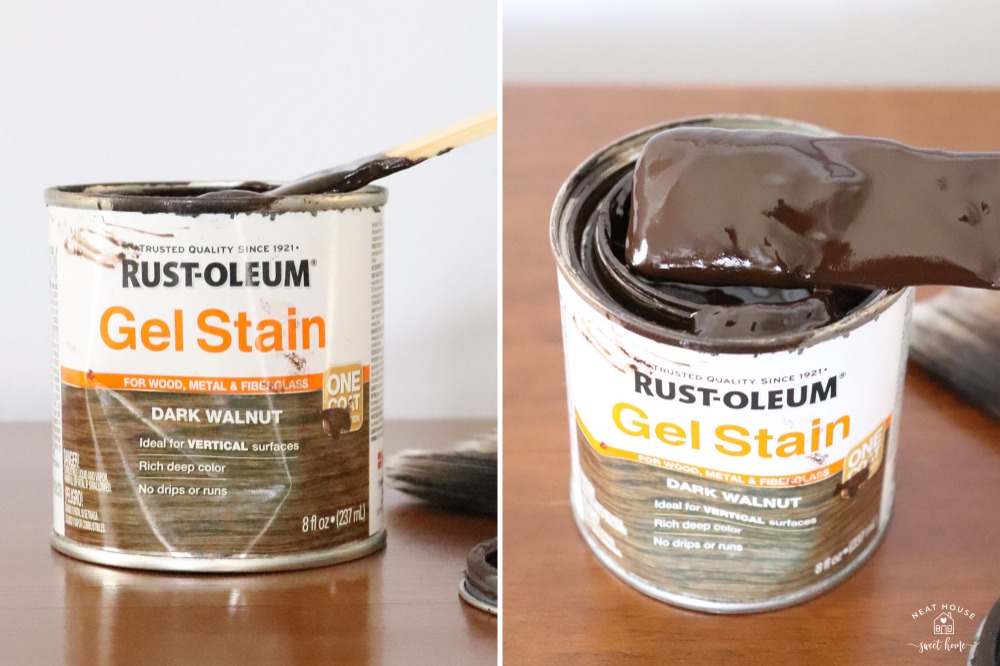
Gel stain is different from regular wood stain because it’s designed for vertical surfaces. It also covers metal, fiber glass, and other non-porous surfaces. Its consistency is thick and it doesn’t run or absorb as regular wood stain.
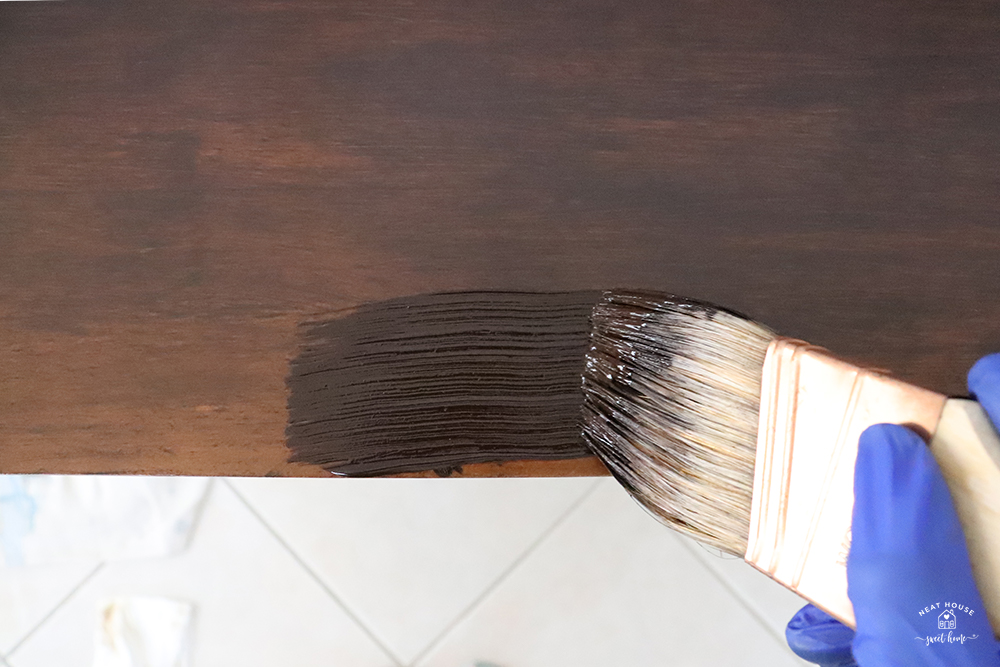
Because of its thick and goopy consistency, you must work fast and one small area at a time. Otherwise, spreading the stain evenly becomes difficult.
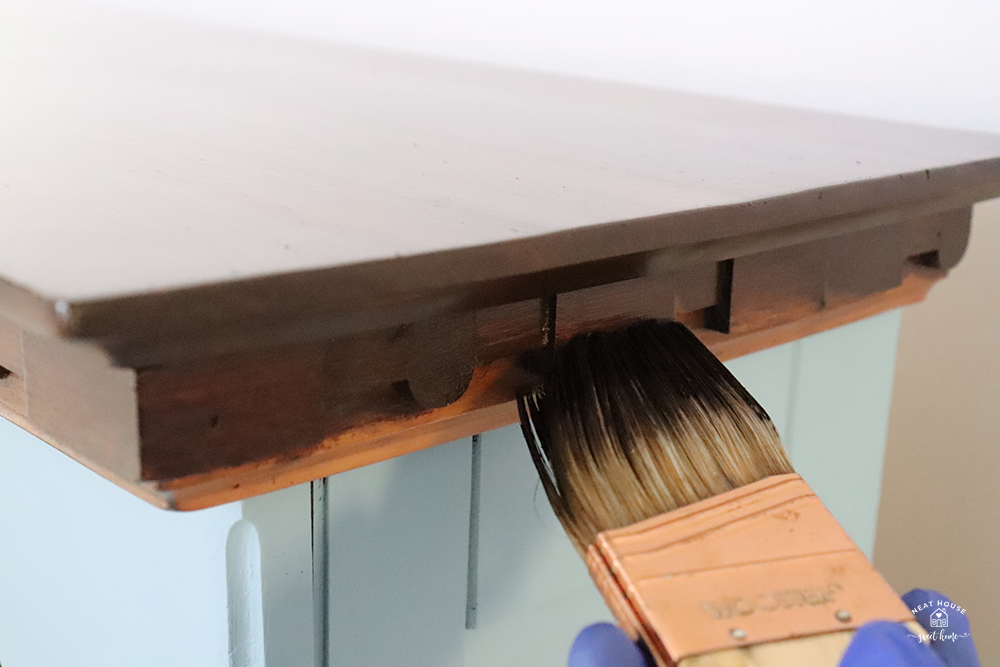
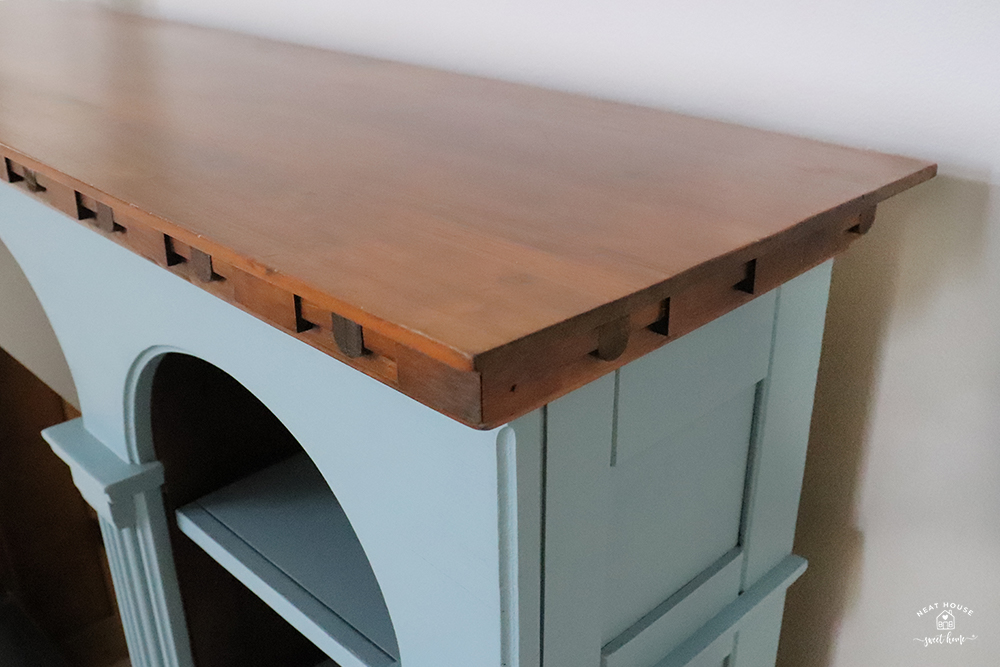
You can see the richness of the gel stain and the dark walnut color in these pictures.
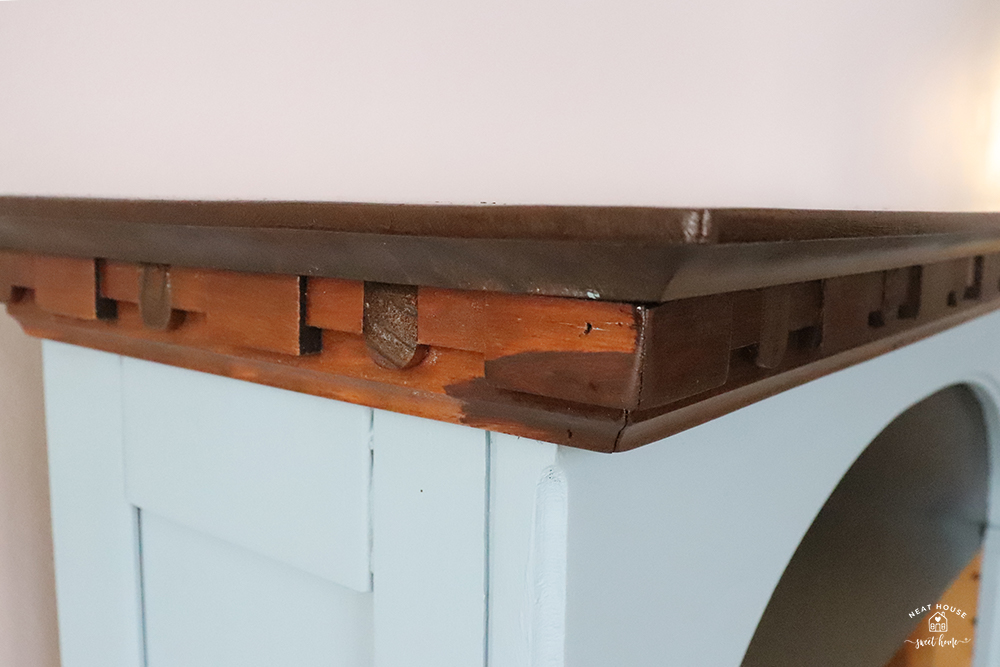
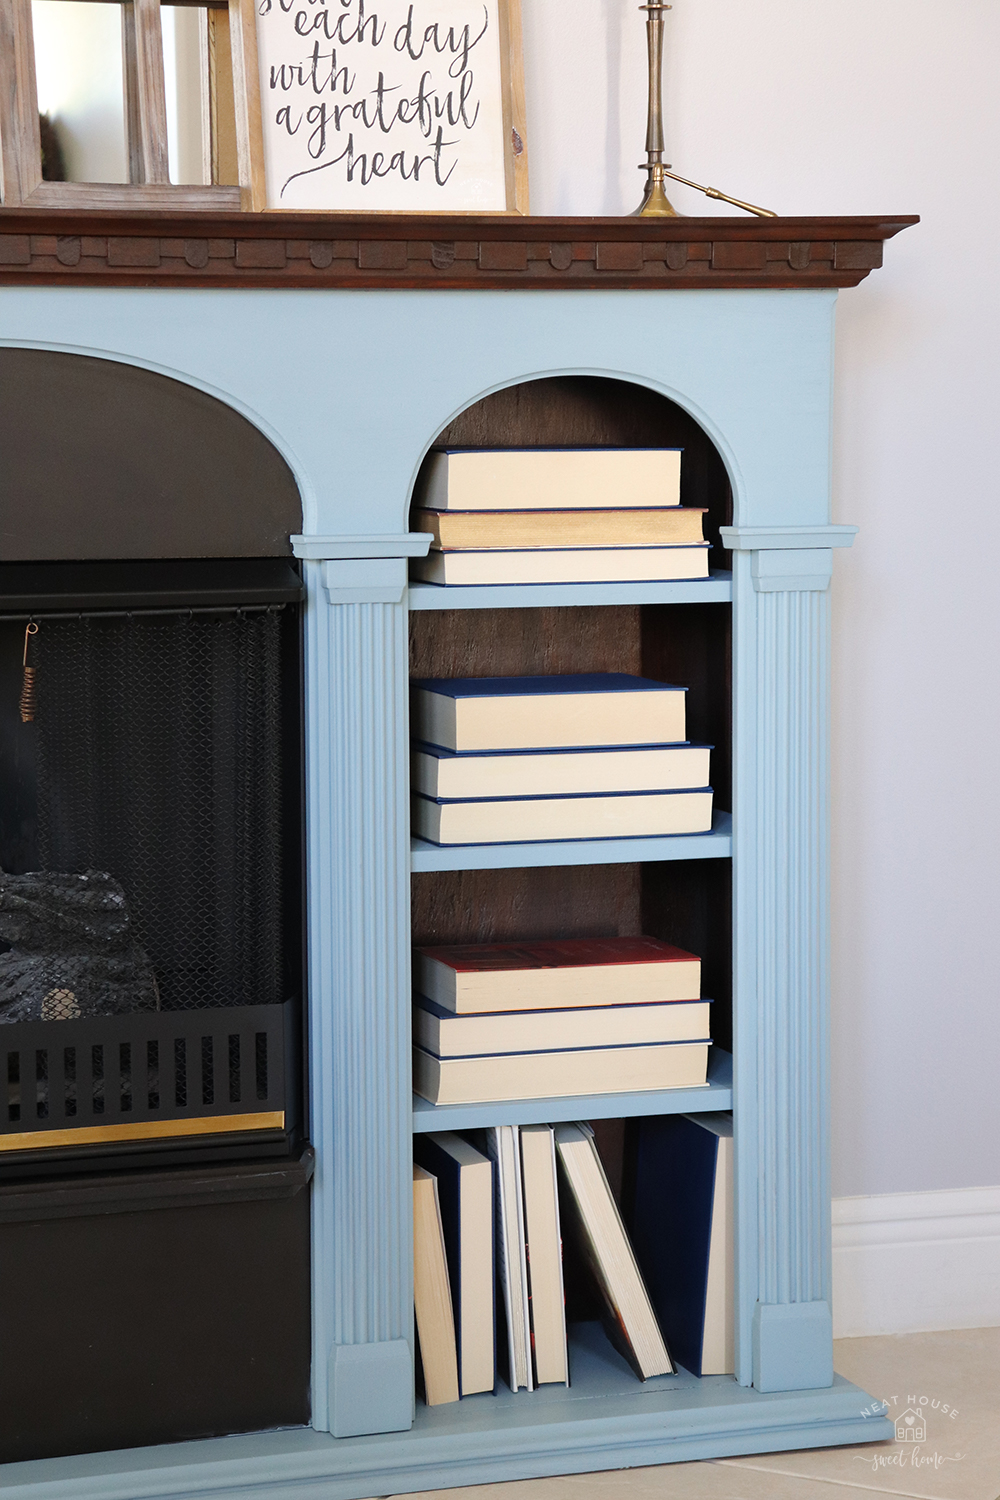
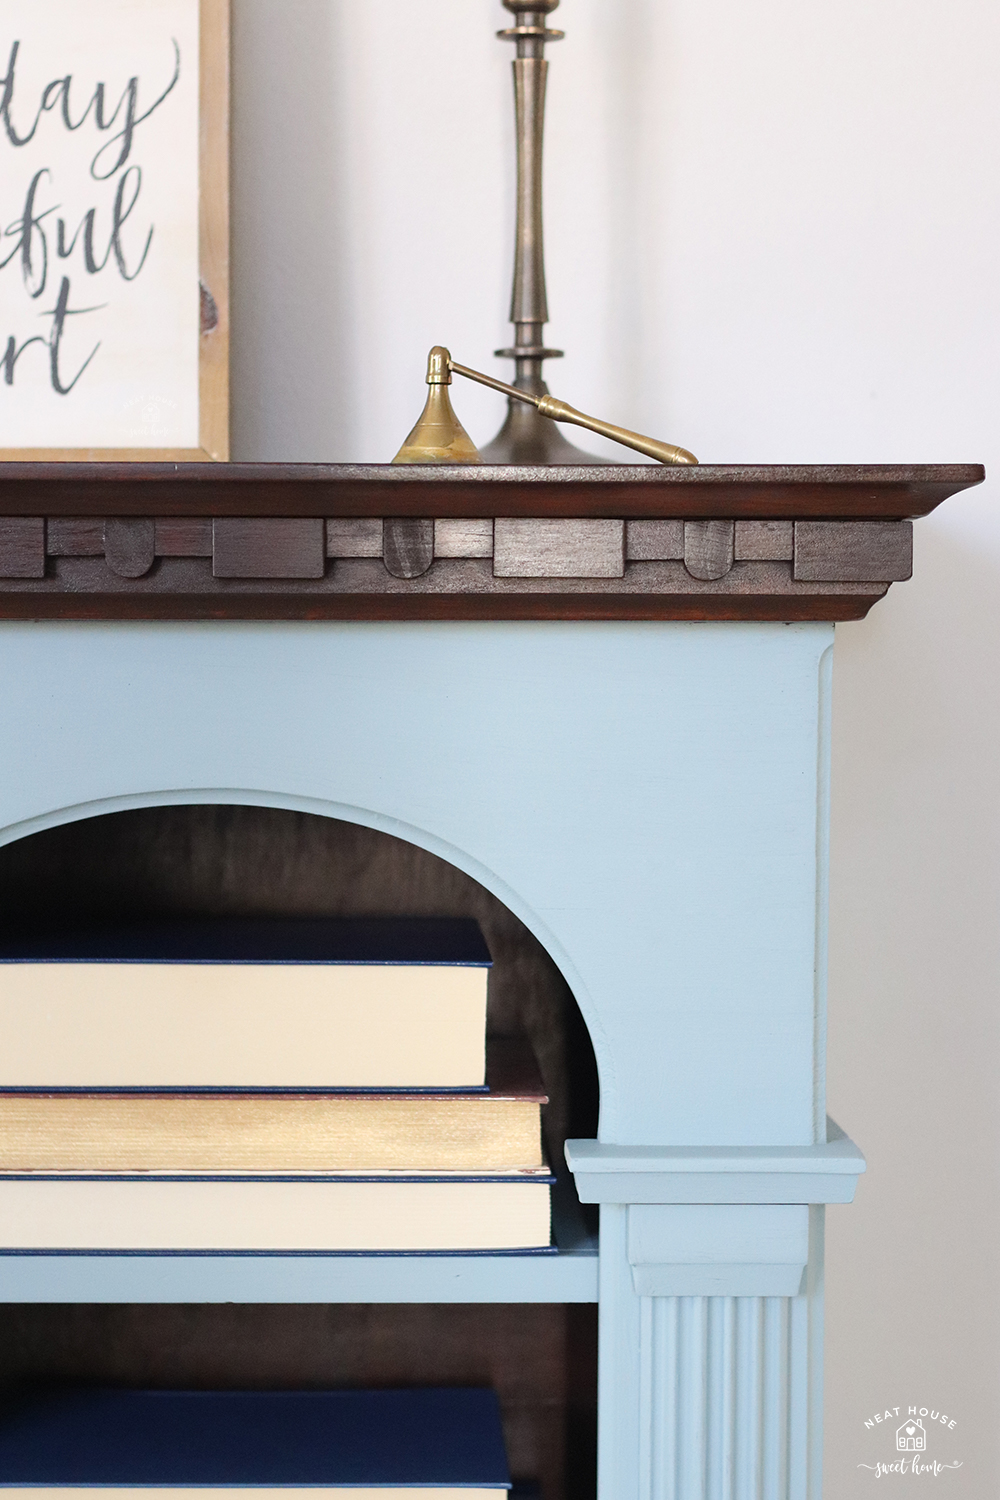
I stained the mantel and the inside of the bookcase to create contrast with the blue shelves.
Allow 24-48 hours for the gel stain to cure completely. The drying time will depend on the humidity level and type of ventilation in your home. The gel stain on my fireplace took 48 hours to dry completely.
Note: Fusion™ paint dries in minutes!
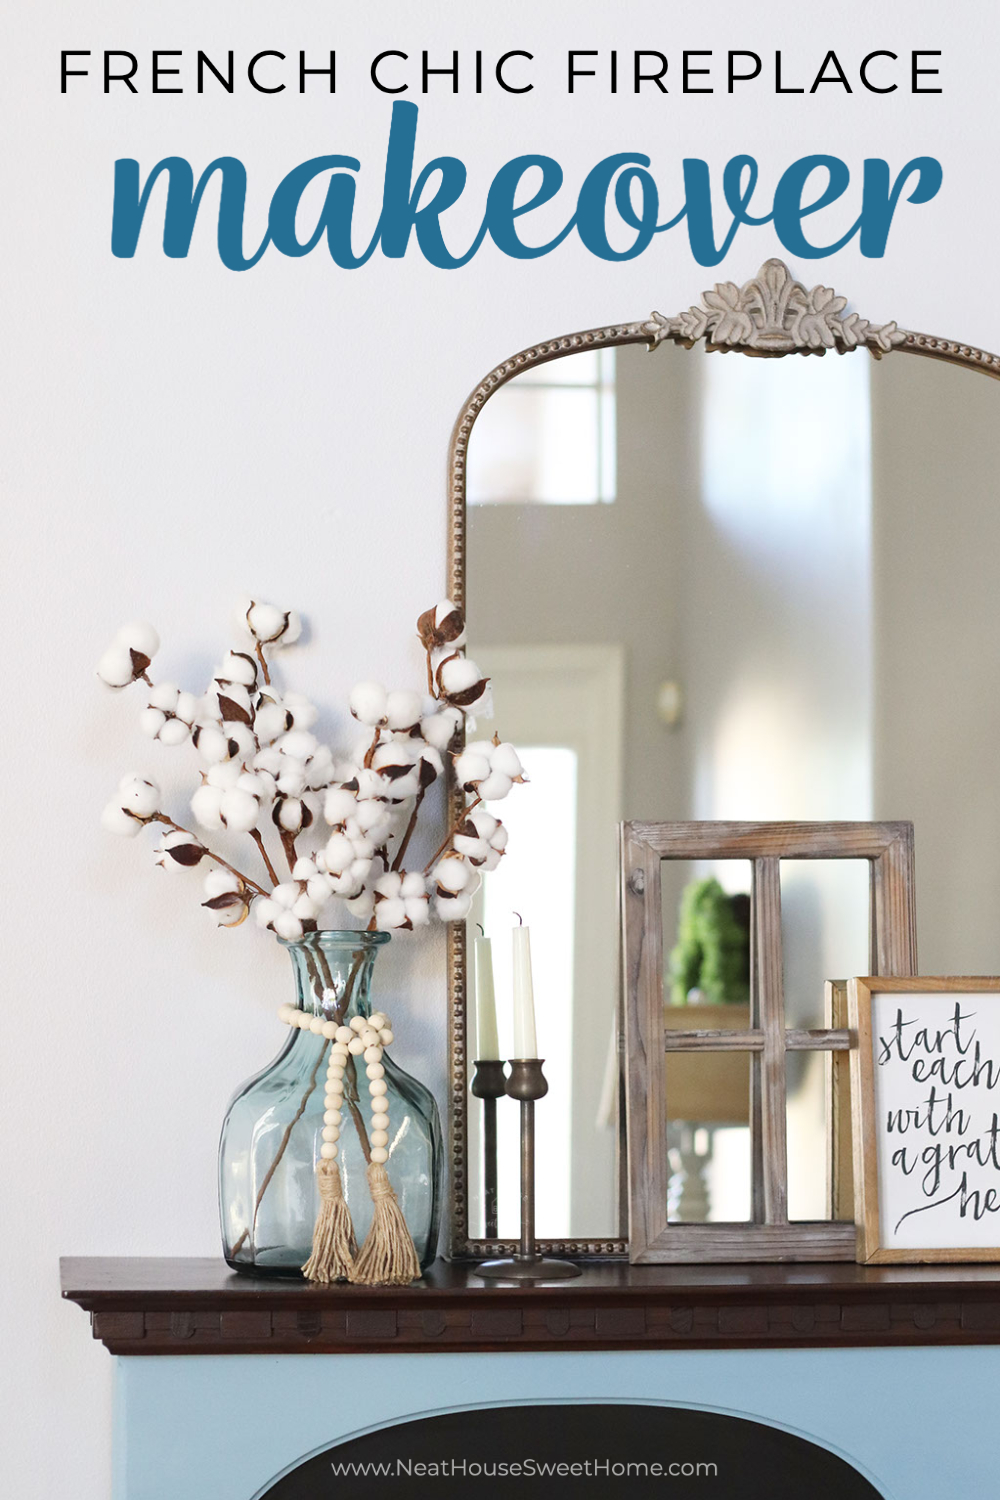
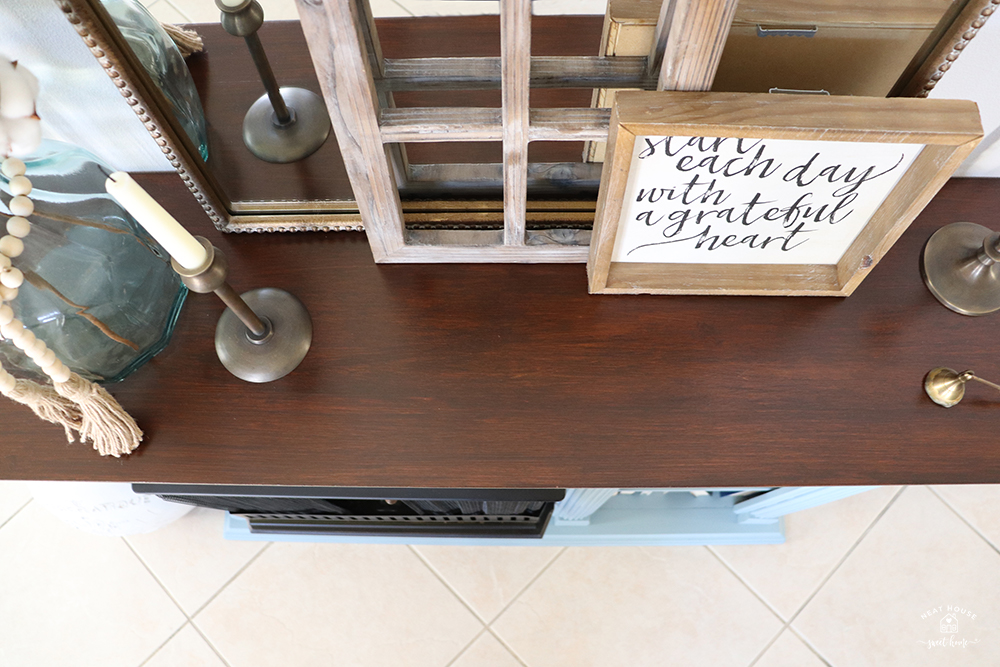
Fireplace Mantel Decor
Once the fireplace mantel and book cubbies were completely dry, I styled it with a very simple yet classy french, farmhouse chic style vignette.
One of the pieces that our fireplace mantel decor needed was a statement mirror. This antique mirror from Decor Steals was on my wish list for a long time. The day it got back in stock, I purchased it without even thinking about doing a fireplace makeover.
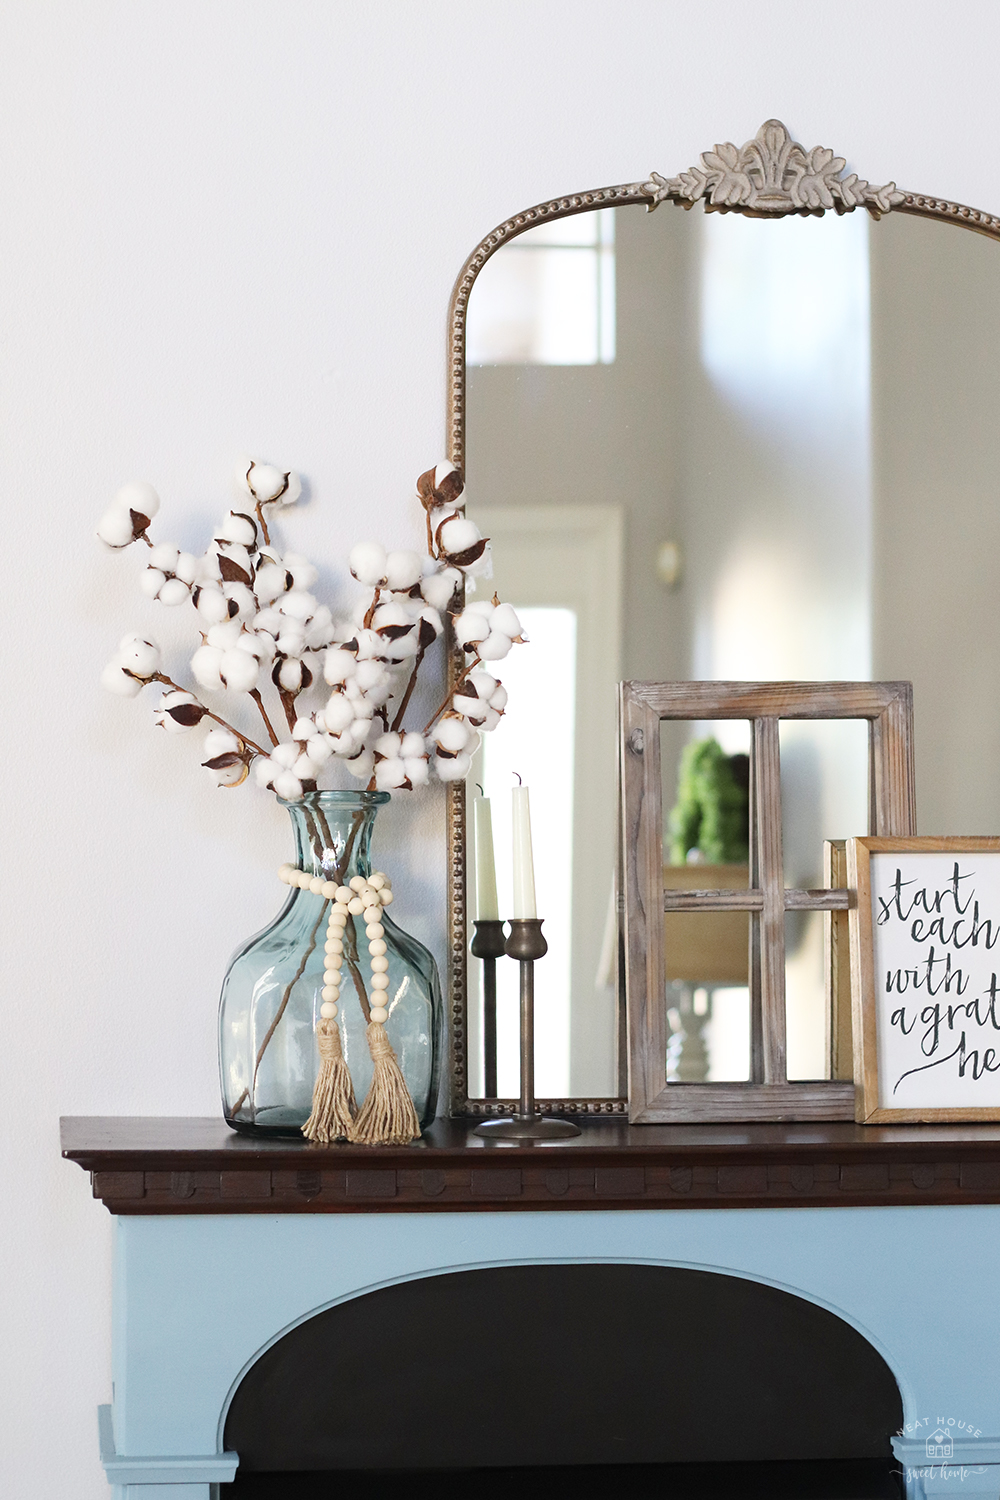
The mirror arrived the day the gel stain cured on the fireplace, and I knew it was a match made in mantle decor heaven.
The rest of the decor I placed on the fireplace mantel, I shopped around my home. This means I might need to purchase some more of these items to fill the voids.
The glass vase and cotton stems were a TJ Maxx find from a couple of years ago. But Amazon has a wide arrangement of fake cotton stems and they are a steal! The bead garland is from Amazon, too.
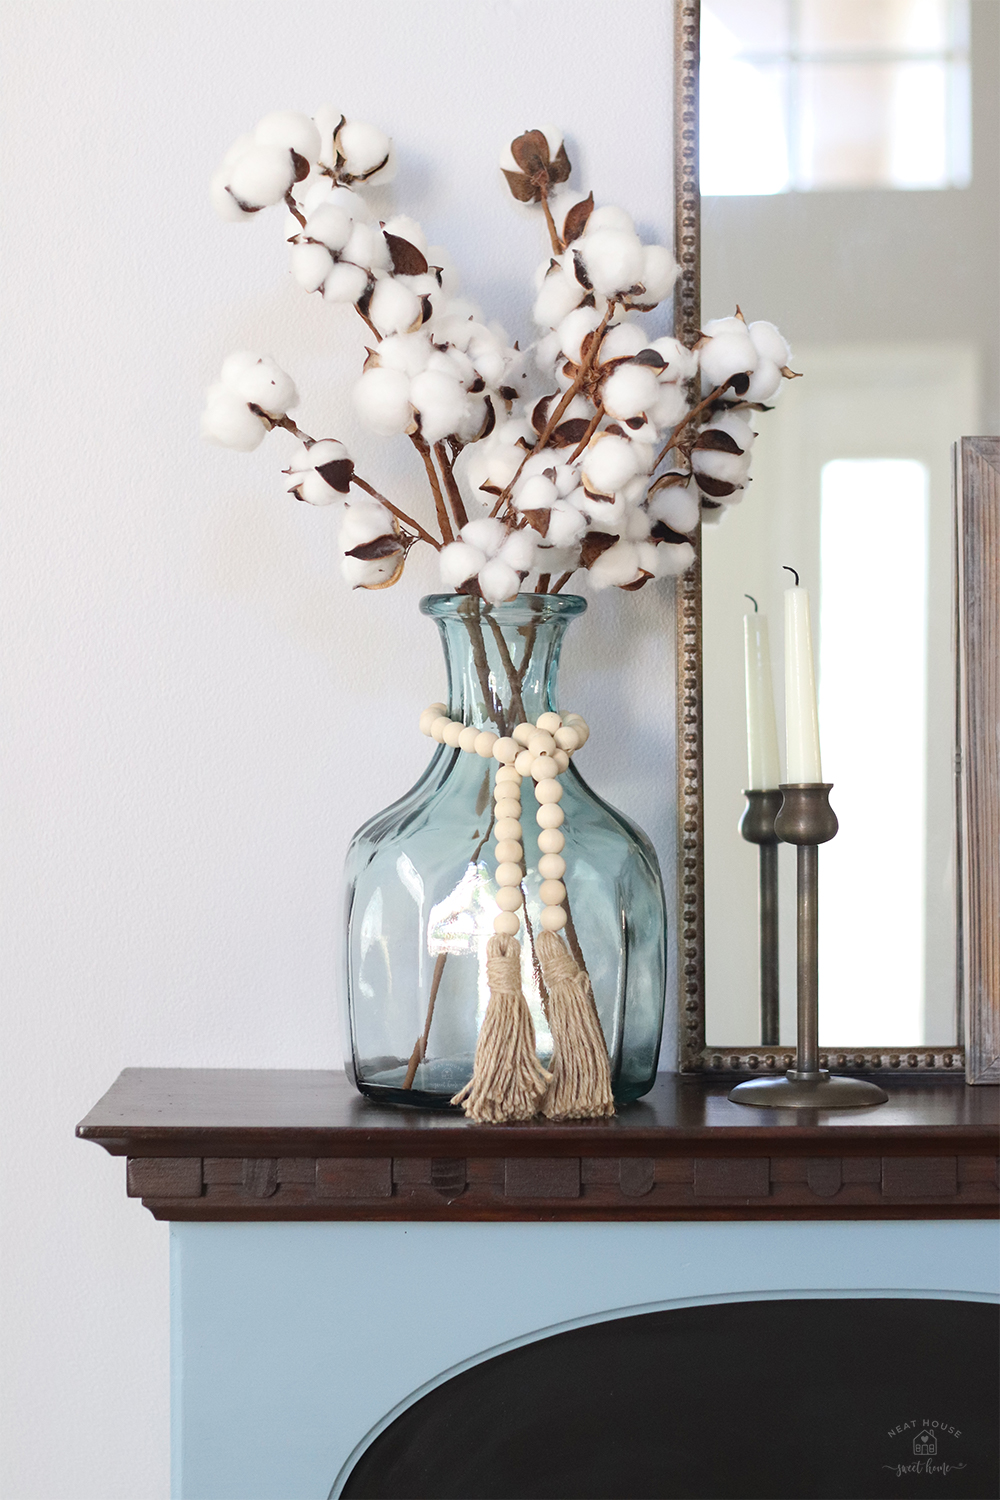
The candlesticks are also from Decor Steals, but they are also available on Amazon. I might have to purchase another set because I took these from the bookshelves of our entertainment center.
👉🏻 Here is a list of my favorite decor items for bookshelves, fireplace mantels, and more!
The window frame is from Amazon; I purchased a set of two when we updated our family room. The framed quote is another TJ Maxx find. Here is one from Amazon with a similar farmhouse style.
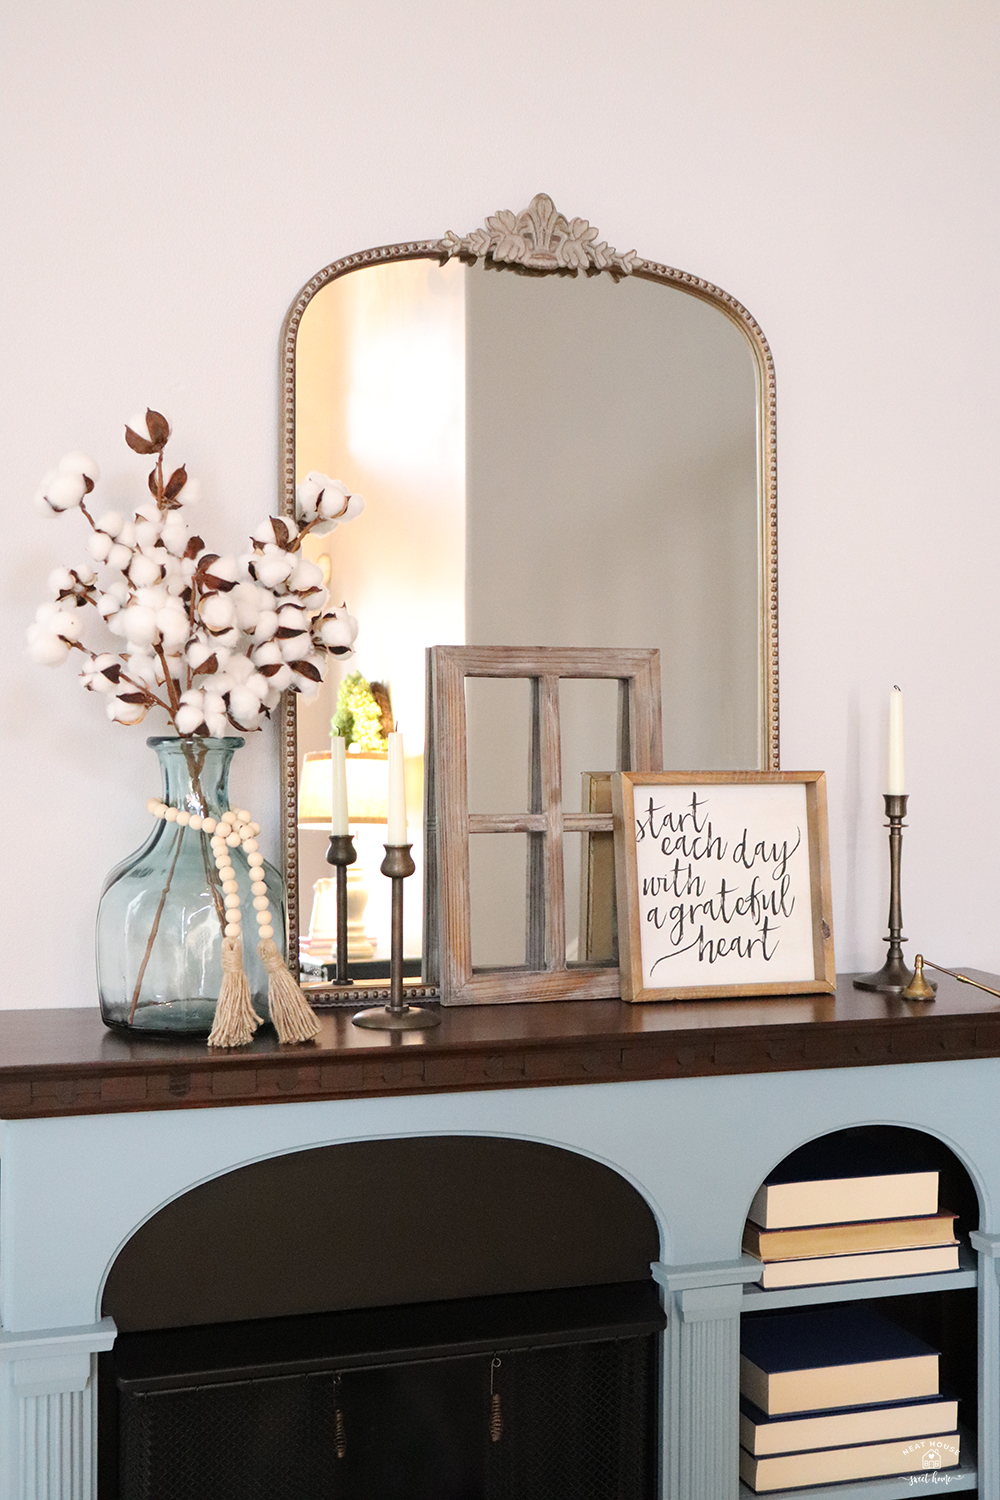
The books are a mix of real and fake/blank books. The fake books are leftover from a wedding I styled a few years ago. I think books add great interest to any home decor style.
I love how this fireplace makeover turned out, and the great difference the new mirror and other decor make on the mantel.
Shop The Post