Cabinet Makeover with Fusion Mineral Paint
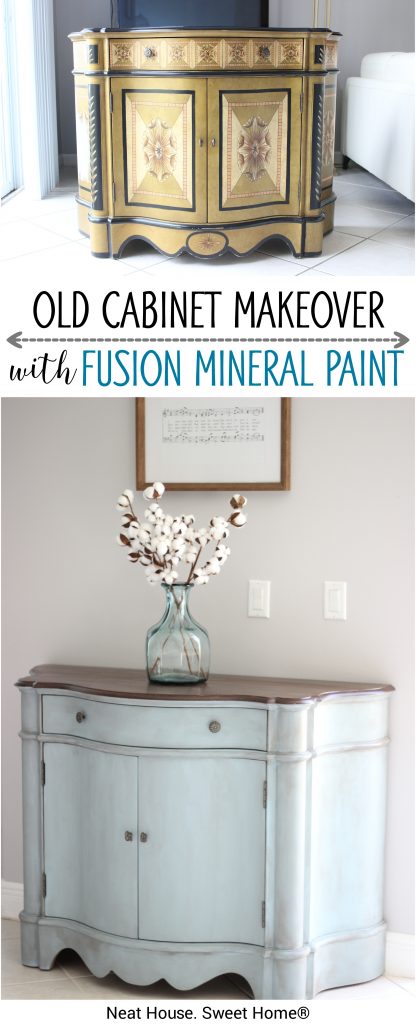
Prepare to be amazed by this cabinet makeover. This is my first time doing a furniture makeover with Fusion Mineral Paint, and it did not disappoint! The color I chose is Champness, and I finished it off with dark Espresso wax.
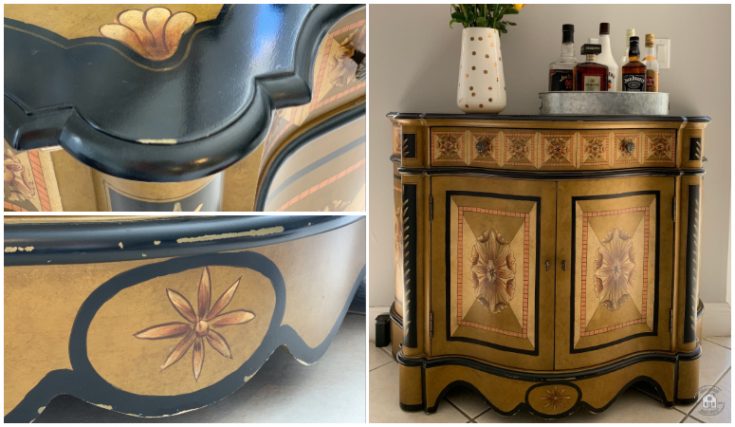
This MDF cabinet was initially painted gold and black, with intricate hand-drawn flowers and lots of little details. I covered it with Fusion Mineral Paint with minimal prep work and no priming.

Would you like to save this?
The cabinet was a Home Goods find we fell in love with 12 years ago. It served us well in our formal living area for many years, where we stored our holiday dinnerware. But as we slowly transitioned to a different decor style, it was time to give it a much-needed makeover.
What Is Fusion Mineral Paint?
My Instagram feed is full of DIY projects; I particularly love furniture transformations. A few furniture makeovers have stopped me in my tracks, and coincidentally they all have been done using Fusion Mineral Paint. So, I finally decided to tackle this project using Fusion.
The Fusion paint color chart is vast and beautiful. With so many colors to choose from, it’s hard to make up your mind. Since I love blue and have a few aqua and blue items spread throughout the house, I chose a beautiful shade of light blue named Champness.

Fusion™ is an easy-to-apply paint that leaves a smooth matte finish. The best feature has to be that it requires minimal prep work, no finishing coat, waxing, or ongoing maintenance!
Here are some of the highlights of this fantastic paint:
- Zero VOC
- Minimal prep work
- Easy application
- Exceptional coverage
- Gorgeous matte finish
- No top coat required
I have painted furniture several times, although none of them have been recorded in my blog archives, except for this Shabby Chic Bathroom cabinet makeover I painted with leftover paint I had in the garage. In my experience, Fusion Mineral Paint is the best choice by far.
Tools and Supplies Needed for Cabinet Makeover
Now, without further ado, let me show you this fabulous project and cabinet transformation using Fusion™ Mineral paint in Champness.

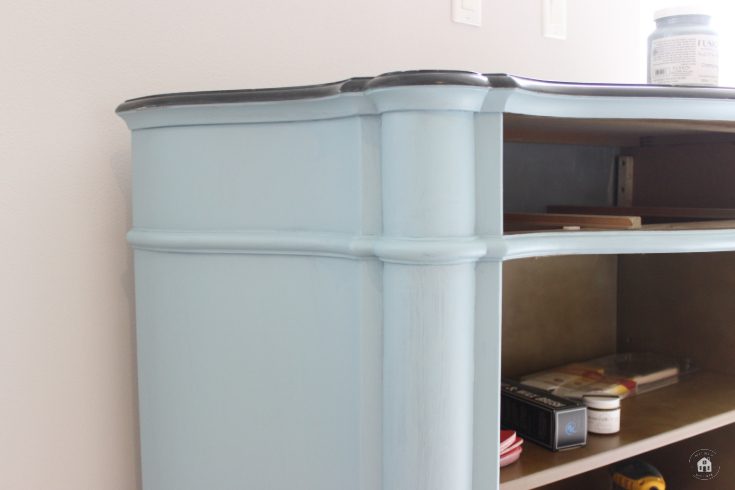
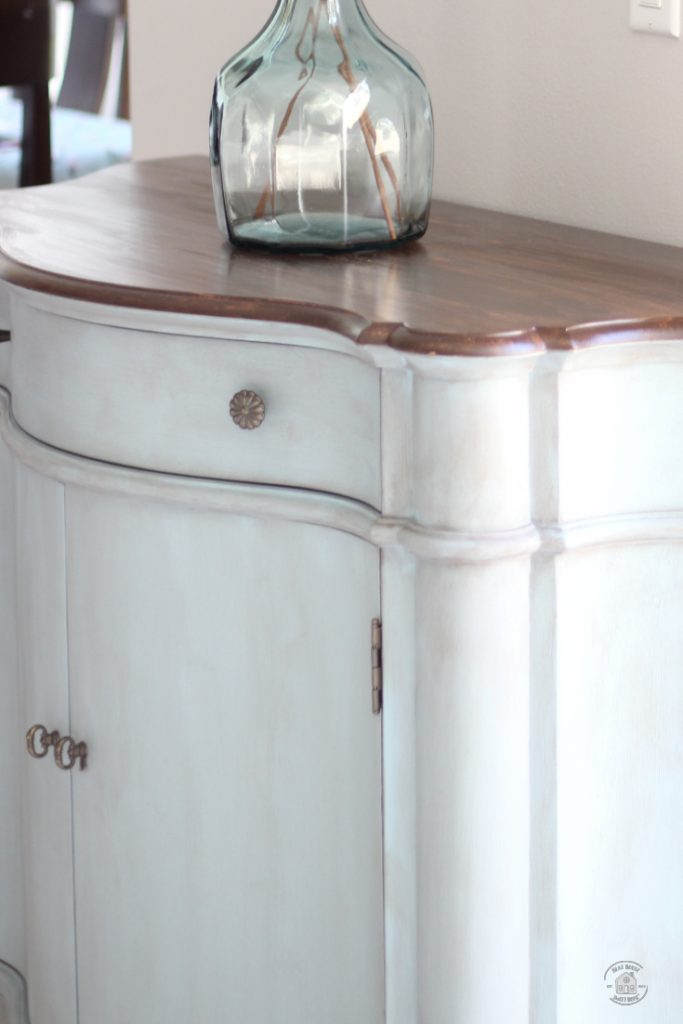
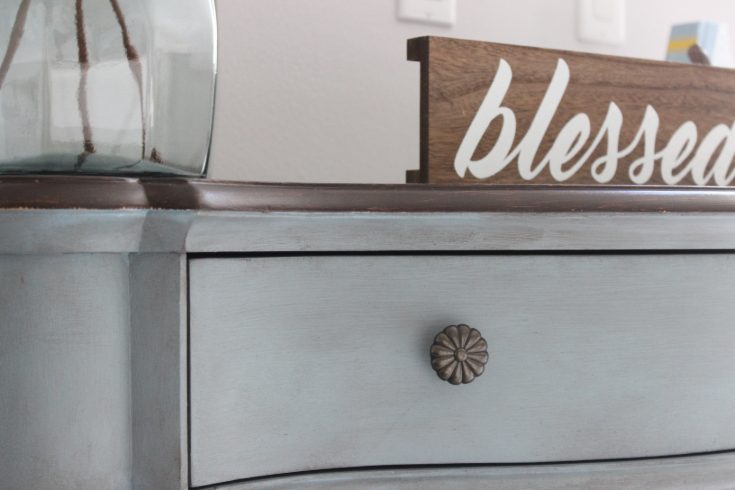
Side note: I painted the cabinet (sides, drawer, and doors) with Fusion Mineral Paint in Champness and finished it with an -optional- coat of dark wax in Espresso. Since the cabinet is not natural wood but MDF, I couldn’t stain the top. So, I finished the top differently using a faux wood grain technique.
This post may contain affiliate links for your convenience. For more information, please read my Affiliate Disclosure.
Materials and Tools You Will Need
- Fusion Mineral Paint. A 16.9 fl. oz jar was enough to paint two coats on my cabinet, and I have leftover paint. When painting with Fusion Mineral Paint, a little bit goes a long way. The color I used is Champness.
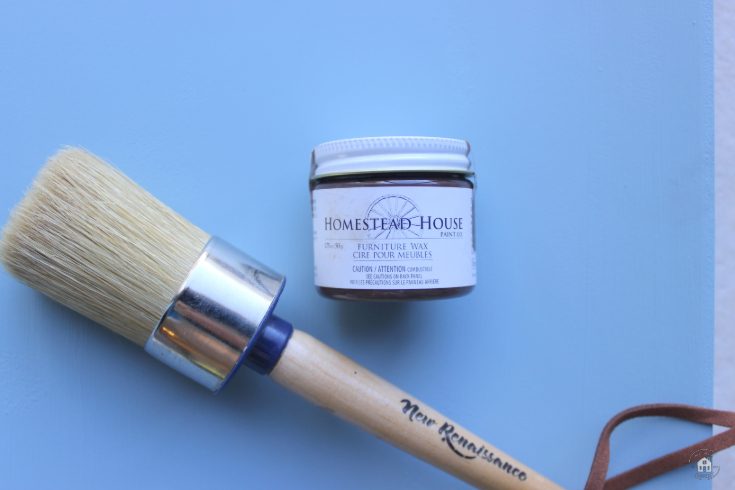
- Homestead Wax in Espresso (optional). I purchased one 50 gr. Container (which is very small). It would’ve probably been enough for my project if I didn’t hit so many bumps waxing and buffing (more on that later). I would recommend purchasing at least two 50 gr. containers.
- Paintbrush Set. I like this set of 3 Gold Edge Wooster paintbrushes. Each size was perfect for tackling different areas of the project.
- Wax Brush. This was my first time using a wax brush, and I loved it. Highly recommended.
- Minwax Finishing Wax in Natural (optional), I used this clear wax to remove some dark wax blotchy areas (explained below).
- Extra-Fine Sandpaper 320 Grit. You will need this to remove the layer of sheen or finish from your piece.
- I recommend using a mouse sander if you have a big cabinet, dresser, or other big furniture pieces.
- Paint drop cloth (optional). I placed it underneath the cabinet to protect the tile floor.
- Power drill or screwdriver to remove doors and hardware.
How to Prep to Paint with Fusion Mineral Paint
Step 1 – Remove all your cabinet’s drawers, doors, and hardware.
Step 2 – Depending on the finish of your furniture, decide if you need deep sanding, just light sanding, or no sanding.
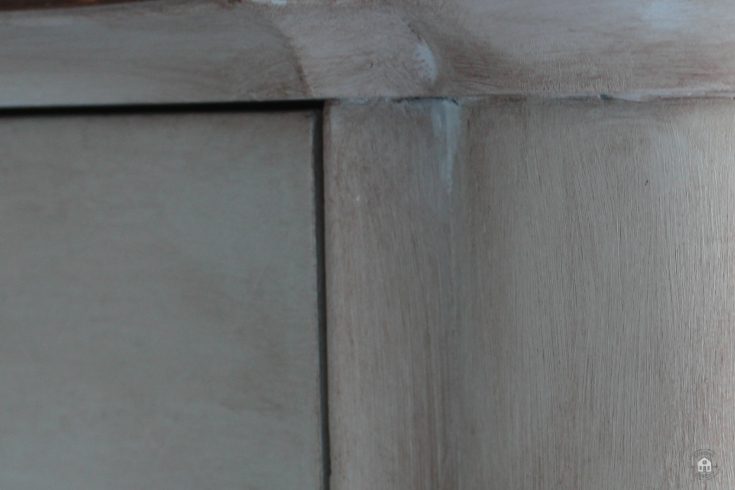
Because my cabinet had many intricate details, I started sanding the doors with a mouse sander and 220 Grit sandpaper. Well, that was a big mistake.
It turns out I sanded too much, and I ended up revealing the MDF. I didn’t think much of it until I painted my first coat of Champness. In the picture below, you can see the rough areas where I sanded too much.
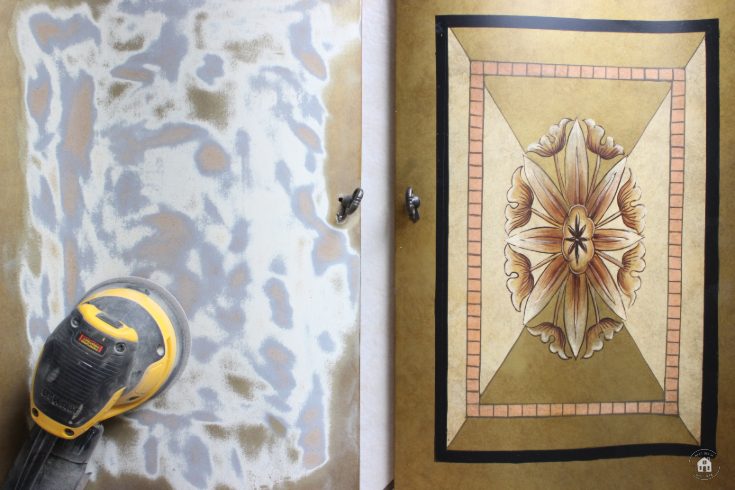
Luckily, I realized this before I sanded the other door, the drawer, or the rest of the cabinet, for that matter!

So, I used my bare hands with the recommended 320-Grit sandpaper for the rest of the cabinet.

The sandpaper slightly removed the white layer of gloss the cabinet initially had. I put more effort into the flowers and other lines that seemed to be raised from the surface. I sanded, putting very little pressure until the texture felt smooth.

Step 3 – Once all the surfaces are sanded, wipe them clean with a wet, lint-free cloth to remove all dust, and then you can start painting.
Painting Furniture with Fusion Mineral Paint
To say that this paint goes on like butter is an understatement. It certainly is, hands down, one of the best paints I have used for painting furniture. I love this color, Champness, but I am looking forward to using a different color (so many to choose from!) for another furniture transformation.

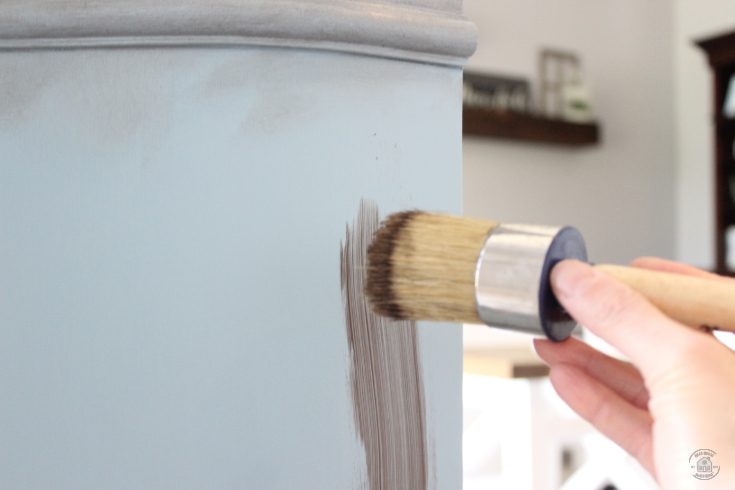
I used the 2-inch paintbrush in the kit to paint the cabinet. I started painting the sides of the cabinet using long, vertical brush strokes from top to bottom and worked my way through how the shape of the cabinet led me.
Fusion paint coverage is impressive, and the first coat covered most of the original dark burnt gold and black. I applied a second coat once the first one was completely dry.
Fusion Mineral Paint dries fast. So, by the time I finished the details on one side of the cabinet, the other side was ready for a second coat. I didn’t have to wait for the paint to dry since I also had to paint the cabinet doors and the only drawer. For smaller areas, such as right under the beveled edge of the top of the cabinet, I used the slanted 1-inch wide paintbrush from the same kit.

I was careful not to paint the top of the cabinet and its edges because I planned to paint faux wood grain.
Applying Wax Over Fusion Mineral Paint
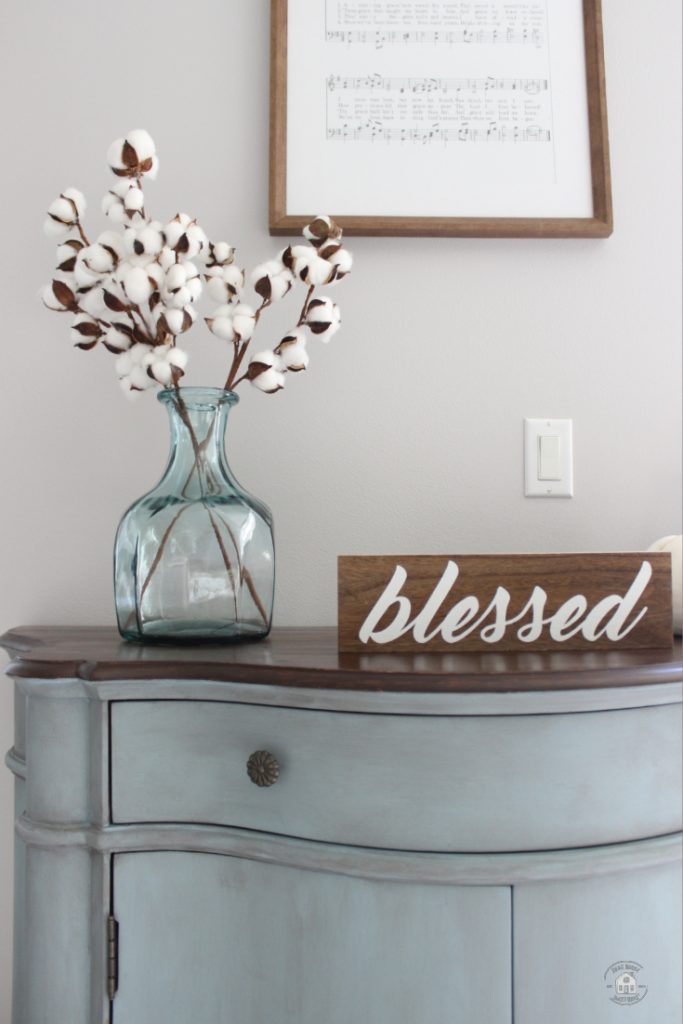
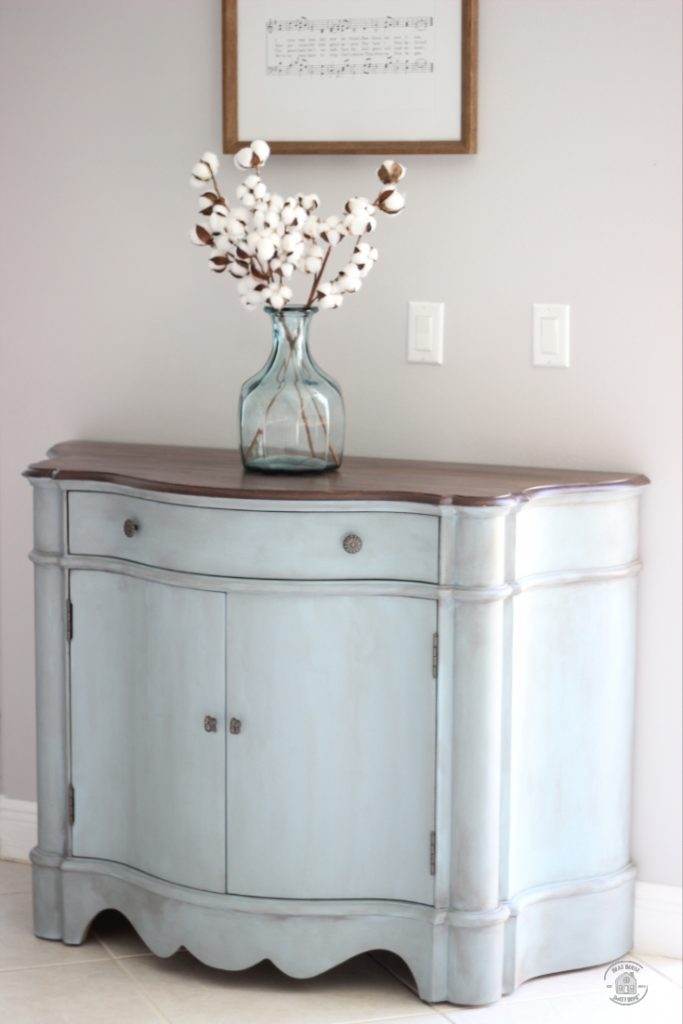
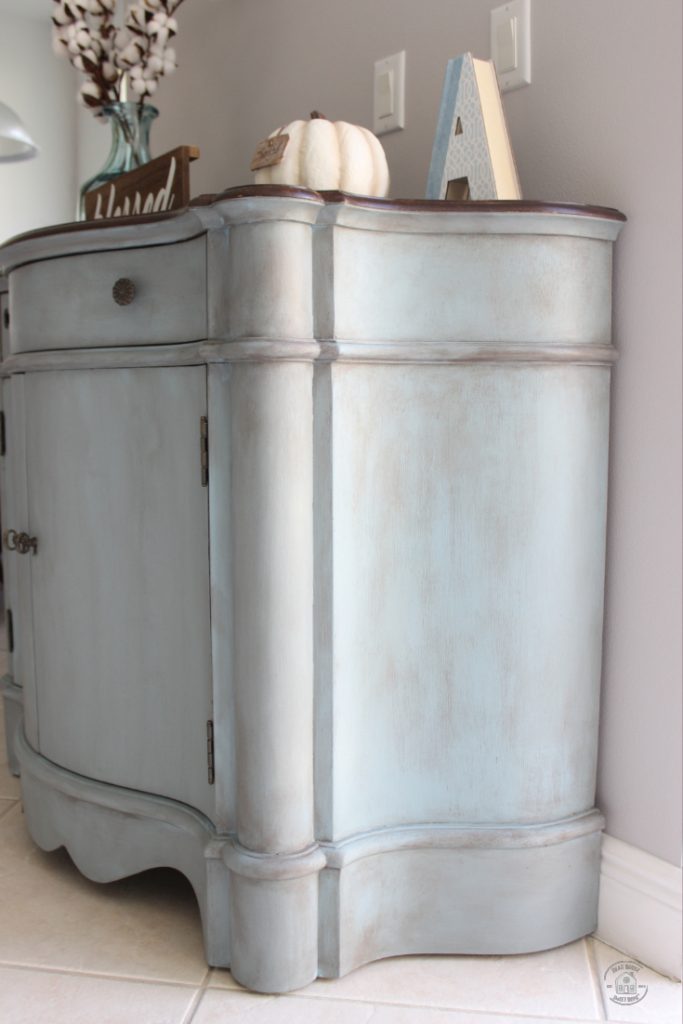
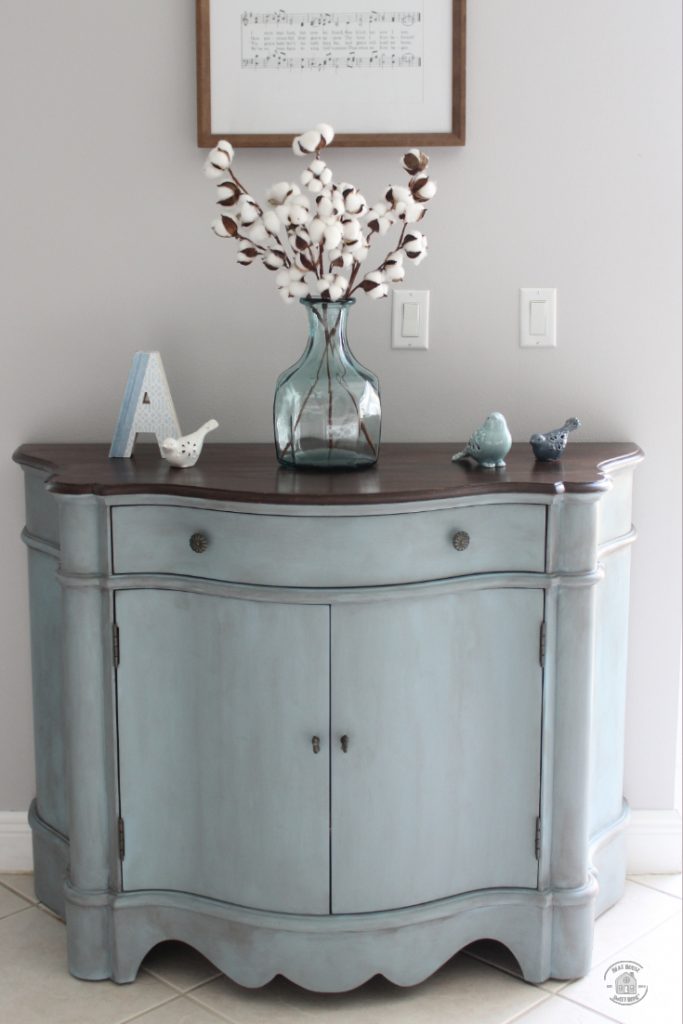
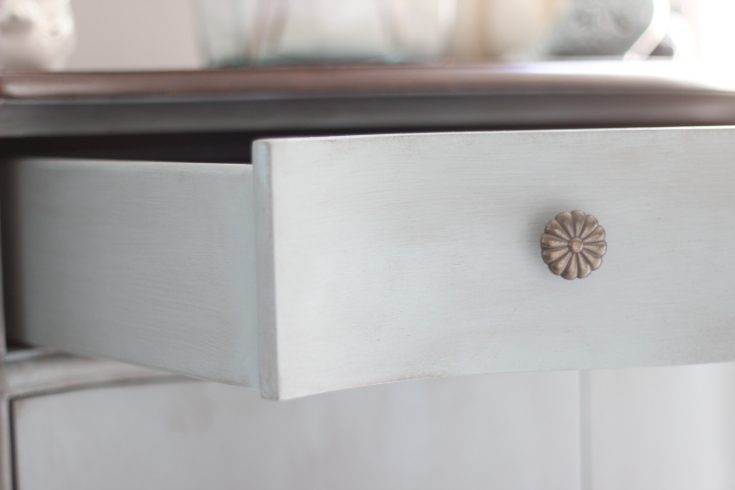
Fusion Mineral Paint has a built-in topcoat, which is another great benefit. However, I decided to apply dark wax in Espresso over the beautiful Champness. It almost hurt to do this because Champness is a GORGEOUS color, but baby blue doesn’t go with my current home decor.
As a result of applying dark wax over Champness, the cabinet’s color changed from this pale – yet still beautiful – baby blue to a different shade. Depending on the lighting, it could look between a weathered robin’s egg blue and gray. Either way, I adore the final color and look of my cabinet!
Important Note: I waited 48 hours before applying the wax. I wanted to make sure the paint was 100% dry and cured.
I thought waxing the cabinet would be a simple process. I have done it before, and it went well. However, I used different paint and wax products. Hence, before I get into details on how to wax your project, I must disclose that I hit a few bumps in the road. On a bright note, if you have the same issue, I can tell you how I fixed my mistake.
Ok, with that out of the way, here’s how I waxed my cabinet.
How to Apply Wax Over Painted Furniture
Step 1 – Dip the brush in the wax and apply directly over the paint.
I tried applying it in two ways: straight strokes and circular motion. In the end, straight strokes worked better for my liking.
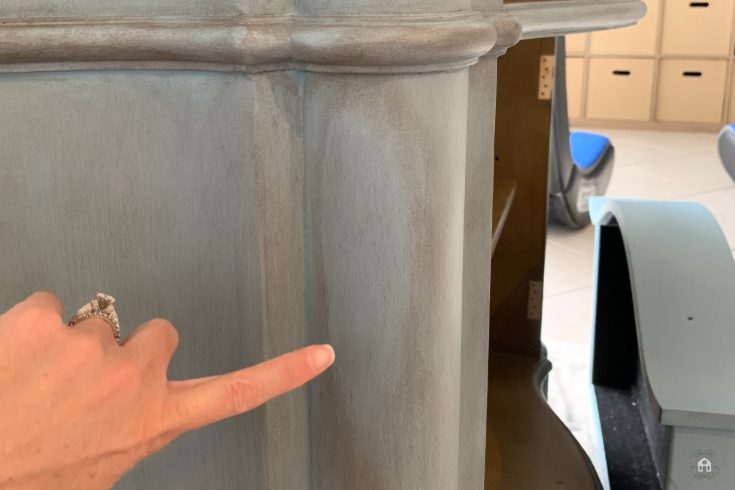
Step 2 – Blend strokes until you find uniformity in the color. In other words, blend until you can’t see any brown (like in the picture above) but more of a grayish layer (image below).

You can blend your strokes, moving your hand up and down or from left to right. I preferred blending in an up-and-down motion.
Blend the wax using little to almost no pressure on your brush. If you put too much pressure on your brush stroke, you can wipe the wax off the cabinet.
Step 3 – Every few strokes and blending, walk away from the piece and look at it from a distance. You will see if you need more or less wax in certain spots.
You can get away with leaving some areas or corners with extra wax since this gives the cabinet that old, rustic look. As you wax, you will see that certain areas are difficult to access to apply or buff the wax off, but that’s ok.
Personal tip: in most cases, we apply dark wax over painted furniture to achieve a rustic and shabby chic look. For this reason, you shouldn’t be looking for perfection. The idea is to give the cabinet an aged look.
My Mistakes Applying Wax and How I Fixed Them
As I mentioned before, Fusion Mineral Paint goes on like butter, and I loved every step of the process. Waxing the cabinet, however, gave me a few headaches.
Most of the cabinet surface seemed to take the wax and the buffing with no problem. However, I found blending the wax in some areas challenging, and I ended up with wax blotches quite a few times.
I tried everything! More wax, less wax, wiping with a cloth, circular motion, re-applying wax, different brush (that was a fail!), you name it, and nothing worked. I still had these blotchy spots.
My last resource was to paint over the blotchy areas again. Luckily, Fusion paint is so good that it covers the mess like nothing ever happened. Then, I waxed and buffed again, blending and overlapping what looked like a hot mess. And guess what? The flaws would appear somewhere else!!
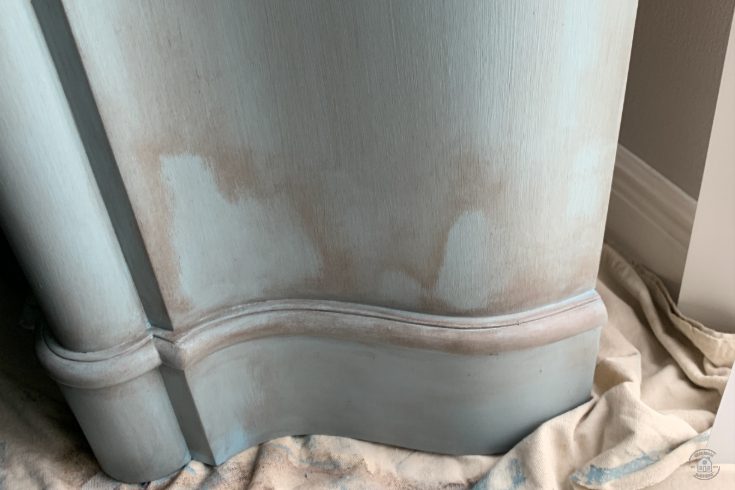
I felt defeated and ready to throw in the towel at this point. I thought my cabinet makeover was a total failure. After all that beautiful Champness finish, I ended up with what looked like a spilled coffee pot over the cabinet!
Then, what I thought would be the death of my cabinet turned out to be what saved it: I ran out of the tiny jar of dark wax. Without wax, I could not do anything else, especially if I kept painting over my mistakes, unless I waited a week after ordering another jar online.
I had an ‘aha! moment’. I remembered this rule: clear wax removes dark wax. Enter: the Minwax Finishing Wax in Natural I had in the garage from previous projects.
I dipped the brush in the clear wax, and like magic, the deep brown blotches started blending in.

If you look closely and pick it apart -I still do that – you will still see some blotchy areas, but nothing like the mess I had before. They add character to the piece; it wouldn’t be a DIY project if it didn’t have imperfections.
I explain in detail how I created the faux-wood finish on the top of the cabinet in this post.
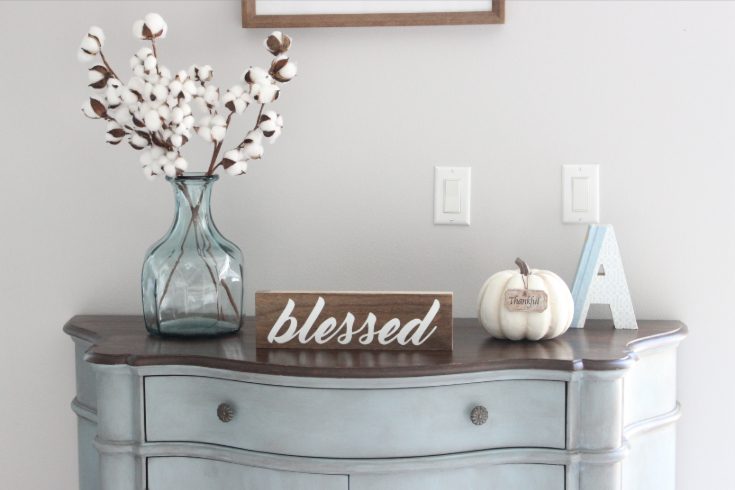
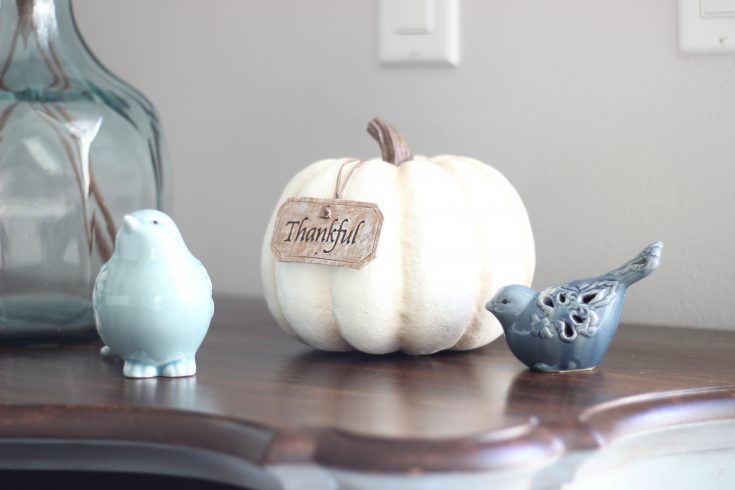
After Pictures of my Cabinet Makeover
Now, look at this beauty! What a transformation!


Also, I couldn’t make up my mind. You will see a few different vignettes displayed on top of the cabinet. Let me know which one is your favorite!
I’ll try to remember when a difficult painting situation happens to me. Clear wax removes dark wax. Noted in my mind.