How to Install Peel and Stick Backsplash

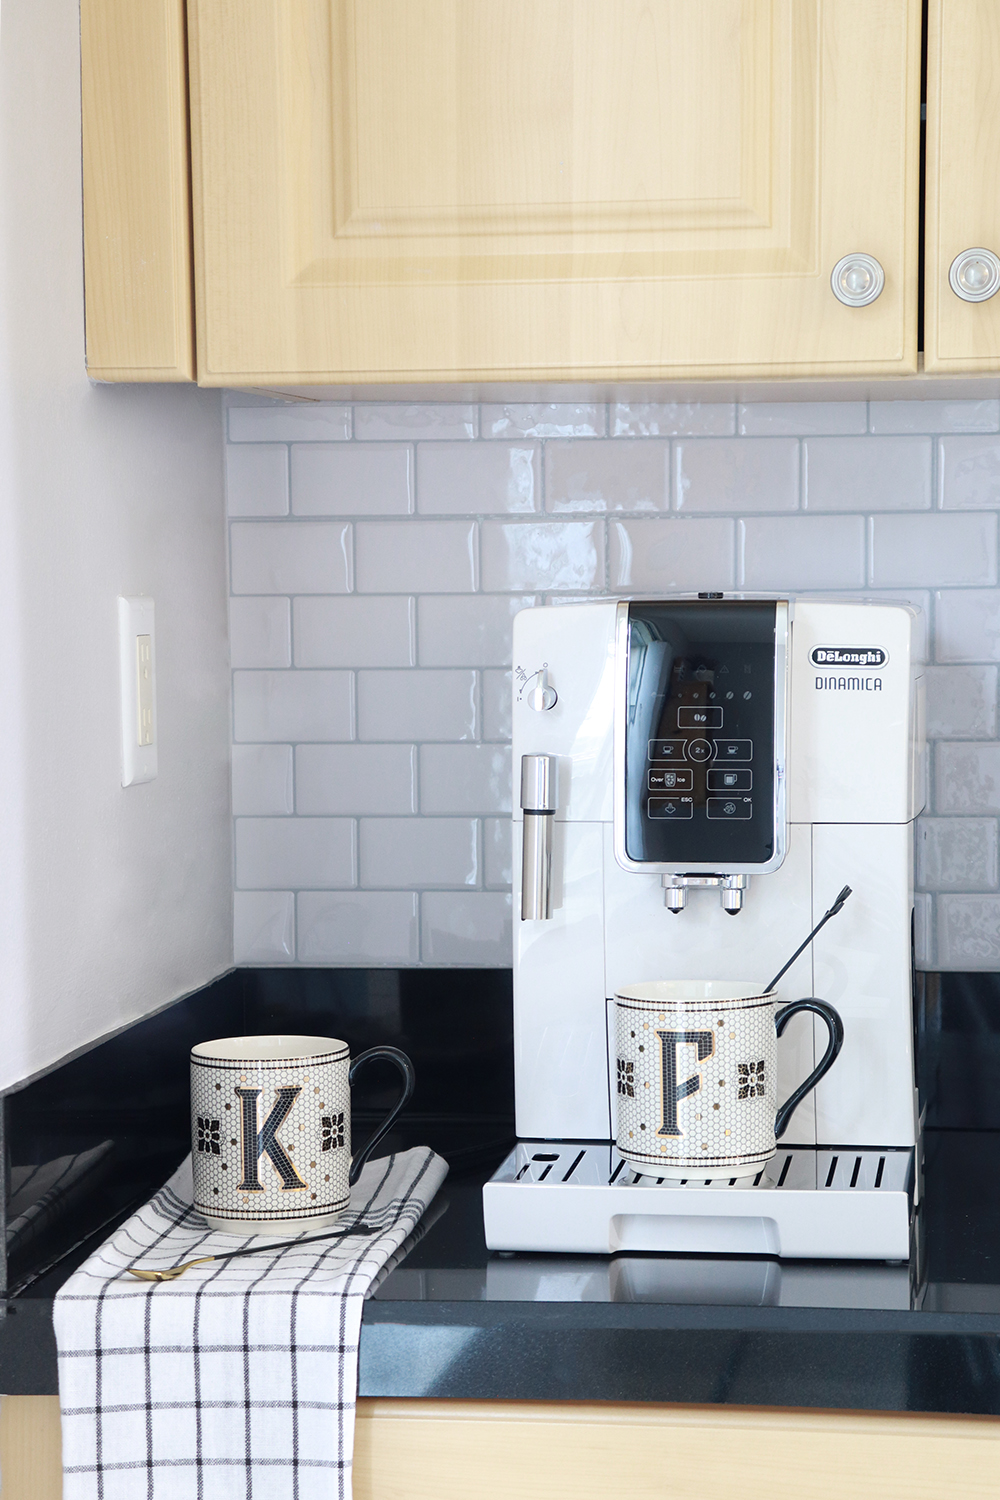
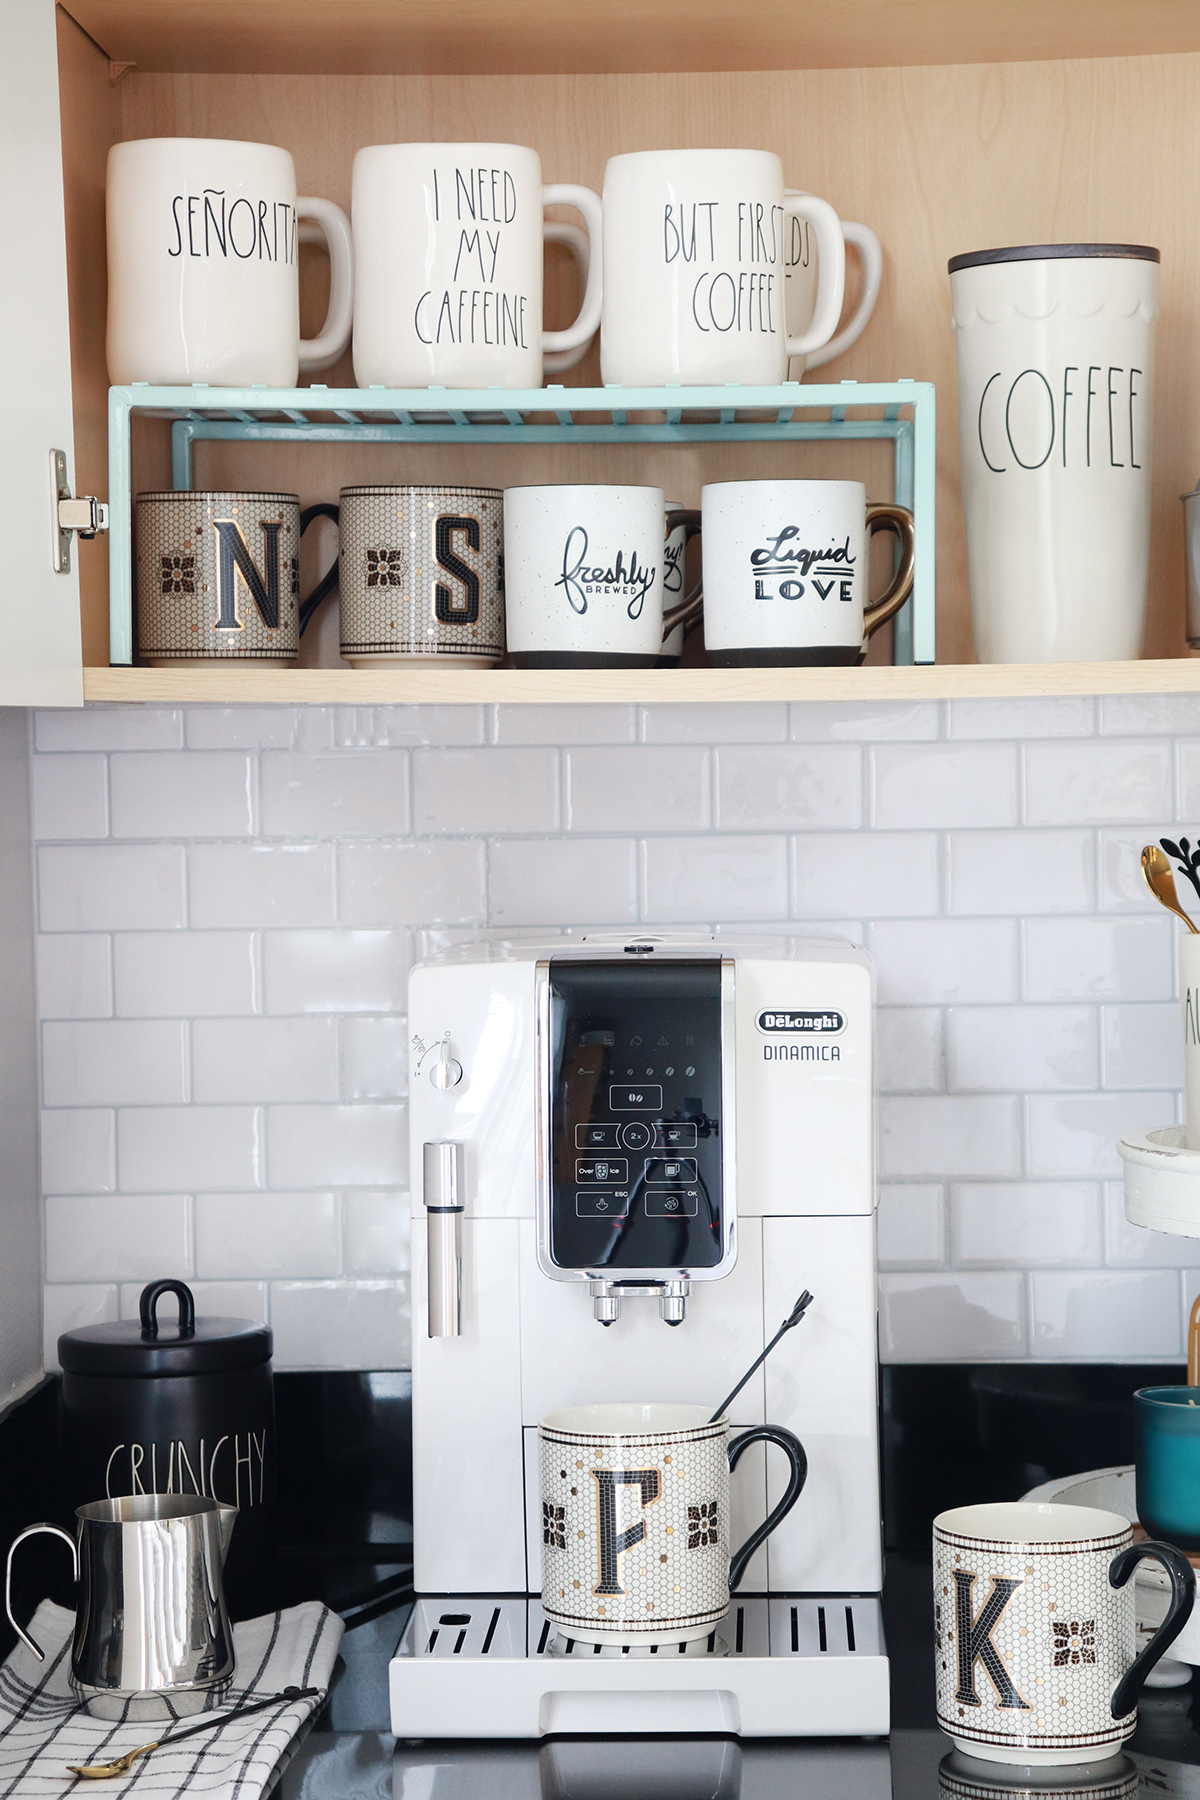
A couple of months ago, I created a coffee station in a small nook in our kitchen. But before it became the functional corner it is now, it was a total hot mess, to say the least. The perfect example of how underutilized spaces become dumping grounds if you do not give them a specific function. Today, I will show you how a decluttering session and peel-and-stick wallpaper backsplash transformed this abandoned kitchen corner.
Installing the wallpaper backsplash in this nook (separate from the rest of the kitchen) was an afterthought. This stand-alone counter and cabinet corner served as a pantry, recipe book bookcase, homework station, and pressure cooker storage. Dumping ground, as I said. I will show you how to install this peel-and-stick wallpaper. Whether you install it in a little nook like mine or as a backsplash in the entire kitchen, I guarantee you it’s an easy DIY project.
Would you like to save this?
This post may contain affiliate links for your convenience. For more information, please read my Affiliate Disclosure.
What Is The Best Peel and Stick Wallpaper for a Kitchen Backsplash?
This is my second time installing peel-and-stick wallpaper tile. For the first time, I used a peel-and-stick wallpaper in a hexagonal tile design as a backsplash in our laundry room. But that didn’t go too well! After a few months, the wallpaper started peeling off, and to this date, I have not replaced it (or fixed it). I will give you an update on that!

So considering that installing the hexagonal peel-and-stick wallpaper was tricky and that the RoomMates Sticktiles started to peel, I picked a different brand for the kitchen nook backsplash. This time, I chose this Art3D peel-and-stick subway tile wallpaper, a trendy kitchen backsplash.
So, is Art3D the best and most recommended wallpaper for a kitchen backsplash?

I am unsure if it is the best in the market because I have only tried two types. But trust me, I read many reviews (pros and cons), and some mention that these tiles are super sticky. That basically sold me. Most customers have installed this same peel-and-stick backsplash in their kitchens, which seems to work. It’s been three months since I installed them in the kitchen nook, and they show no signs of peeling off.
Things to Consider When Installing Peel and Stick Wallpaper
Based on my -brief- experience installing peel-and-stick wallpaper, here are a few things I recommend you should consider.

Use in Small Areas
Use peel-and-stick tile to cover small areas. Arranging and configuring the peel-and-stick tiles is time-consuming. I recommend it for small projects like backsplashes and short walls and nooks.
Avoid Installing on Freshly Painted Surfaces
I am unsure if this factor affected the performance of the peel-and-stick wallpaper we installed in the laundry room. The instructions advise not to install on freshly painted surfaces. It had only been two days since we painted the laundry room when we installed the tiles.
Always Prepare the Surface
Peel-and-stick tiles adhere best to smooth surfaces. With that said, avoid installing over brick, stone, porous wood, etc. The smoother the surface, the better the adherence. Prepare the surface by cleaning it with a strong grease remover.
Some degreaser options are:
- Trisodium Phosphate (or TSP)
- Krud Kutter
- Rubbing Alcohol (my favorite, always handy).
Avoid Exposing the Tiles to Direct Heat
This might be another reason why the first set of backsplash tiles installed in the laundry room is coming off. I believe the heat of the dryer damaged the adhesiveness of the wallpaper. So, I recommend looking for a product that can withstand higher temperatures. Although no direct heat affects the kitchen nook, the Art3D peel-and-stick backsplash seems to be a wallpaper with strong adhesiveness.
How to Install Art3D Peel and Stick Backsplash
With introduction and considerations out of the way, let me show you how to install this backsplash. You will be happy to know that you don’t need any advanced tools.

Tools and Supplies
- Art3D Peel and Stick Subway Tiles – Each tile is 12×12 inches (1 sq. ft), and there are 10 tiles in 1 box (120 sq. ft). The quantity will depend on the square footage of the area you are looking to cover.
- Craft scissors
- Craft knife (Xacto)
- Self-healing mat (optional)
- Measuring Tape (you can also use a yardstick*)
- Ruler
- Rubbing alcohol or TSP for degreasing the surface
*Because my kitchen nook is very small, I used my yardstick to measure and mark the cuts.
Step 1. Clean the Surface
With a lint-free cloth, apply the product of your choice (TSP, Krud Kutter, rubbing alcohol) to clean and degrease the surface. Allow for it to air dry.

Step 2. Determine The Tile Seams
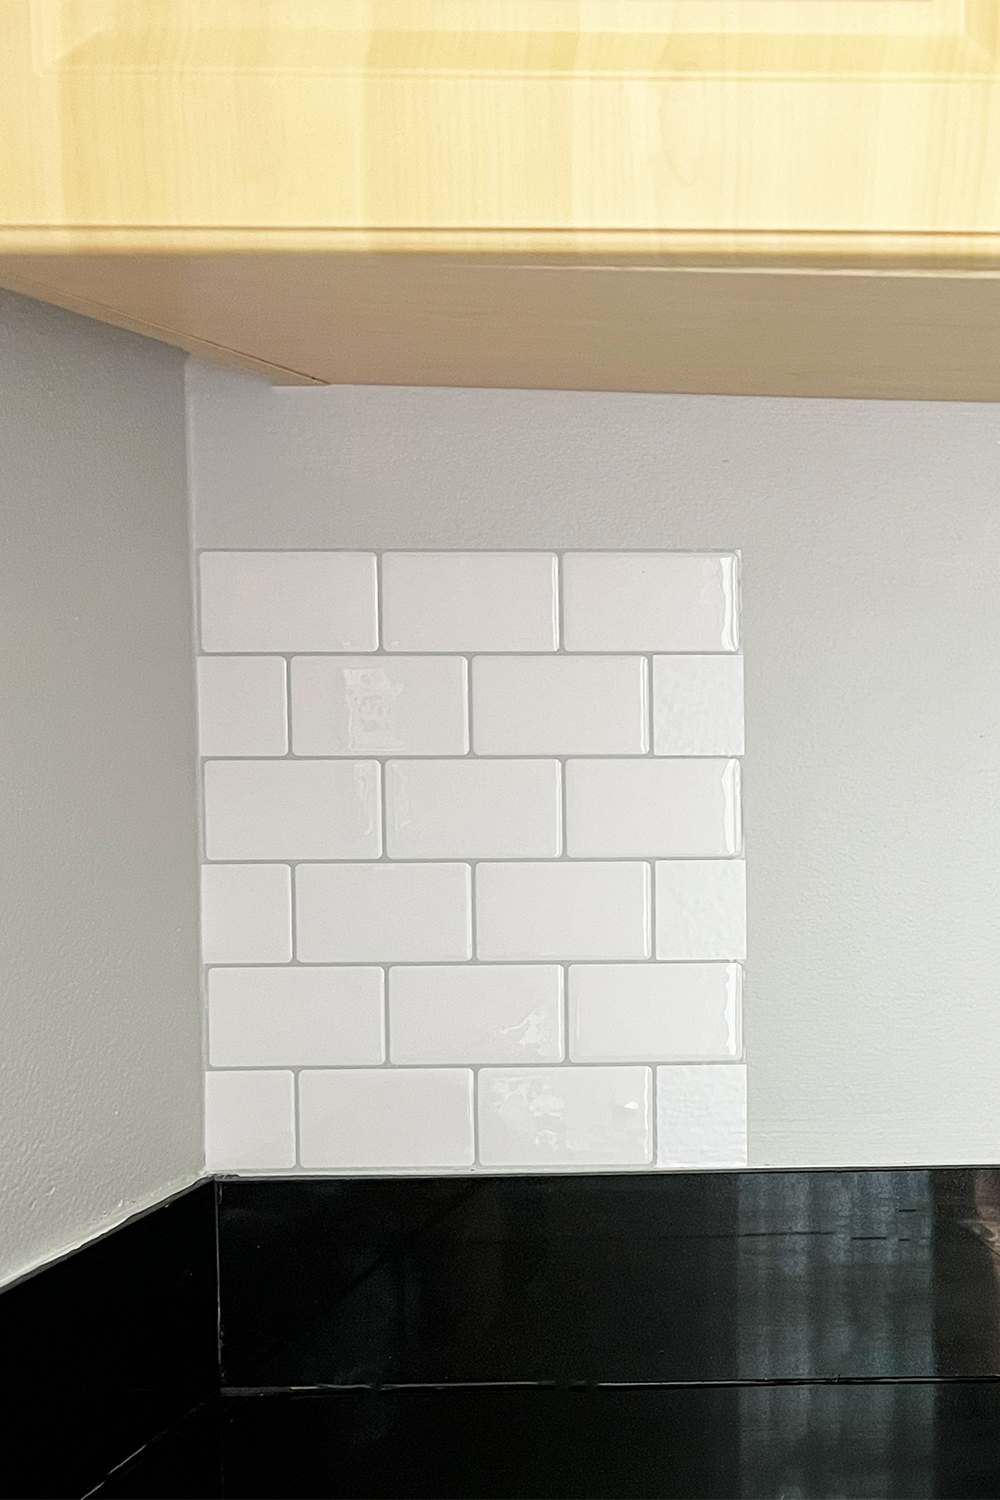
Before you begin laying out tiles, it’s a good idea to determine where you would like the seams to be. In my case, the tiles are 12-inch tall, and the wall between the cabinet and the counter is 14.5 inches. This means that I had to add a 2.5 inches tall strip of tiles along the width of my wall.

I preferred to start from the bottom so that the seams would be towards the top of the wall, away from eye level. However, I must say, the seams with this peel-and-stick backsplash are 100% unnoticeable!
Step 3. Start With a Straight Edge
These peel-and-stick backsplash in Subway Tile style, are interlocking. This means that the tiles do not have a straight edge. Instead, they overlap on a thin layer of white paper. So, to start in your far corner, you must ‘sacrifice’ your very first tile by cutting the opposite edge, where there is no overlapping paper.


Before peeling the backing off the tile, I laid it on the wall to determine the configuration.

Step 4. Measure and Determine the Configuration
Because my kitchen nook is really small, I easily determined how much wallpaper I needed to backsplash the wall. Depending on the size of your wall might or might not be able to do this. Use the measuring tape to determine how many tiles you will need before you need to make the next cut. In my case, I laid out the tiles on the black ledge and determined I needed 4 tiles.

From left to right:
- Tile 1 is the tile I cut in step 3 to create the straight edge to put against the corner.
- Tile 2 overlaps tile 1
- Tile 3 overlaps tile 2
- Tile 4 overlaps tile 3, BUT it needs a cut for it to fit.
I held the tile in place and marked the spot in the far right corner (where the walls meet) to then make the next cut.
Step 5. Peel and Stick Your First Tile
Start peeling the backing from the top left corner of your first tile. You can either:
- Peel the backing off completely and carefully adhere it to the wall, or
- Peel the backing only halfway, adhere the first half to the wall and peel the rest off as you go.
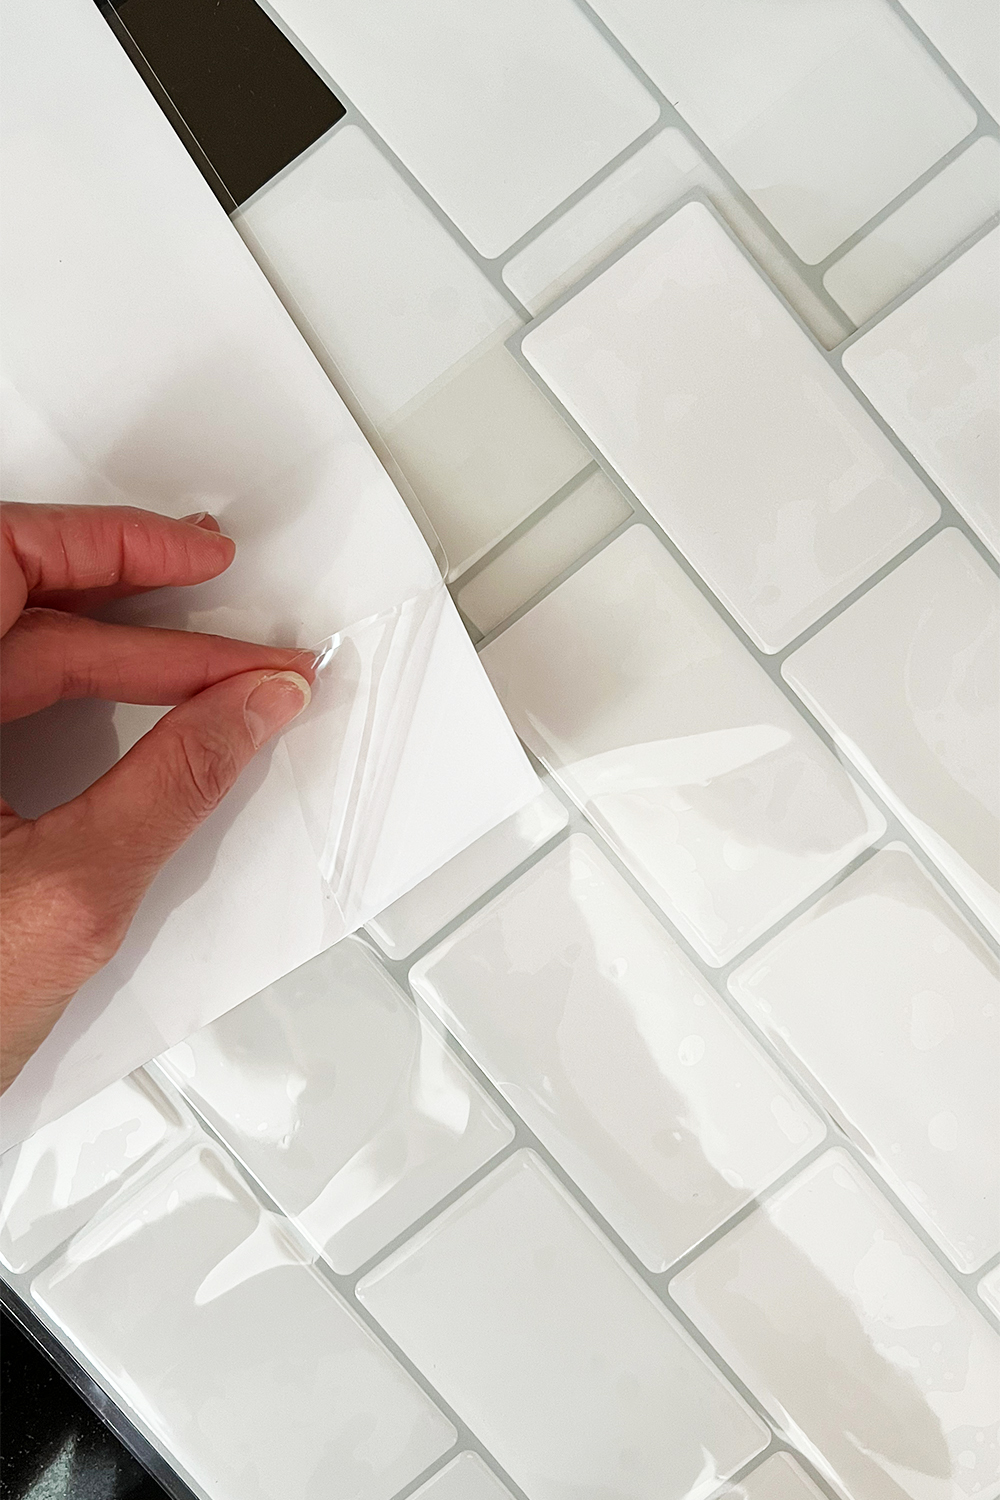
I peeled it off completely to have a better grip on the tile. Either way, grab it by the corners and align it straight with the edges of the wall. Adhere to the wall smoothing out the tile.
Step 6. Start Overlapping
From this point forward, start overlapping the tiles. Once the first tile is laid out, adhering the next tiles to the wall should be easy. The first tile is your guide to overlap the next one, and so on and so forth. Either peel off the entire backing of the next tile or just a small portion and overlap it.


Continue overlapping tiles until you run out of wall space and have to make a new cut.
Step 7. Going Up or Down
Once you cover the wall from left to right, it’s time to either go up or down. After I covered the wall from left to right, I measured 2.5 inches tall pieces to cover the remaining area going up on the wall.

When placing the strips of backsplash on the kitchen nook wall, I made sure to align the grout lines of the wallpaper to continue the subway tile effect.

Final Results of Kitchen Nook with Backsplash
I love a good before and after, and I know that you do too! So here’s a comparison of how this kitchen nook (and cabinet) looked like before. Adding the wallpaper backsplash was the cherry on top. Before getting there, I laid out a plan.


- Decluttered the cabinet to create a coffee station.
- Our son has a dedicated desk in his bedroom.
- Created a better storage system for kitchen appliances.
- Pantry items are still a bit scattered in my kitchen. This project is in progress! 🙂
I hope I inspired you to add some wallpaper or peel-and-stick backsplash to your kitchen or any other nook in your home that needs a little pizzazz!