How To Make a Large Chalkboard Sign
A few days ago, I shared with you 5 simple steps I follow to create the perfect chalkboard lettering.
When you are making a chalkboard sign that is not bigger than the size of a letter or legal size paper, transferring your design from paper to chalkboard is easy. Not to mention, really fast since you are only working on a small (probably 8×10, 8.5×11 or 8.5×14) surface.
However, how do you make a very large chalkboard sign? How do you transfer the lettering and have a perfectly centered aligned design? Better yet, where can you find a very large chalkboard? I asked myself the same questions when I had to create a wedding program on a 8 ft x 4 ft chalkboard and a slightly smaller, 5 ft x 3 ft chalkboard sign.

Would you like to save this?
Make Your Own Large Chalkboard Sign
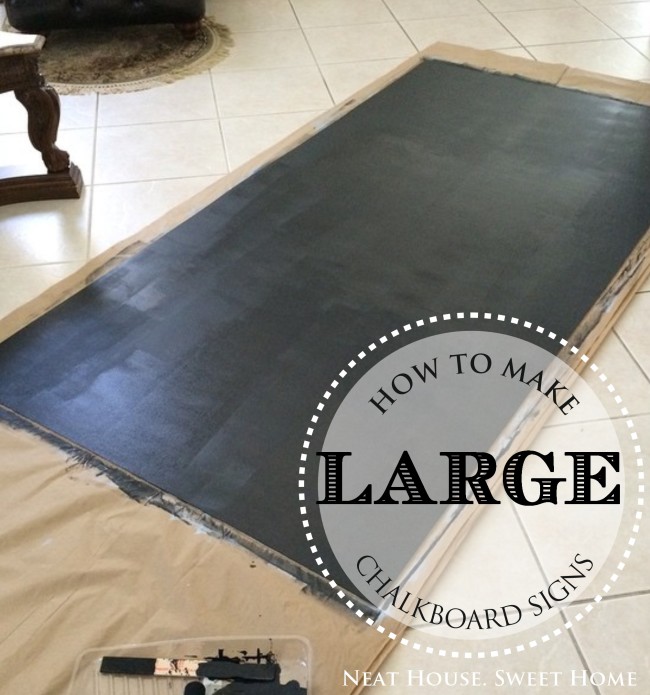
For signs up to 4 ft x 2 ft, I have always purchased pre-made black chalkboard sheets at my local Home Depot. The finish is excellent and the only thing I have to do is cut it to size. But for bigger signs, I make my own by painting plywood sheathing.
Materials You Will Need
- Plywood Sheathing (cut to the desired size) → I used 1/4 inch thick plywood sheathing. Find it at your local hardware store, they can cut it for you there.
- Painter’s Touch Flat Gray Primer
- Chalkboard Paint (my all time favorite!)
- High-density foam paint rollers
- Plastic paint trays
- Paper Drop Cloth
The process is simple, so I won’t go into deep detail. Once your plywood sheet is cut to the desired size, lay it flat on the floor on top of the paper drop cloth, prime and paint according to the label’s instructions.
It is very important that you don’t skip priming your board, as it will coat the rough surface of the plywood and give you a perfect smooth finished layer to apply the chalkboard paint
Here is a candid snapshot of the process. Not the best resolution, it was taken with my iPhone.
Here is an important tip: you must let the chalkboard paint cure for 24 hours before you start drawing with chalk on it.
Design Your Custom Sign, or Graphics
If you have basic computer skills, you know that you can design anything possible on basic programs such as Word, Pages, Google Docs, or PowerPoint.
If you are a little more computer savvy, you can probably design on more advanced graphic design programs such as Photoshop or Publisher. I use Serif DrawPlus and I love it, I give you my genuine word for it!
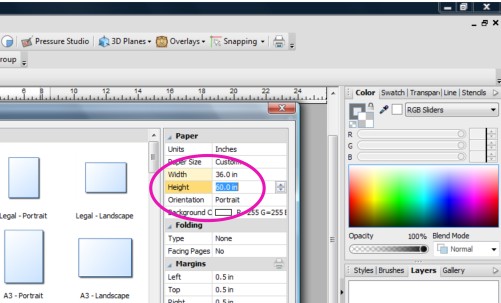
But, no matter what type of program you use, here is the important piece of information you need to know: Design your art in ‘actual size’.
Design in Actual Size
Designing in actual size means to design your art using the same dimensions your actual board is. If your board is 3 ft x 5 ft, you must set your page to 36 inches x 60 inches (landscape or portrait).
Printing Your Design at Home
Once the design is done and centered in the real size page, group the design in one big block and set up the page again to be letter size.
It will look -more or less- like this:
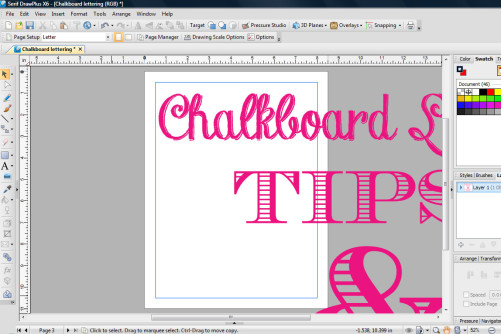
Notice how big the design looks compared to an actual letter-size page. The sample design I made for this post is supposed to fit in a 24 -inch x 24-inch page. Once I made it and centered it, I changed the size of the page back to letter size.
When I click on ‘print page’, the printer is only going to print whatever is in the current view area. In this case, it will only print ‘Chalkbo’, ‘T’ and part of the ‘I’.

After printing, go back to the file and move the design around the page and repeat the printing process until every letter and every piece of the design is printed.

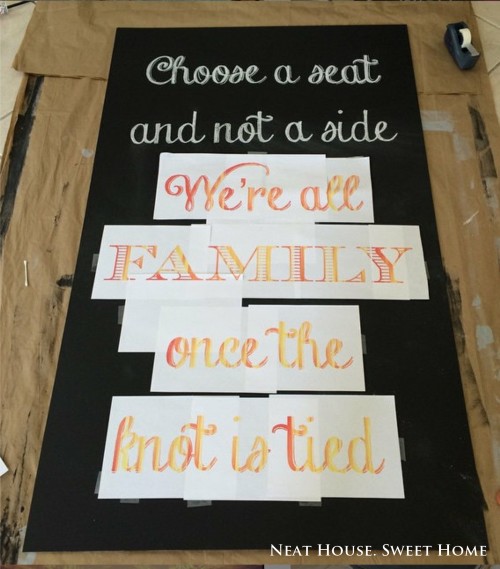
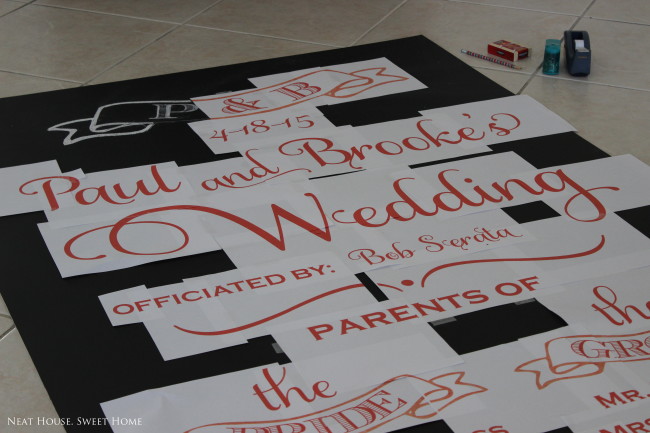
Make a Puzzle
Yes, basically what you have to do is make a puzzle and then, tape that puzzle down on the chalkboard. This is how a puzzle of letter size pages look on a 5 ft x 3 ft chalkboard.
You can also have the file printed in large format at a print and copy center, and have just one giant piece of paper.
My local Office Depot has a plotter printer on-site where I have printed several posters before. However, I think the maximum printing width is 3 feet and my maximum width in one of the chalkboards was 4 feet wide. So, I had no choice but to use this ‘puzzle method’.
When you have to make an 8×4 ft chalkboard, it’s crazy overwhelming! But I could not be any happier with the results.
It actually turned out to be a great idea. As I was transferring and drawing my design on the board, the rest of the surface stayed clean because the paper was protecting for flying chalk dust.
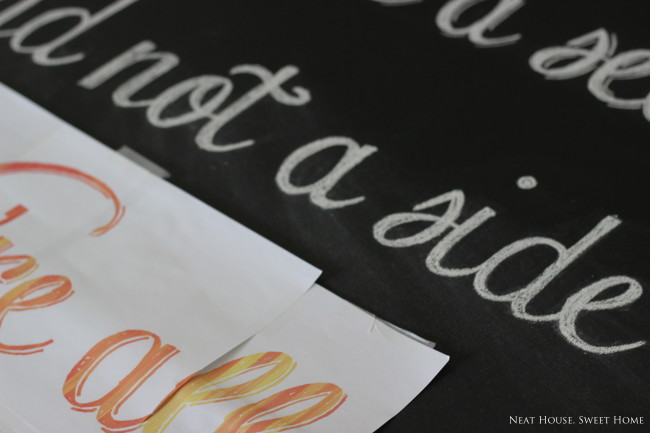
Transfer the Design
To transfer your design to the board, follow steps 3, 4 and 5 shown in my article Chalkboard Lettering in 5 easy steps.
I understand that this process and technique could be overwhelming for many, and it was for me at the beginning. But by far, this has been the best way to create perfect hand lettering on large-scale chalkboard signs.
If you have any questions, please ask in the comment section below! I will be more than happy to give you tips and advice!
Save now on Pinterest, come back later when you are ready to make your art!
You may also like these posts:
Have a great day!

May I ask the name of the font you used in the large chalkboard for the word “Wedding?”
Hi Nikki! The name of the font is Samantha Upright. Thanks for stopping by!