Pantry, Fridge and Freezer Organization
The holidays are over, kids will be soon back to school, and now it’s time to put our families back to a regular schedule and, it is also time to go back to our daily eating habits.
With so many treats, holiday dinners and parties, lazy take-out nights, and cookie-baking, I think we can all agree that it is time to check the back of the pantry, the fridge, and the freezer. I don’t know about you, but I have way too many cookies and treats in mine, a couple of bottles of eggnog in the fridge, and I desperately need to clean the freezer.
Would you like to save this?
Pantry Organization
Call me weird, but I LOVE organizing my pantry. Sorting through dry goods gives me a feeling of satisfaction. Maybe because it is the easiest thing to purge. There’s no hesitation in the decision-making process; if it is expired, stale or ‘funy-looking’, you know it’s time to toss it. You can’t keep it!
I wish clothing – like food- had an expiration date. It would be so easy to declutter my closet!
The first thing you have to do is empty out the entire pantry and place contents on top of kitchen counters or on a table. Proceed to clean every shelf as you usually do and let air dry. Sort the food and/or items in 4 groups: keep, discard, donate and relocate.
- Keep all food that is fresh and that you know you will use up within the time set on their shelf life.
- Discard any expired or old items.
- Donate any non-expired canned goods or other non-perishable food that you know your family won’t eat. I can’t tell you how many times I have bought all different types of snacks for my son and he ends up saying the usual ‘Mommy… I don’t like it’. Friends and neighbors could benefit!
- Relocate items that do not belong in a pantry. Chances are, you have been stuffing your pantry cabinet with other things such as utensils or appliances that are taking up prime real state. Consider finding a new place for all items that aren’t food, unless you absolutely don’t have any more closet or cupboard space.
Once you have all 4 groups in front of you, concentrate on group 1 (keep) and do the following:
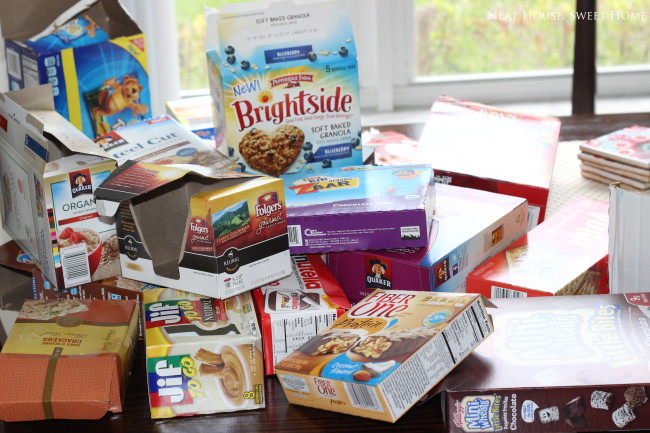
- Discard as many boxes as possible. You have no idea how much of a space saver this is! To give you an example, this is what came out from my last pantry sorting back in October. That is a lot of boxes, friends.
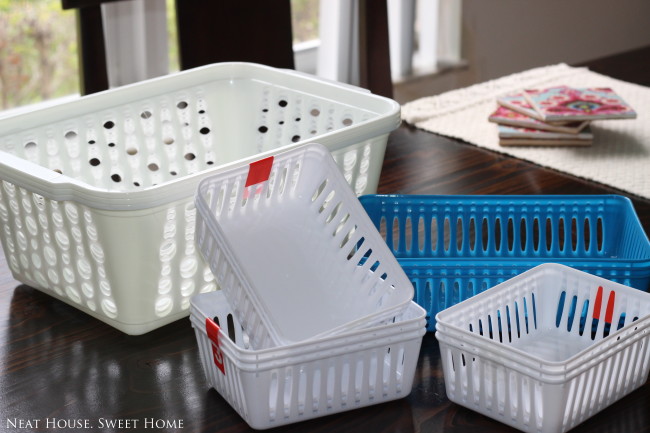
Now, what to do with all the loose packets of everything? Here comes my thrifty secret: use dollar store baskets! For a single dollar you can get 1 of the big baskets, and 3 of the little ones. Isn’t that a sweet deal?
sort your food into groups
This step is very important. It is going to give you perspective and notice what you really have stored in there. Ask yourself two questions (and be honest with your answers!):
- Is it real food or all odds and ends?
- Can I can put together a hearty meal out of this?
Sorting the food in groups helps you organize your shelves effectively, and you will find your food faster when you need it. Make groups such as:
- Pasta and grains (rice, beans, lentils, quinoa, etc.)
- Sauces and canned goods
- Cereals, bread, and crackers
- Snacks. I like to call this shelf ‘the lunchbox station’.
- Oils, dressings, other bottled goods.
- Baking goods such as powdered sugar, flour, chocolate chips, etc.
Once you have sorted your food into these groups (or in any other way that fits your needs), it is time to put the food back in the pantry cabinet or closet. It never fails, the cabinet might be a little empty now, but that is because you made a lot of purging. Good for you! Now it’s a good time to make an inventory and head to the food store 🙂
If you manage to keep your food classified, toss boxes as soon as you come from the store and use those handy-dandy baskets, I promise that your pantry will stay organized for a much longer period.
- Want to learn more? Here is an entire post on pantry organization.
- Want to be savvier when buying food? Try planning your meals in advance!
Fridge and Freezer Organization
Your refrigerator is an area that, even though is opened and checked several times a day, it tends to be neglected. I get you, we are always in a hurry, doing something else…but there is a time for everything and your fridge and freezer need some of your time.
Purge your fridge once a week and clean it at least once a month. Make sure to clean it and make room in it before heading to the food store.
PICK A DAY FOR PURGING
I like to clean out my fridge on the day that is ‘garbage night’ (that means the night when we have to put the garbage out on the curb). It will only take you 10 minutes to scan through every shelf and drawer, and as I said before, it is effortless to decide to toss something out.
Check expiration dates. The appearance and smell of meat, fruits, and vegetables are the perfect indicators for whether to toss or not. Throw out any food that is freezer burnt, although it is safe to eat, it is dry food and tasteless. And remember: ‘when in doubt, throw it out!’
CLEAN THE FRIDGE AND FREEZER
Whatever your system is to clean your fridge, do it! Some people take the time to fill a cooler with ice in order to keep some food refrigerated while cleaning the shelves.
I personally believe that, that is absolutely unnecessary, unless you are planning to spend more than an hour on each shelf (please don’t!).
Use this system for both the fridge and freezer.
- Clean from top to bottom. That way, drips, crumbs, and dirt will fall on the shelves that you are cleaning next.
- Starting with the top shelf (or drawer), take out all the food that is on that top shelf only, and place it on a counter.
- Remove the shelf (or drawer) from the fridge and close the refrigerator.
- Wash the shelf in the sink with warm water and your regular dishwashing liquid.
- Wipe clean the fridge walls with a disinfecting wipe. Dry with a clean cloth or paper towel. Close the fridge.
- Wipe clean jars and containers that might be dirty and sticky.
- Put the shelf or drawer back in the fridge.
- Return food to the shelf or drawer.
- Repeat steps 1 to 8 with every shelf and drawer of your fridge and freezer.
Do you have a system to store food in your fridge? or do you just place things randomly? I am OCD with my fridge! Milk must be on the door, middle shelf, all the way to the left. And juice boxes should always be inside the lunchbox station at my son’s level so he can reach them easily.
Try this:
- Place glass jars such as pickles, olives, capers, etc. on the top shelf. Those are items that are not used on a daily basis and, if you have kids at home, it is safe to have them out of their reach.
- Place deli items in a drawer. I keep mine inside a small shallow drawer located at eye level. It is so convenient to access them in the mornings when it’s time to prepare lunch boxes.
- Place milk, cream, juices, water, etc. on the door for easy access. Those are items that are used constantly and having them on the door is better than having to reach the back of a shelf.
- Place meat and vegetables in their designated drawers. Some drawers have humidity control levers, which are great to keep your food fresh longer.
- Have a lunch station. To give you an example, I have a few fridge bins that help me keep zones defined inside my fridge. On the left I have a bin that holds juice boxes, yogurt pouches, smoothies, etc. and to the right I have a bin that holds pre-washed fruits that I grab in the morning to cut and put inside the lunchbox. It is also good to have them pre-washed and at eye level for your child. My son opens the fridge and if he sees a shiny apple at his eye level he will grab it and eat it.
READY TO TACKLE WEEK 1?
I know this post has been a little long, but I packed three tasks that hopefully you will be able to perform within the next 7 days. If you can’t tackle all three, don’t feel defeated. It’s the start of a new year and I know there is a lot on our plates. There is always another week, and another, and another!
Remember, we are not judging, we are helping each other to be a little bit of a better homemaker each day! Share your progress, pictures and ideas on our Facebook group, and on Instagram with the hashtag #52weeksneathouse
Love this assignment? Pin the image below! Have something to say right now? Leave me a comment in the comments box at the end of this post.
I’ve been looking forward to this while a little nervous too. Feeling that “what have I gotten myself into?” I’m feeling encouraged. We think alike about organization. I have my food pantry organized like you describe, baskets and everything. I also use Lock and Lock containers with wheels on the back for flours, sugars, etc. I purchased on QVC. I probably should be able to add a link here, but I am new to the blog world, sorry. It does make it easy to always keep neat. In fact, since I have gone to this method I will be able to pretty much skip the pantry and spend more time on a much neglected fridge shelves. 😝 I also am OCD when it comes to where things go in the fridge, labels forward…yes, feel free to feel sorry for my husband…poor guy. When I move something around, I get that, “well I put it back in the fridge at least” look. lol. Thanks for the organized motivation to get going! Happy Organized New Year! Cheryl
I am so so excited to get started! Been waiting for this!!! Happy days ahead x
Oh! So happy hear 🙂 – make share your progress with us !