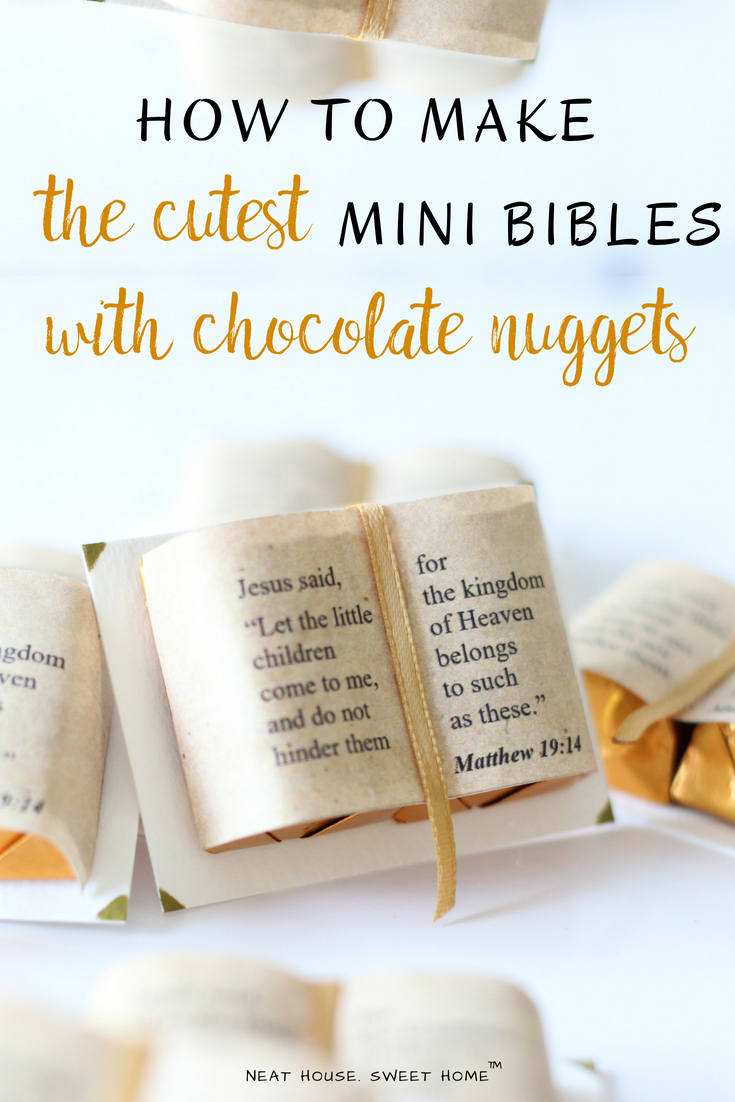
How to Make Miniature Chocolate Bibles
Have you ever seen those cute little small Bibles made from chocolate nuggets? I made these mini-bibles with Hershey® nuggets, and everyone loved them! Here’s my full tutorial on how to make miniature chocolate Bibles and the Hershey® nugget Bible template to go with it.
Would you like to save this?
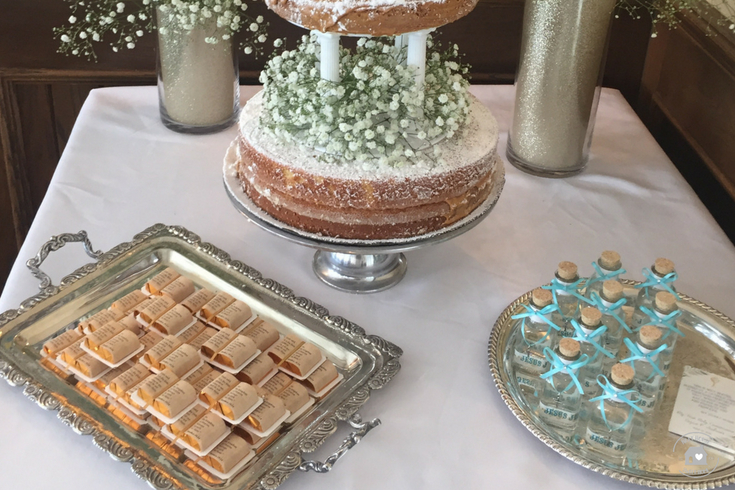
Last May, our son made his First Holy Communion. After two years of CCD education and dedication, we were happy to celebrate this important milestone in his life. We hosted a private luncheon with our closest friends, and, as always, I like to add a touch of decor and glam to my events, even if it’s in a restaurant like this time. Enter these miniature chocolate bibles.
I searched high and low for First Communion favors ideas, and Pinterest kept suggesting my very own DIY Baptism Favors, along with a wide arrangement of Holy Water favors and these cute miniature chocolate bibles made with Hershey’s® nuggets.
I placed the chocolate bibles on a silver tray to add decor to the small table with the cake. These chocolate mini bibles were an extra takeaway for the guests and the Holy Water Favors.
Now for the small chocolate bibles tutorial.
Tools and Materials to Make Small Chocolate Bibles
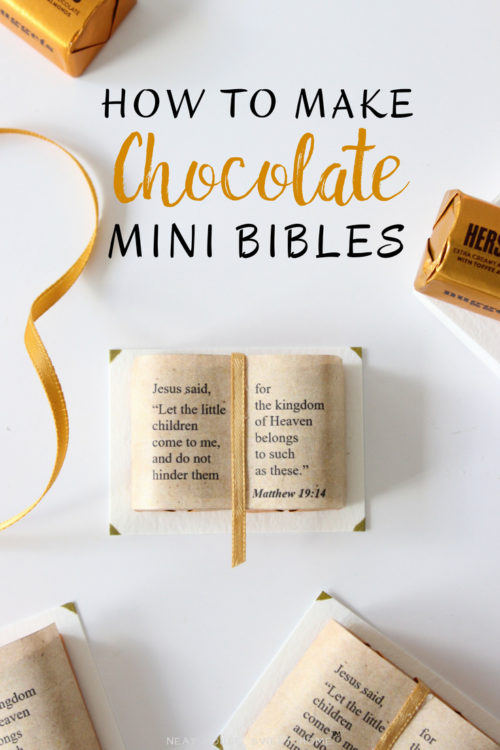
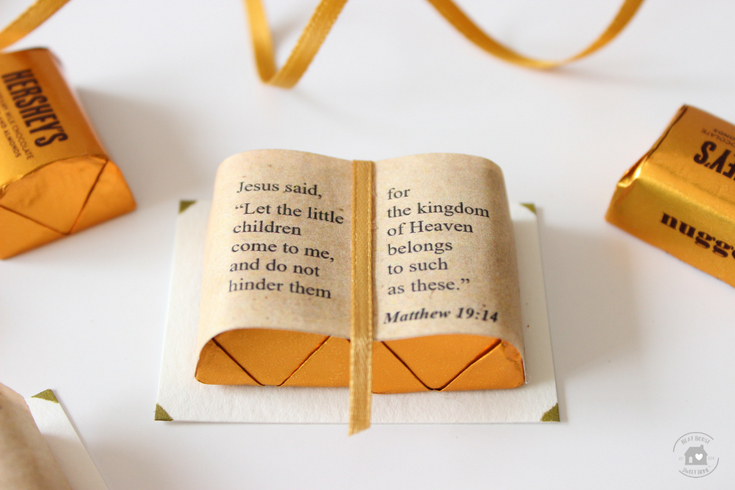
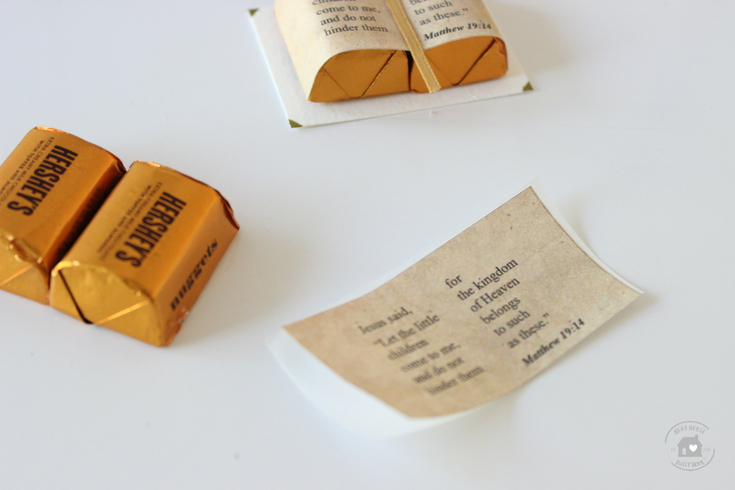
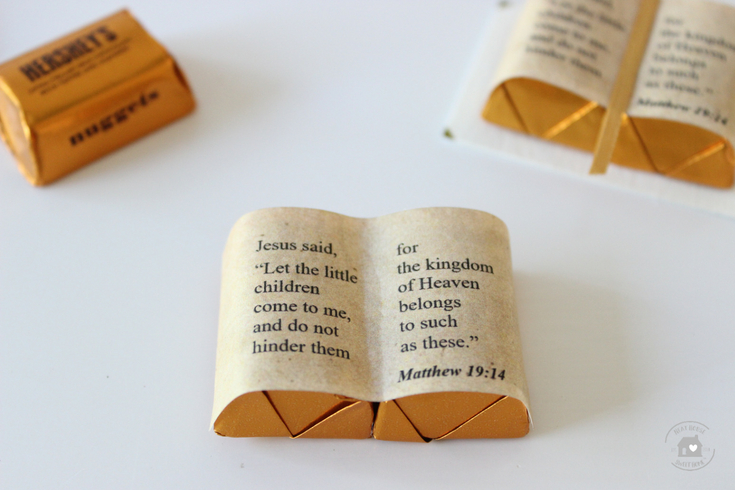
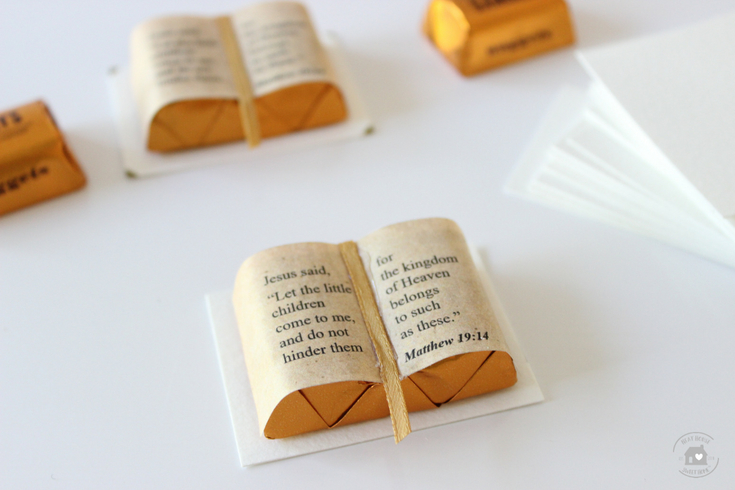
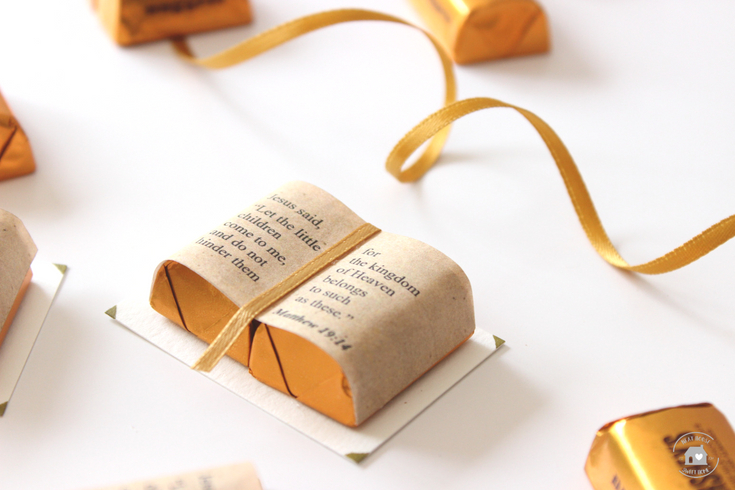
The first thing you will need is the miniature chocolate Bible scripture. I chose one of my favorite Bible verses from Matthew 19:14, which I think is very fitting for a child’s First Holy Communion. It definitely fits a baby’s Baptism, too!
Jesus said: "Let the little children come to me, and do not hinder them, for the kingdom of Heaven belongs to such as these." Matthew 19:14
Bible Verse Options for Miniature Bibles
To choose a bible verse for your miniature Bibles, I offer three options for you to choose from. Please read carefully and click on the appropriate link.
- $7 – If you like the Bible verse shown in this tutorial (Matthew 19:14), you can purchase it here.
- $10 – If you would like a different Bible verse, you can type and edit it yourself here.
- $16 – If you would like me to customize your file, you can purchase a custom file here.
Type of Candy You Need to Make the Small Bibles
To make these miniature chocolate candy bibles, you have a few different nuggets to choose from:
- Milk Chocolate Nuggets, in a silver wrapper.
- Milk Chocolate Nuggets with Almonds, in a gold wrapper
- Milk Chocolate Nuggets with Almonds and Toffee, in a deep gold wrapper. These are the nuggets I used.
Material and Tools to Make the Bibles
- White copy paper or Sticker Paper
- Printer – If you are due for a new color printer, this is a good, tried & true, affordable printer. If you are looking for a good laser printer, this is the one I currently use for my online business.
- Xyron Create a Sticker (if you don’t use sticker paper)
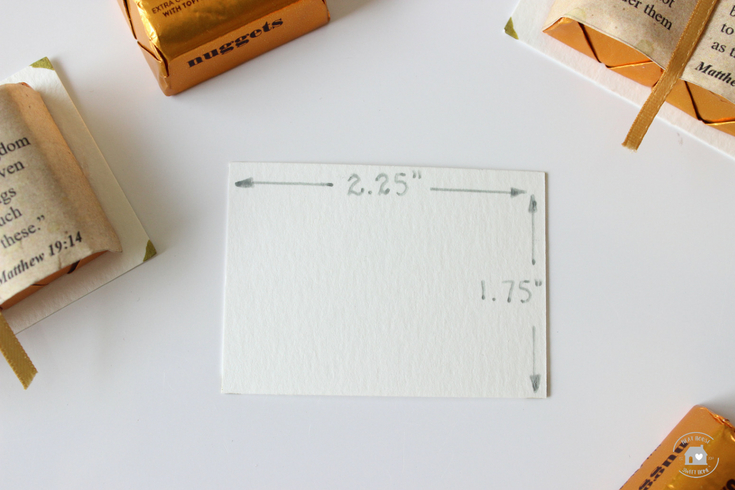
- Cardstock (to make the small Bible’s open cover). Cut into 2.25 x 1.75 inches rectangles.
- Craft scissors or paper trimmer
- Gold satin ribbon (1/8 inch wide) or any other color you choose, as long as it is 1/8 inch wide.
- Hot glue gun and sticks
- Gold Sharpie marker (optional)
1. Print and Cut the Scripture
You can purchase a custom file from my shop or edit it yourself and print the scripture on white sticker paper or white copy paper.
- If you decide to print on sticker paper, cut each card along the lines with the paper trimmer.
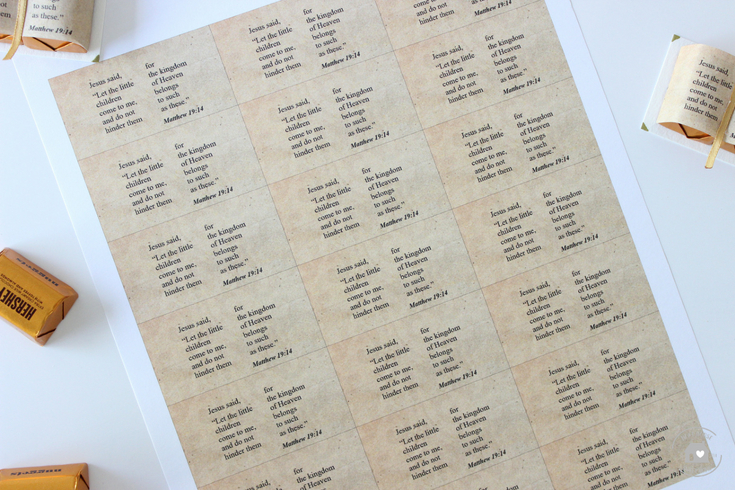
- If you decide to print on copy paper, trim the scripture into three columns, as shown in the picture below.

Insert each column separately inside the sticker maker. This crafting tool will make the back of your plain copy paper sticky.
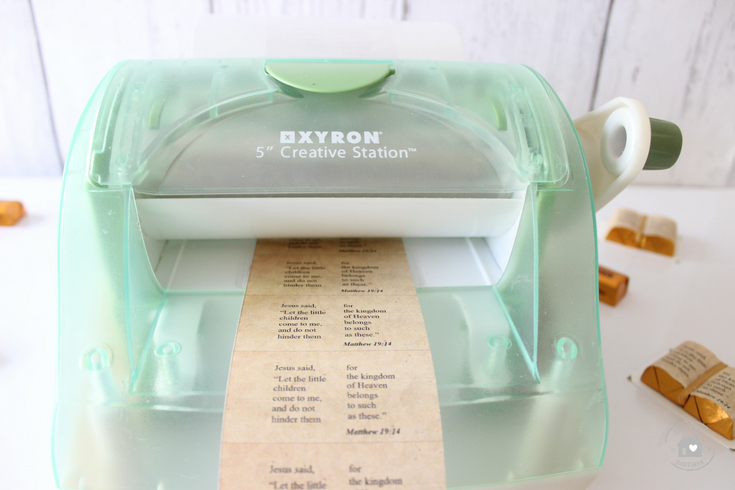
After making each column of scriptures sticky, you can cut each miniature card along the lines. Set all your cards aside.
2. Glue Hershey Nuggets
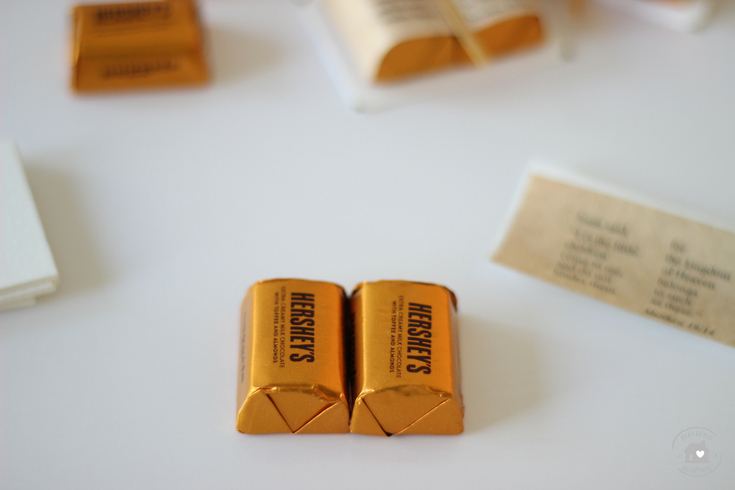
Warm up the hot glue gun and add a thin line of glue to only one of the nuggets. Then, attach the nuggets together, caring to attach them only at the very bottom of the sides, on a straight line. If you tilt them just a bit, you won’t have a flat bottom.

Hold the nuggets together for a few seconds until the hot glue dries completely. Lay them on a flat surface. There will be a small gap between them, and that’s OK; that’s where the ribbon will go.
3. Stick the Scripture to the Nuggets
Whether you print on sticker paper or create your own sticky backing, as shown in step 2, now you can stick the card to the top of the chocolate nuggets.
Start sticking the paper from left to right. To do this, align the paper with the bottom edge of the nugget on the left.
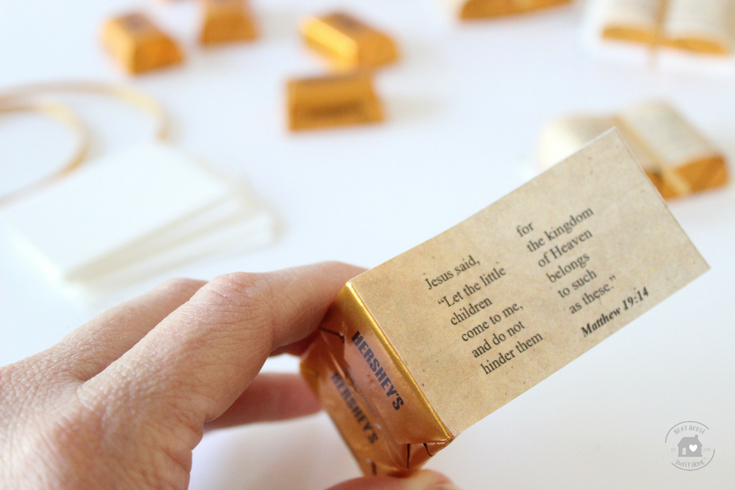
Continue sticking the paper around the nuggets following the shape of the surface.
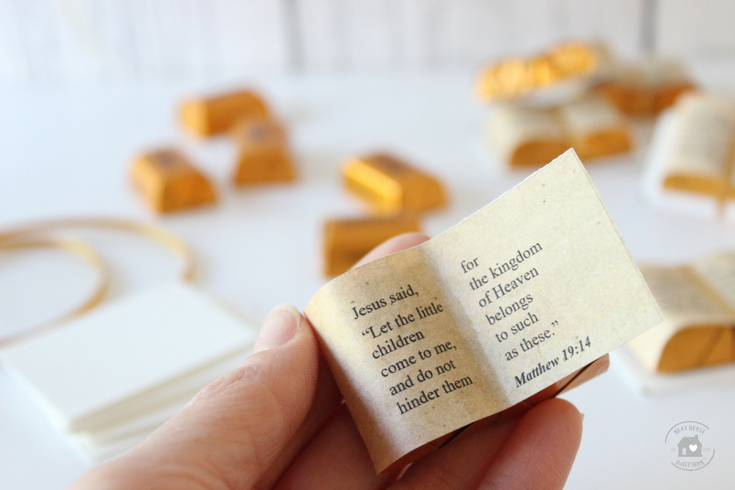
Follow the path towards the center indentation, where the two nuggets meet. Avoid putting too much pressure on the indentation, or the paper can rip. The wrapped nuggets should look like this. A beautiful, open, miniature Bible!
4. Add the Ribbon to the Bible
Turn the book (nuggets) upside down and add a thin line of glue in the middle, just halfway. Follow the instructions below using the picture’s frames as a guide.
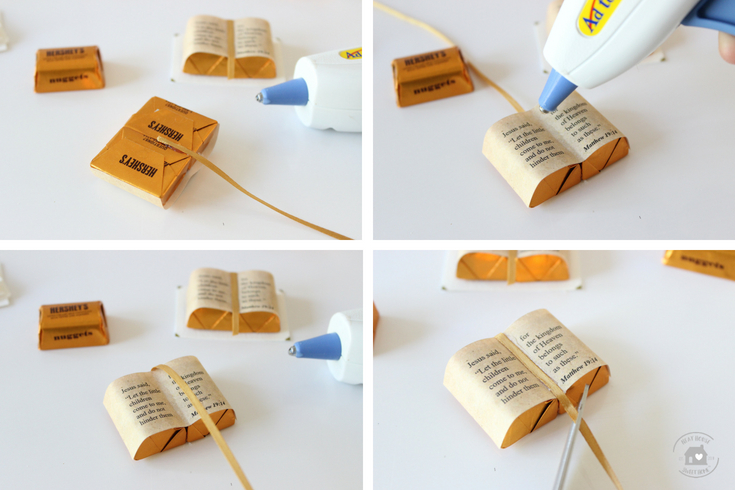
- Top left picture: attach one end of the ribbon in the back.
- Top right picture: add another thin line of hot glue down the middle of the Bible
- Bottom left picture: drape the ribbon over the middle and attach it
- Bottom right picture: cut the end of the ribbon in a diagonal
Looking gorgeous!
5. Add the Cover of the Bible
Turn the mini chocolate bible around once again, and add enough dabs of hot glue to the back of the nuggets.
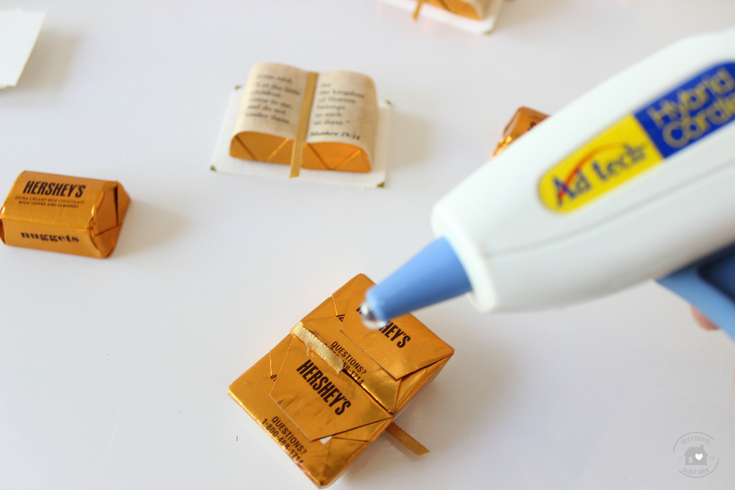
Place the small 2.25 x 1.75-inch rectangle flat on the table.
Set the nuggets down and put some pressure until the glue sets.
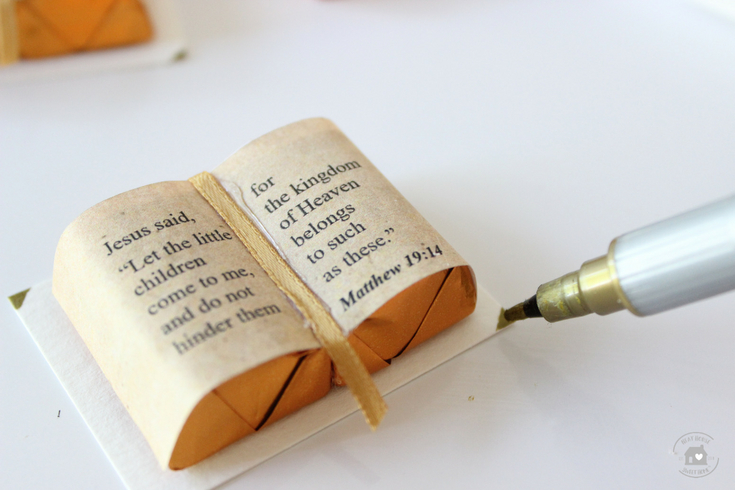
At this point, your miniature chocolate bibles are complete! I added golden corners to the book cover with a gold marker for extra charm.
Take one last look at these cuties!
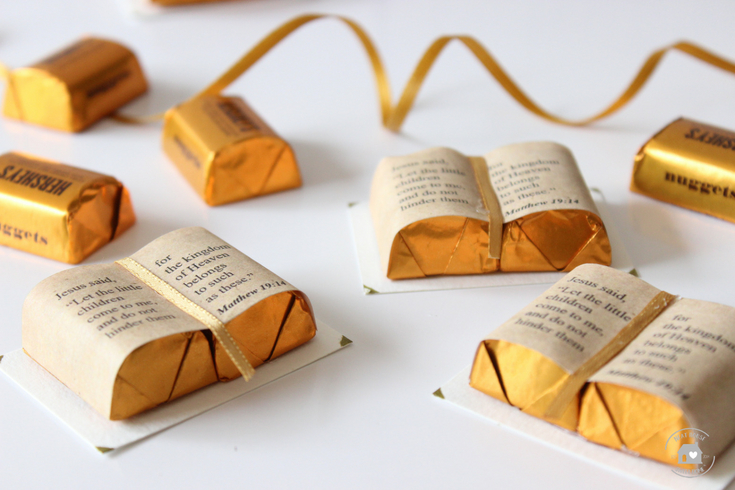

I like these mini bibles!