DIY Ninja Party Backdrop
If you are looking for a quick, easy, and affordable way to decorate a ninja-themed party, you’ve come to the right place. You can make this ninja party decor backdrop in one afternoon, and all materials are easily available at your closest craft store or dollar store.
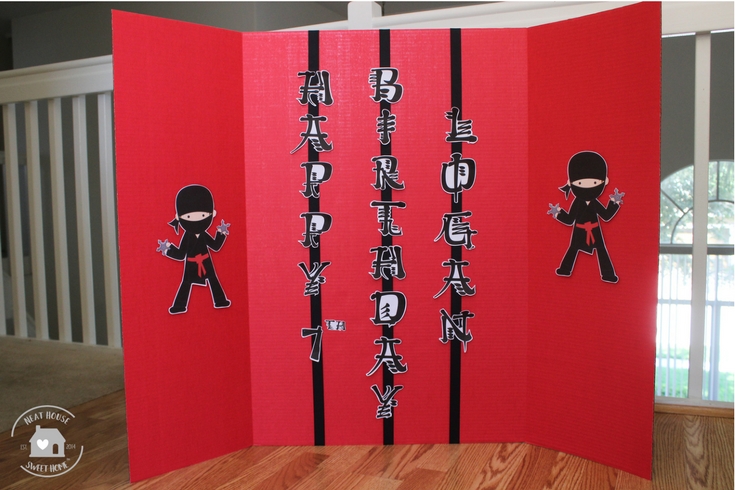
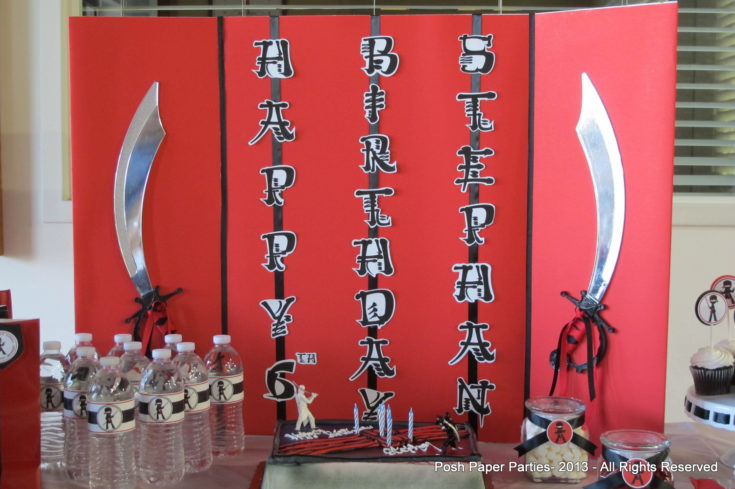
I made this ninja party backdrop once before in 2013 when my nephew turned 6 years old. And last summer, I made it once again for my son’s 7th birthday. All you need is a trifold poster board, ribbon, and banner, which you can download below.
DIY Ninja Party Backdrop: Tools and Materials Needed
- 1 – trifold poster board, red
- 1 – spool of black grosgrain ribbon or black satin ribbon (1 inch wide) – you will need around 10 ft
- 1 – box of glue lines
- White cardstock (65 lb +)
- 3D Pop Dots squares (1/2 inch)
- Scissors
- Measuring tape
- Happy Birthday banner, alphabet, and ninja characters. (free download below)
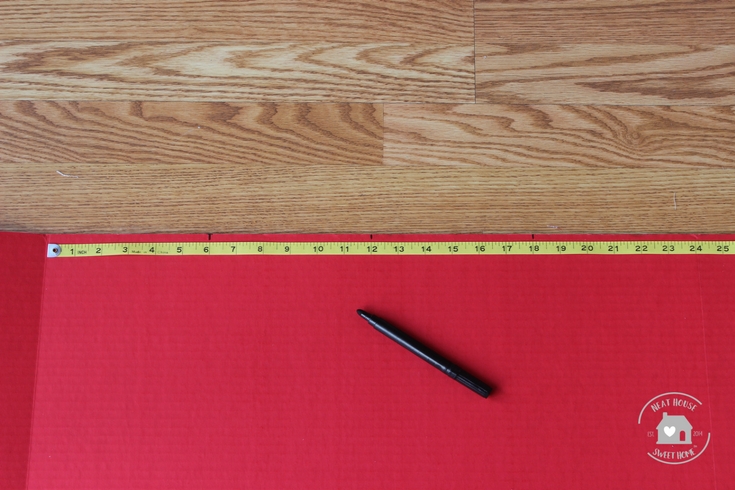
Step 1: Measure The Poster Board
Take the trifold board and measure the inner panel. A standard poster board measures 48 in x 36 in, and the inner panel measures 24 inches from fold to fold.
Measure the inner panel and divide it into thirds. In a 24 inch panel, your marks should be at the 6-inch, 12-inch, and 18-inch marks (see picture below).
Would you like to save this?
Make the same marks at the bottom of the board.
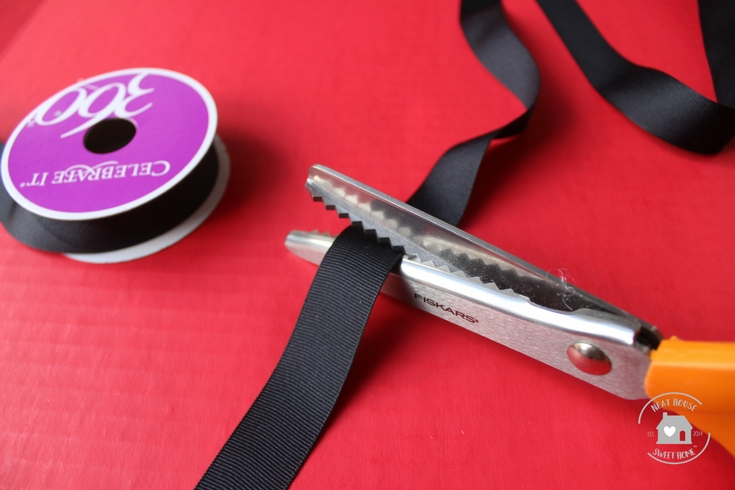
Step 2: Cut the Ribbon
Measure the height of the board and add 4 inches to that measurement. So, if your poster board is 36 inches high, cut 3 pieces of the black ribbon, 40-inch long each. The extra 4 inches are added to wrap the ribbon behind the board, 2 inches on each end (top and bottom).
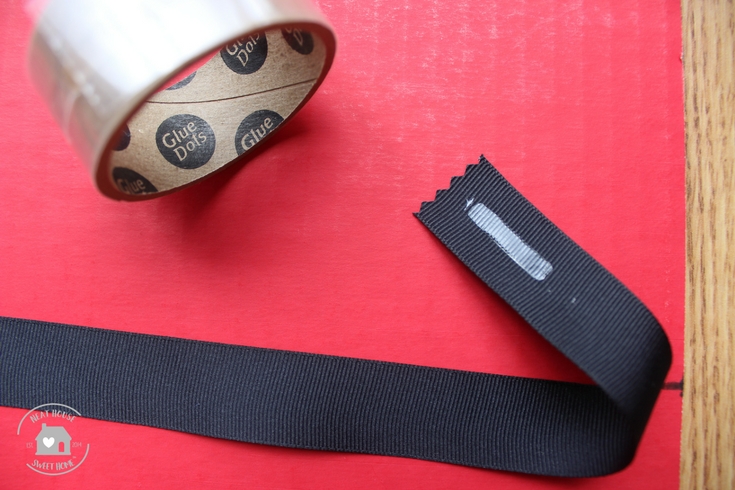
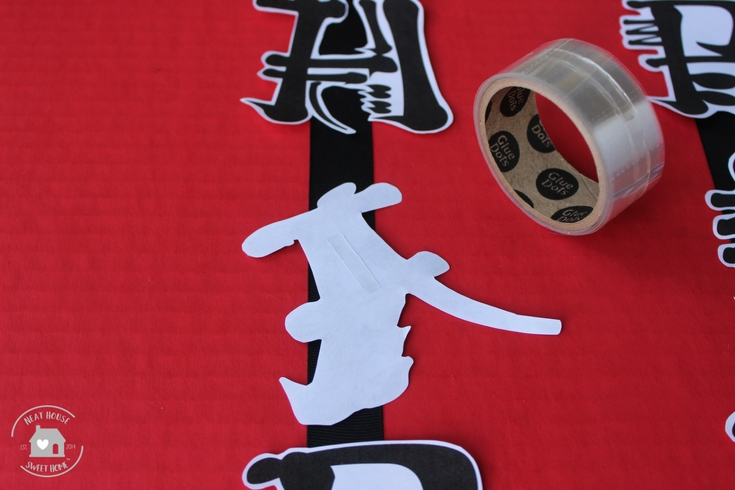
Step 3: Attach Ribbons to the Poster Board
Place one glue line behind one end of the ribbon, as shown in the picture below. Align with the mark.
Adhere the end with the glue line under the board, aligning the ribbon with the mark. Secure the ribbon.
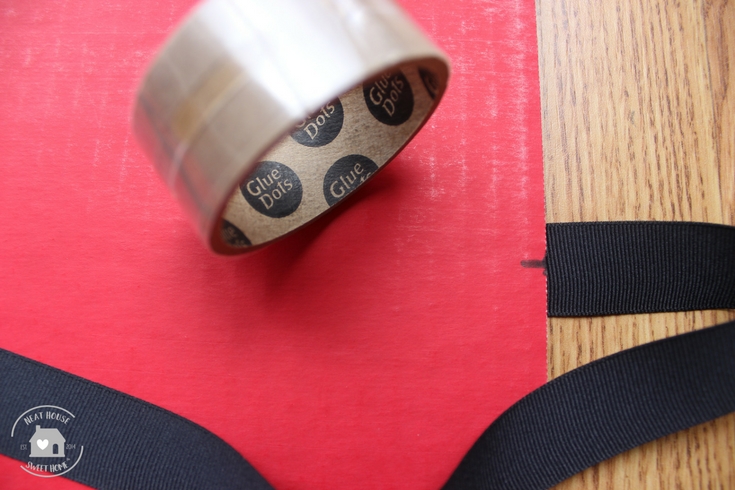
Pull the ribbon over the board, following a straight line, and align with the mark at the bottom. Place a few more glue lines behind the ribbon to secure it to the board.

Repeat this step for the other two pieces of ribbon (at the 12-inch and 18-inch marks).
Step 4: Print and Cut
Print this file and cut the letters and the little ninja images, leaving a slight white border around them.
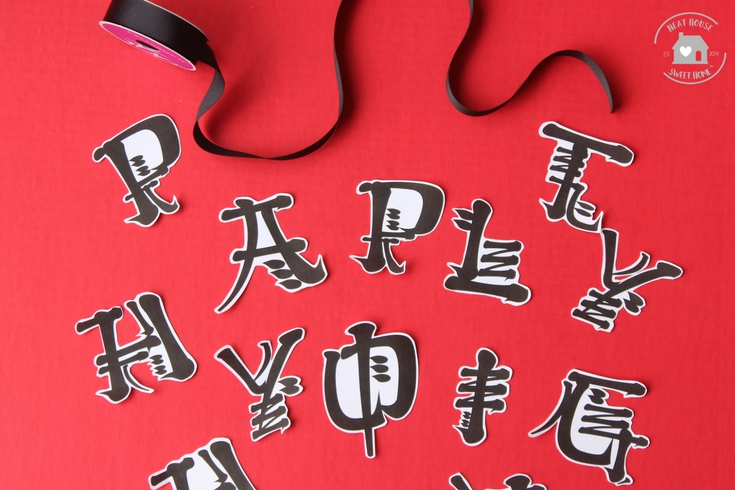
The file contains the following:
- Happy Birthday
- Numbers 0 to 9
- The contractions st, nd, rd, and th
- The entire alphabet (so you can print out the name you need)
- Little ninja clip art
It doesn’t have to be perfect. Just cut around the silhouette.
The file is available in a our Library of Free Printables

Step 5: Place the Words on the Board
Once all the letters are cut, place them over the ribbons, spacing them accordingly to find balance. Do not attach any letter to the board with the glue lines until you’re happy with their position.
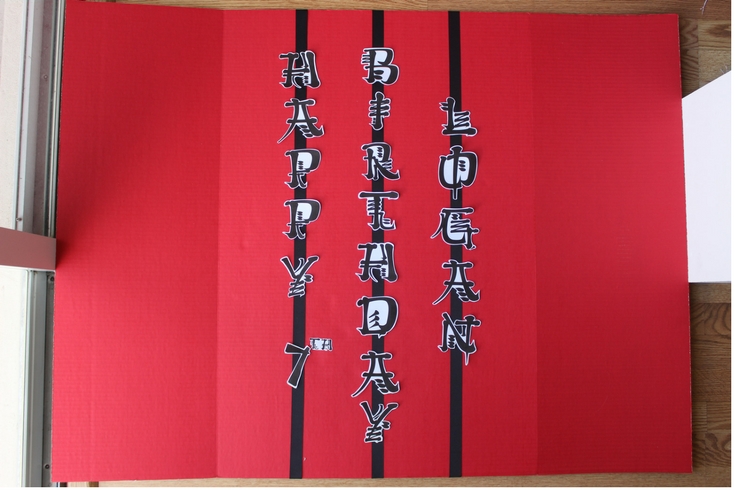
Once you have placed each letter in the right place, start lifting them one by one, affixing them to the board with the glue lines.
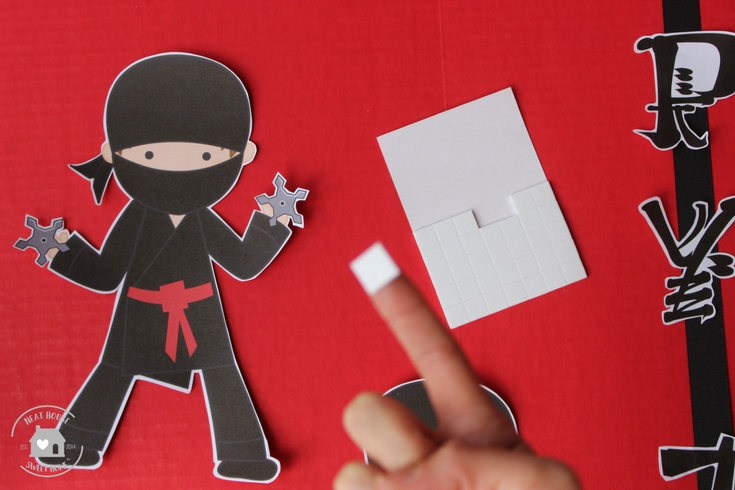
Step 6: Add the Little Ninjas
Use pieces of the sticky squares to attach the little ninja images to each side of the board. This gives the images a three-dimensional feel.
When I made this ninja party backdrop for the first time, I used swords instead of little ninja images. This set of ninja toys, for example, would be great to decorate the board too.
Here is a picture of the first ninja party decor and backdrop I made.
Hope you enjoyed this ninja party backdrop tutorial! You can download the file from our FREE library of printables!