DIY Farmhouse Wood Bird Decor

Make this wood bird decor in just under an hour. These bird sculptures are perfect for adding a Valentine’s Day vibe to your farmhouse decor without red or pink!
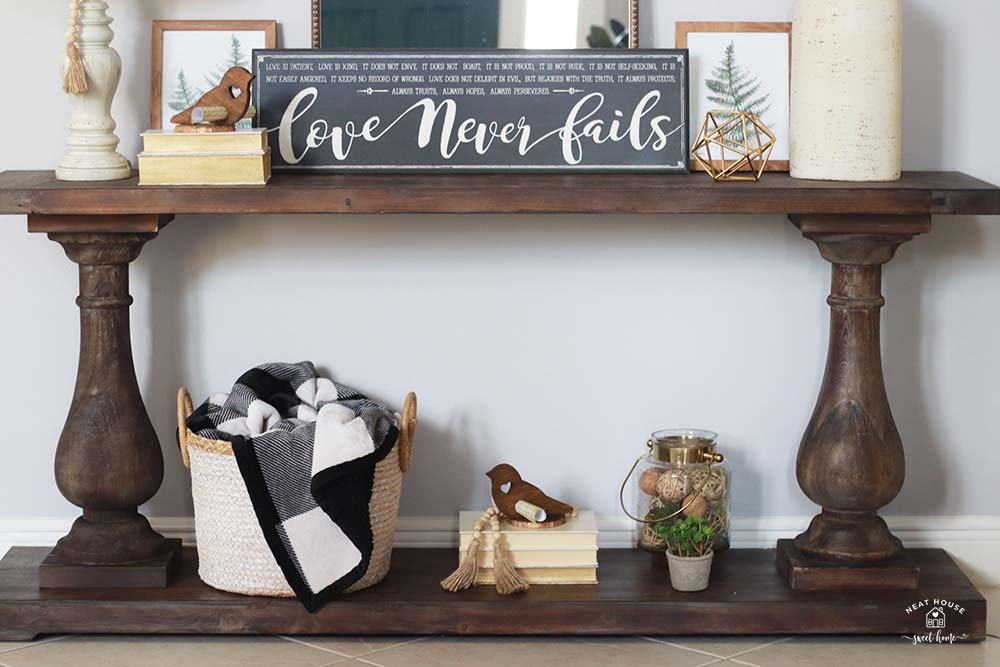
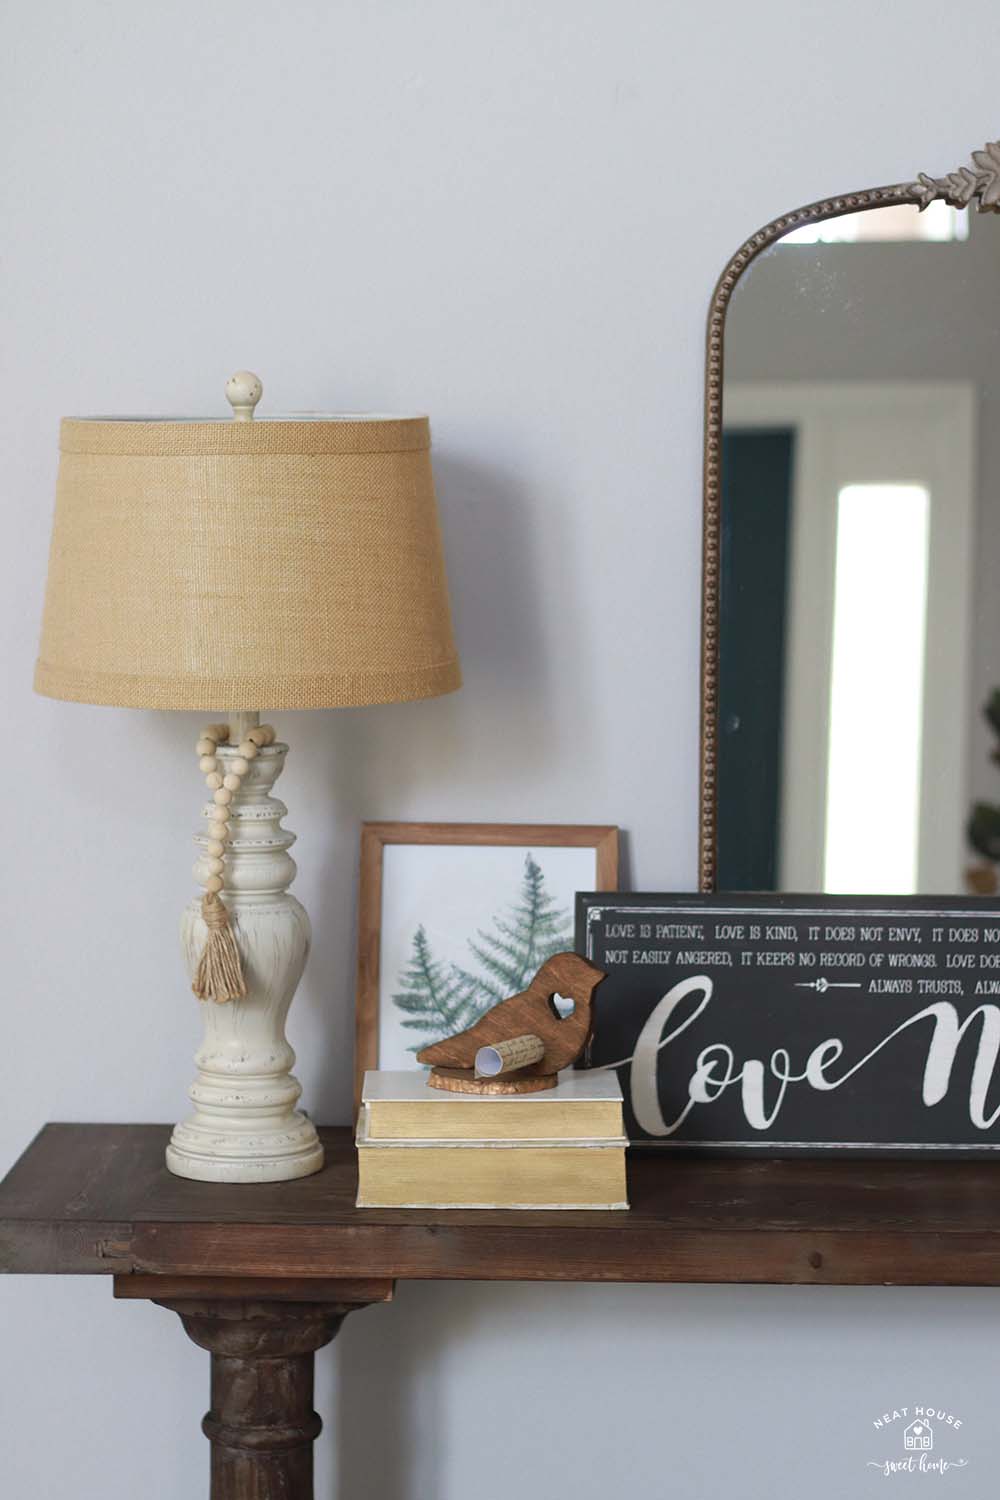
Decorating for Valentine’s Day is not a big deal for me. I have a Corinthians 13 farmhouse sign in our family room, which celebrates love every day in our home. However, to add more Valentine to my home, I decided to place the sign on our console table by the entryway to bring it front and center and make it stand out this time of the year.
Would you like to save this?
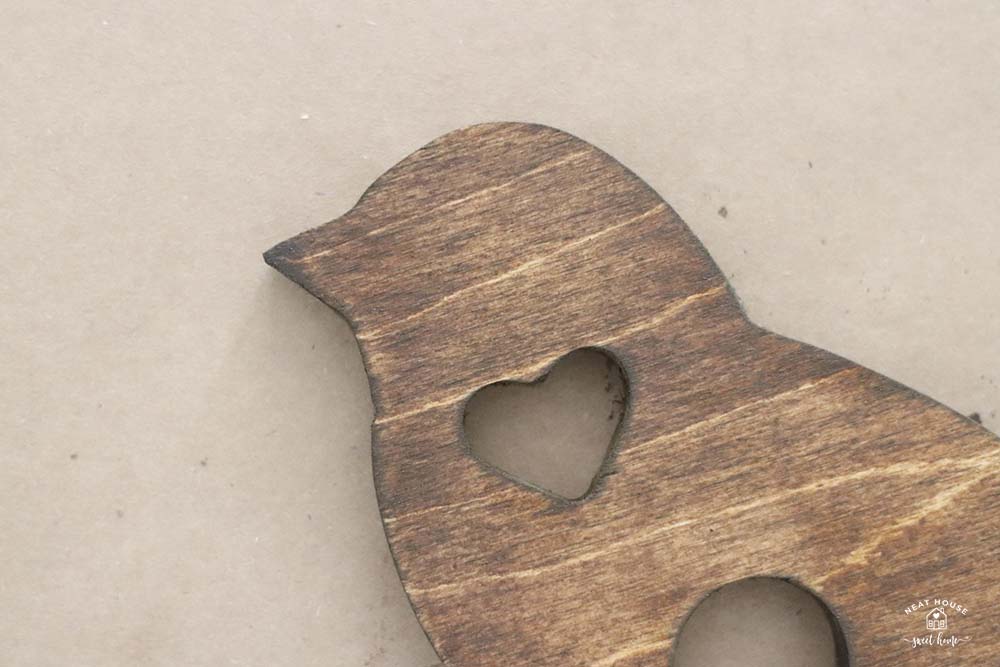
Because I love wood, earthy, and natural tones, I stained these cute little wood birds in dark walnut. The birds have a heart cutout that adds to the love vibe.
Farmhouse Wood Bird Decor for Valentine’s Day
Here’s what you will need to make these wood birds for your Valentine’s farmhouse decor. They come together in under 2 hours (glue drying time included).
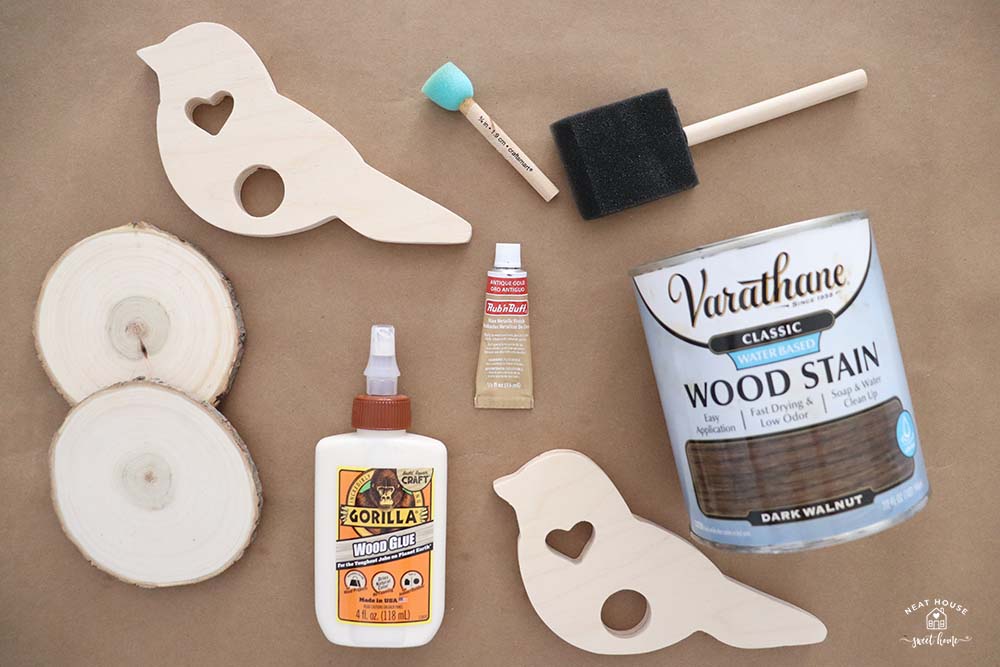
Tools and Supplies Needed
- Wood stain – I used Varathane in dark walnut, my favorite stain color.
- Valentine Love Bird
- Wood slice coasters – the ones I used are 4.25 – 4.5 inches
- Foam brush – I always keep a bunch of these for single use. They are perfect for staining small pieces.
- Wood glue – I love Gorilla wood glue because it bonds pretty quickly and leaves no residue.
- Rub ‘n Buff – I used antique gold.
How to Make This Wood Bird Decor
If you prefer a shortcut to this tutorial, check out this 60-sec Instagram Reel.
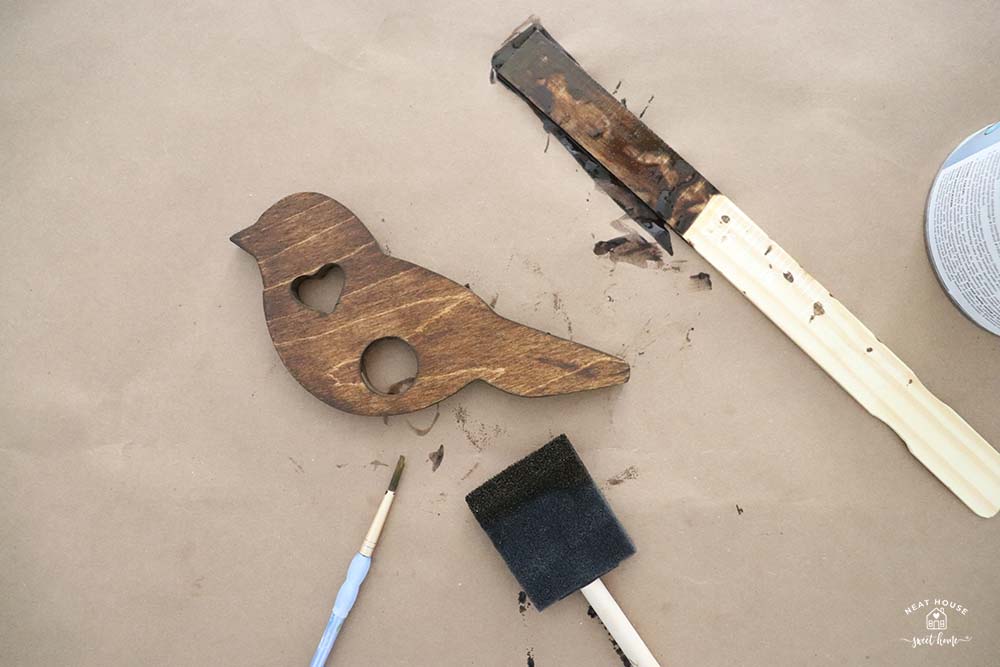
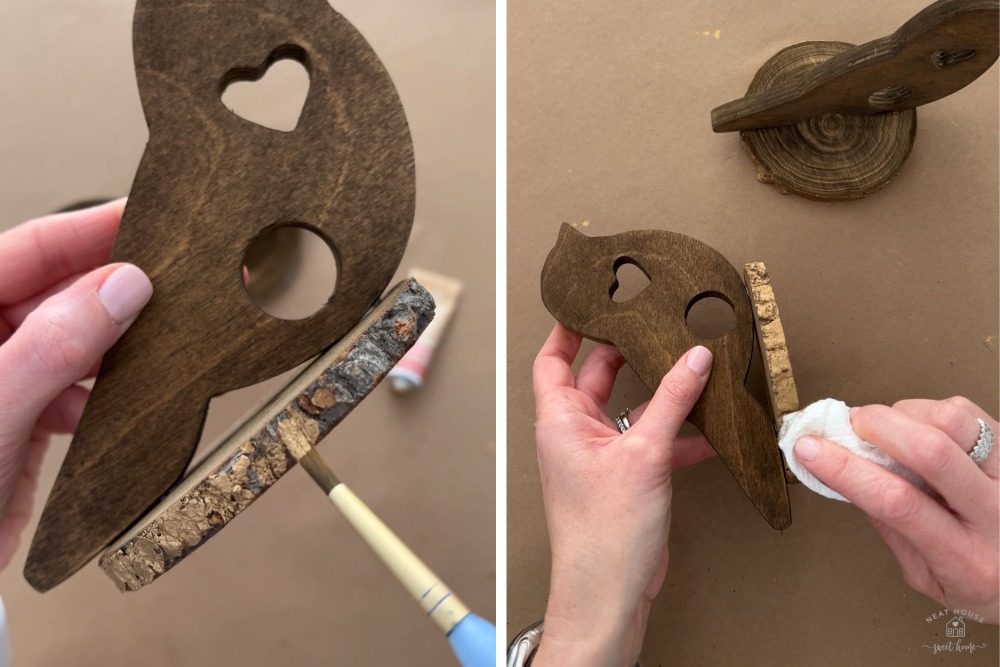
Step 1. Stain the Wood Bird Cutouts
Use a foam brush and stain all sides of the wood bird cutout. I used a small detailing brush to stain the inside of the heart cutout.
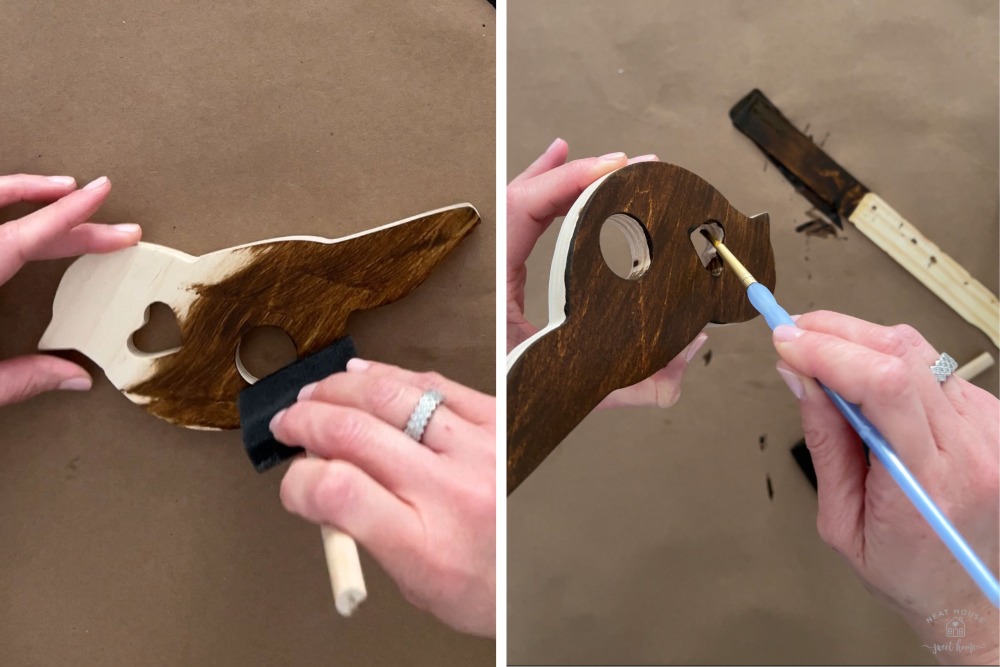
Allow the stain to dry on one side (it dries really quick though!) and then flip the cutout and stain the other side.
Step 2. Stain the Wood Slices
While you wait for the bird or birds (I made two) to dry, stain the round wood slices. For this project, in particular, I chose to use coaster size wood slices (4.25 to 4.5 inches diameter). Choose the size according to the size of your project.
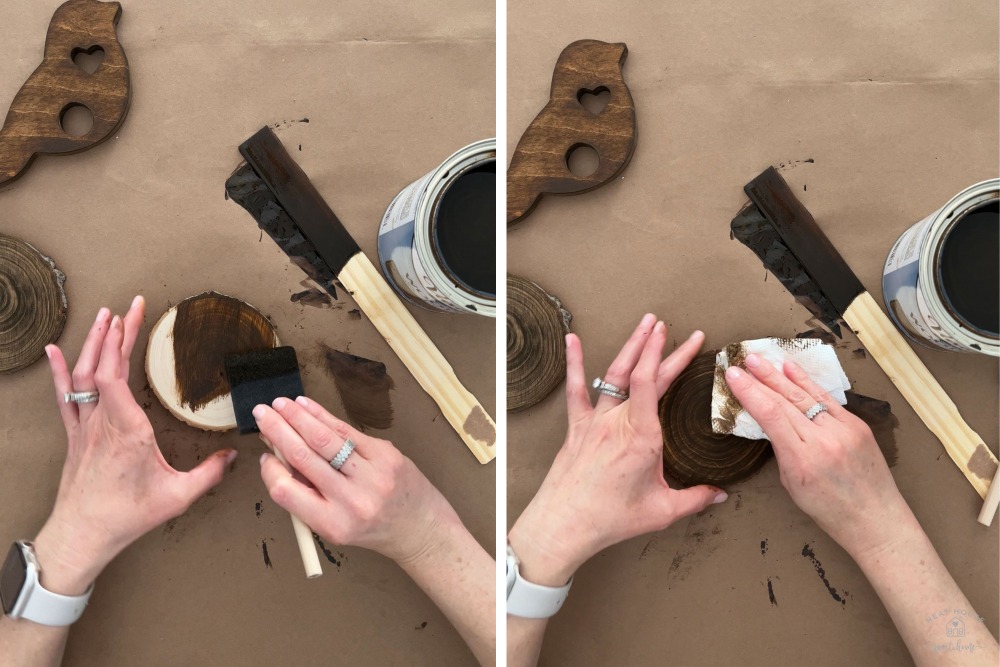
Use a paper towel to wipe off the excess stain from the wood slices.
Step 3. Glue the Pieces Together
Once the stain is completely dry, glue the pieces together. It is important you use wood glue for this step. You may want to use a hot glue gun to speed the process, but it won’t bond and adhere as strong as wood glue.
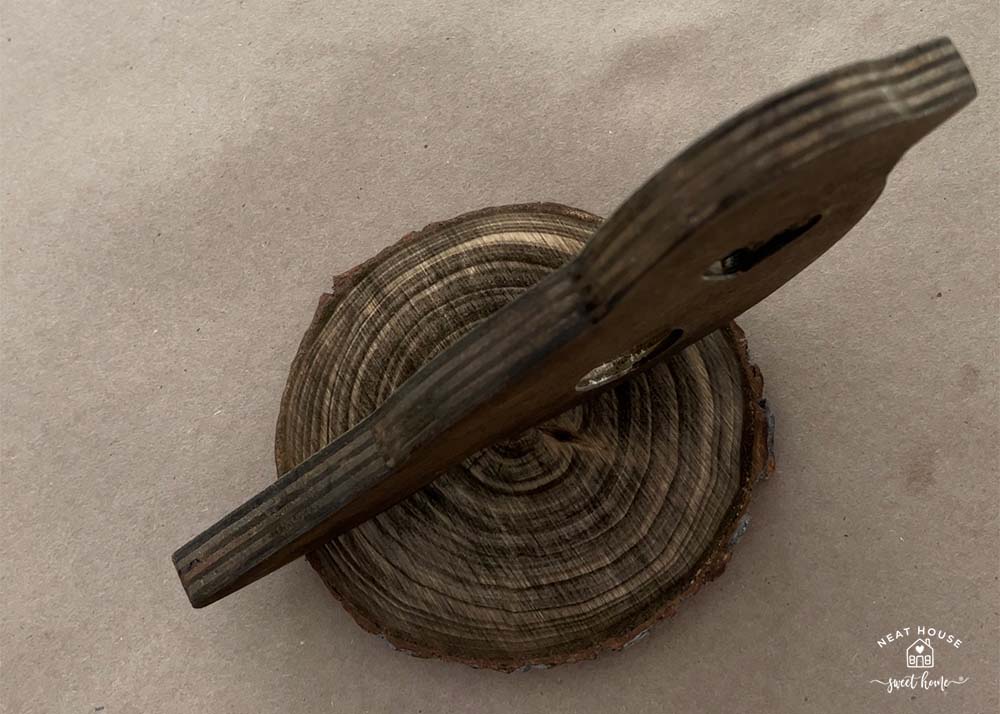
It’s also important that you center and glue down the wood bird piece exactly as you intend to do. In my case, the belly, and mid-tail are touching the coaster. But you can choose to have the wood bird on an incline for a more interesting decor.

Put some pressure on the pieces and they will adhere strong relatively quick. With a small brush, wipe off the excess glue.
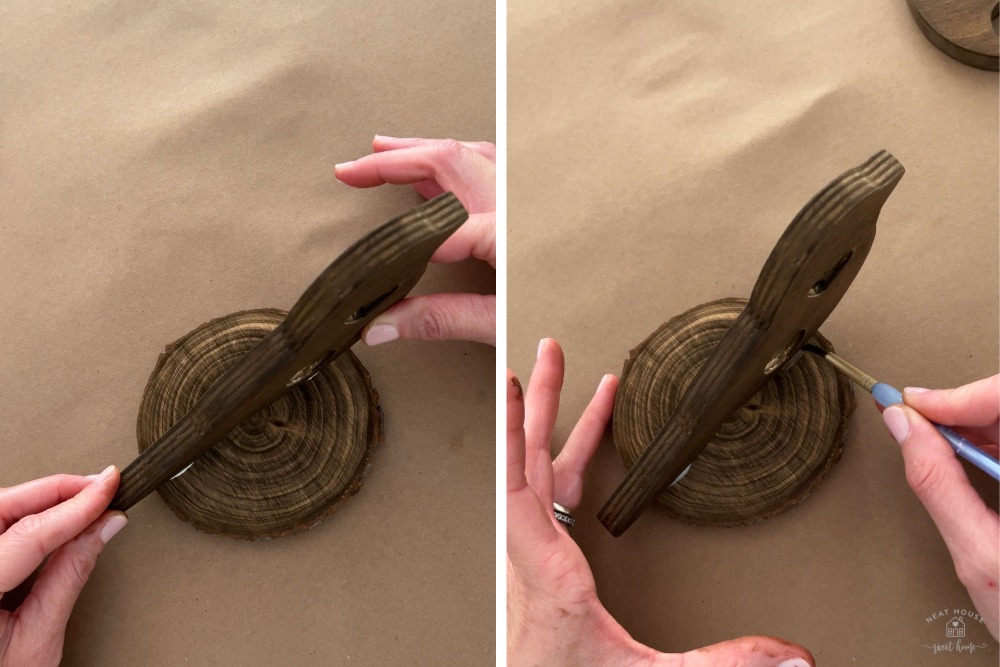
Allow the glue to dry completely. About 30-45 minutes.
Step 4. Apply Rub ‘n Buff
I wanted to add a touch of gold to these wood birds because I use gold pieces and accents in my decor. Rub ‘n Buff is perfect for this project because it’s super easy to apply, dries in seconds, and is appropriate for small details.
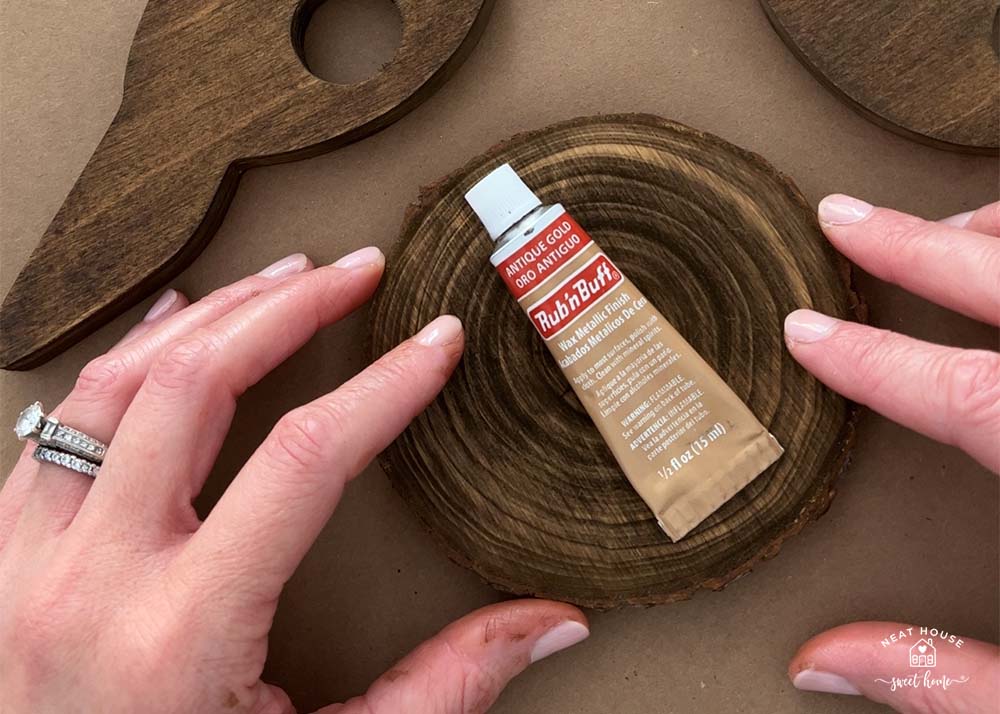
To apply Rub ‘n Buff, gently squeeze a small amount directly over the bark of the wood slice, and spread it with a small brush. A little bit goes a long way. For a shiny look, buff immediately after application with a paper towel.
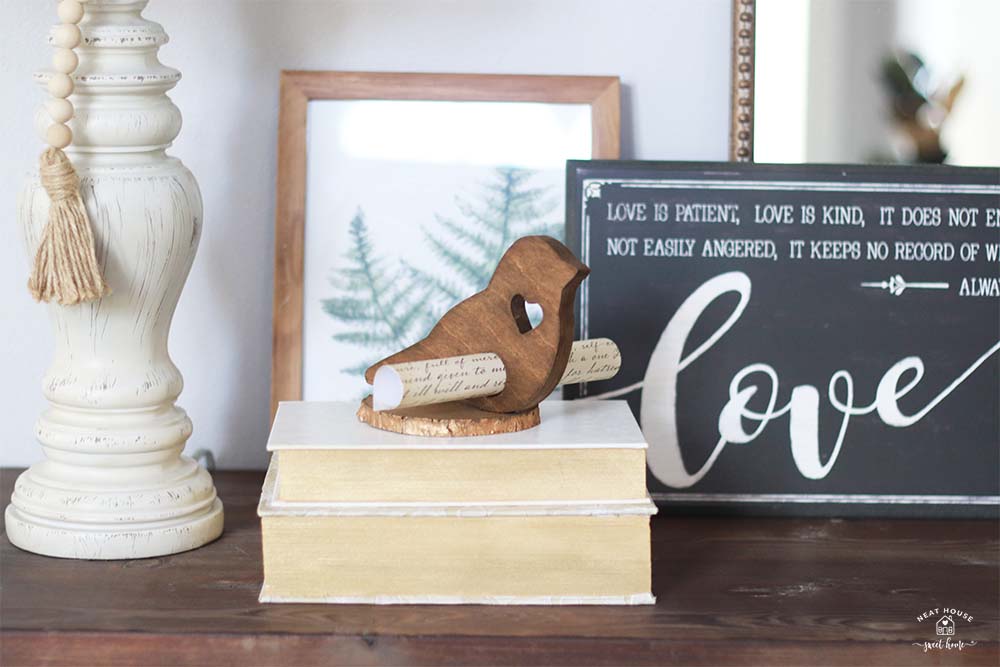
And with that, your wood bird decor is done and ready for display.
See the circular cutout in the bird? These wood birds are actually ‘messenger birds’. Just write a love note, roll it and slide it through the circular hole.
How cute are my messenger wood birds?
Happy crafting,