No-Paint Christmas Chalkboard Art Coasters

I had the idea of making these DIY Christmas chalkboard art coasters for a while now. Initially, I thought about using chalkboard paint and tracing the art directly on the tile just like I do on regular chalkboard art pieces and then sealing it.
But when I started designing the graphics, I had a lightbulb moment. I decided to print them out and glue the paper directly to the tile to make these DIY tile coasters. They turned out beautiful, and the weathered look of the graphics adds a beautiful vintage charm.
Here’s a full tutorial on how I made these Christmas chalkboard art coasters without using any paint.
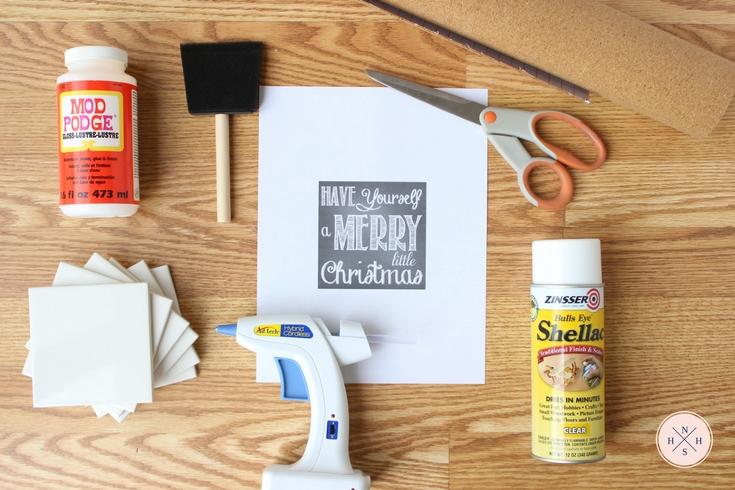
Materials You Will Need
Would you like to save this?
- 6 glossy ceramic tiles (4×4 inches) – I made 6 coasters but you can make more or less, up to you!
- Christmas chalkboard art printable
- Craft scissors or paper trimmer for precise cuts.
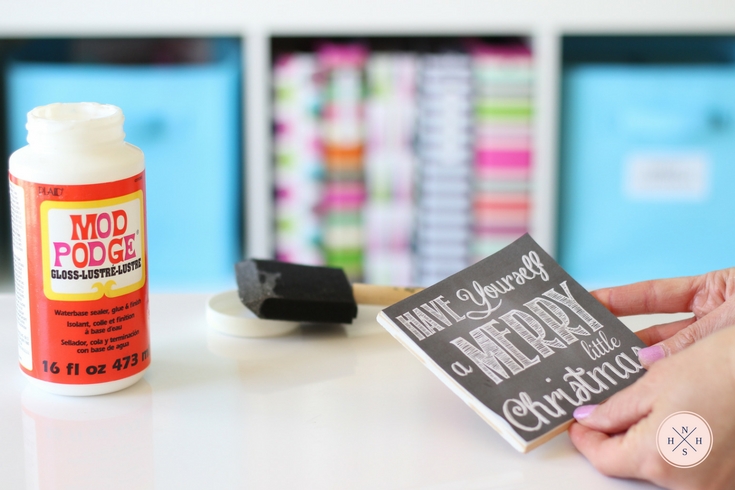
- Mod Podge® Glue and Sealer in gloss finish. You can use matte finish too.
- Foam brushes – these are disposable, so it’s good to have a few at hand. There’s nothing wrong with washing them, either.
- Clear Shellac sealer in spray
- Contact Self-adhesive cork liner – I purchased a roll two years ago and I still have enough to spare. I used this liner for my other set of DIY tile coasters and it holds up really well.
- High-temp hot glue gun – optional, but highly encouraged. I like to reinforce the cork liner adhesive with a few dabs of hot glue (between tile and cork).
Make your Christmas Chalkboard Art Coasters
Gather all your materials and find a table where you can sit comfortably. Make sure to cover the surface of the table so you don’t damage it. There will be a lot of glue drippings! My working area has a Formica top so I can wipe clean easily. Sometimes, I cover the surface with craft paper, which also comes in handy when I don’t have gift wrapping paper!.
To save time and effort, repeat each step as many times as coasters you’re making before moving on to the next step. You might want to rush to the end and get at least one coaster done before making all 6, but sometimes it’s easier to work on one task at a time. If you prefer to make just one coaster, and see how it turns out before you make the rest, by all means, do that.
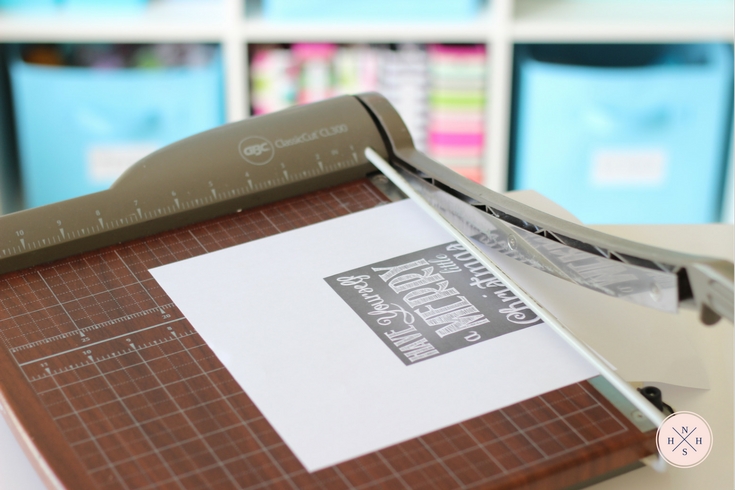
Step 1: Print the Chalkboard art
Print this digital file Christmas Chalkboard Art Coasters. I highly recommend laser printer. If you don’t have a laser printer at home, you can bring the file to your local copy and print center and cut the designs around the edges. I prefer using a paper trimmer like this one for precise cuts. Try not to leave any white edge around the design. I made the design slightly bigger than the tile.
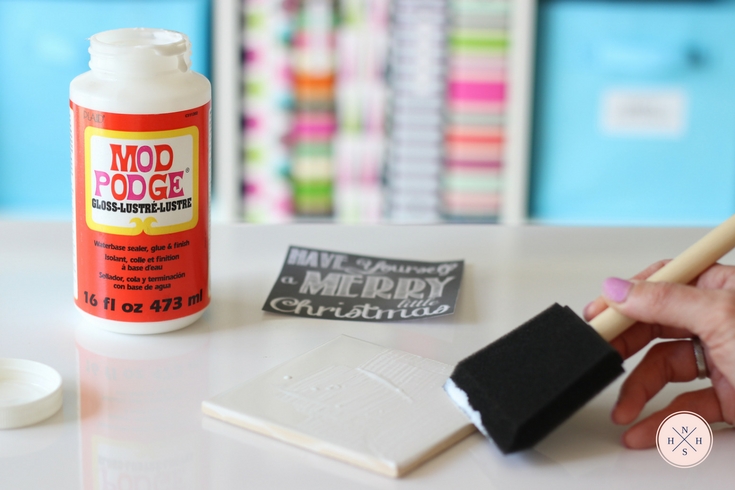
Step 2: prep the tile
With a foam brush, add a thin coat of Mod Podge® over the tile. Make sure to cover all the edges, and a bit more. Wipe off any excess or drips.
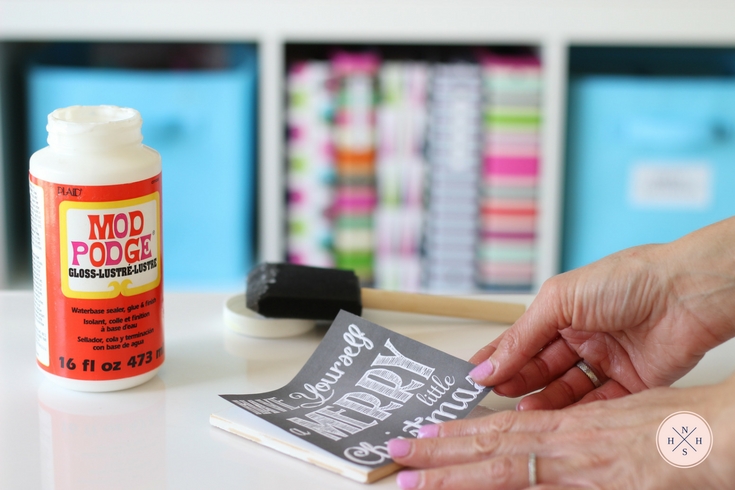
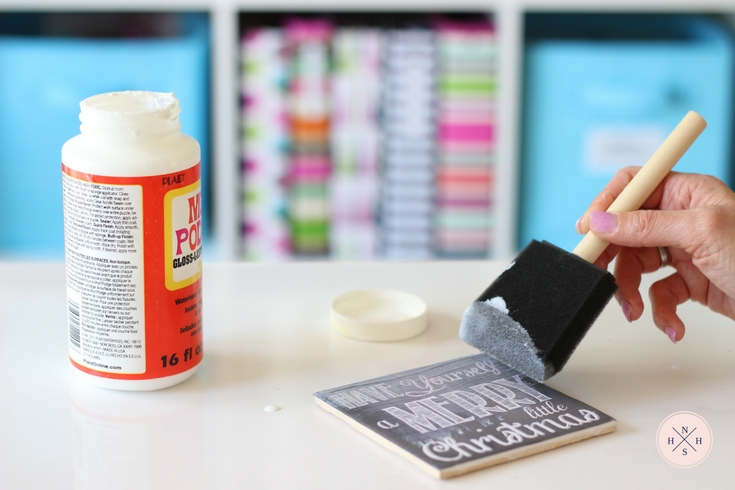
Step 3: attach the art
Take the pre-cut printable and lay it flat over the tile covering it up, edge to edge.
Run your fingers through it to ensure total adherence and eliminate any bubbles. Allow 1 hour to completely dry before proceeding to step 4.
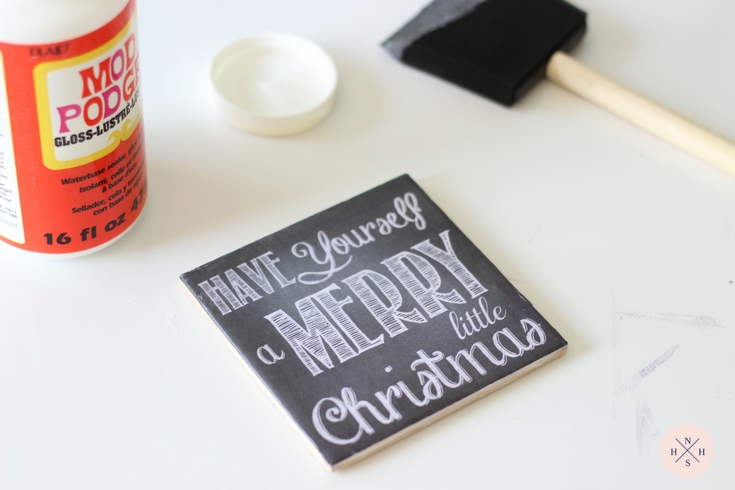
Step 4: Seal the Chalkboard Art
Add another very thin layer of Mod Podge®, this time over the paper. It is important that you keep this layer as thin as possible. If you make it too wet, the black ink will start to bleed. It happened to me a couple of times and I had to reprint. Trial and error, until I got it right. Repeat this step by adding another thin layer after the first one has dried completely. Ensure that the graphics are all covered with a thin glossy coat.
It is very important that you don’t skip this step. I added these 2 extra layers of Mod Podge® over the graphics before sealing with the spray, because I tried spraying the Shellac directly on the paper and it smeared all the ink, turning the white fonts purplish. So, do not skip!. Let it dry again, for 1 hour.
Proceed to Step 5 when the Mod Podge® doesn’t look white anymore but instead, there’s a slight sheen and is not tacky to the touch. The graphics are now sealed and ready for the acrylic coat.
Step 5: Apply gloss
Go outdoors and place your tiles on a row, over a piece of cardboard or craft paper to protect the surface. Following the instructions on the label, shake the can of Shellac clear spray and spray short strokes over the tiles, 10 to 12 inches away. In the picture below, the can is closer to the tiles, just for depiction purposes.
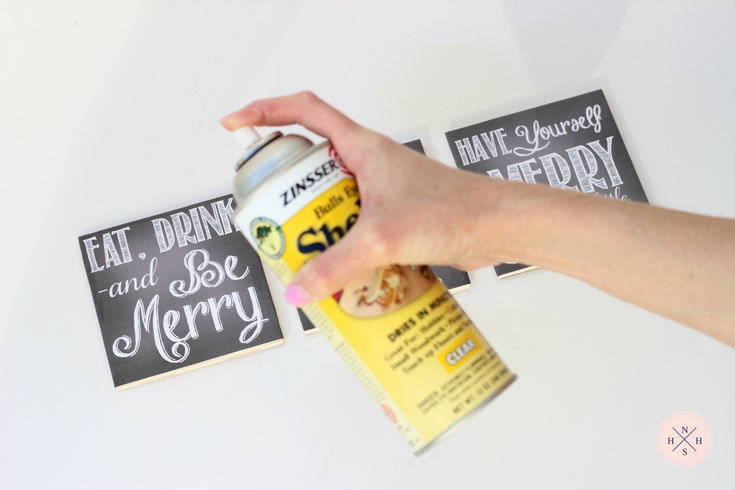
To seal the tiles completely, apply a maximum of 3 coats of Shellac allowing the product to get tacky between coats.
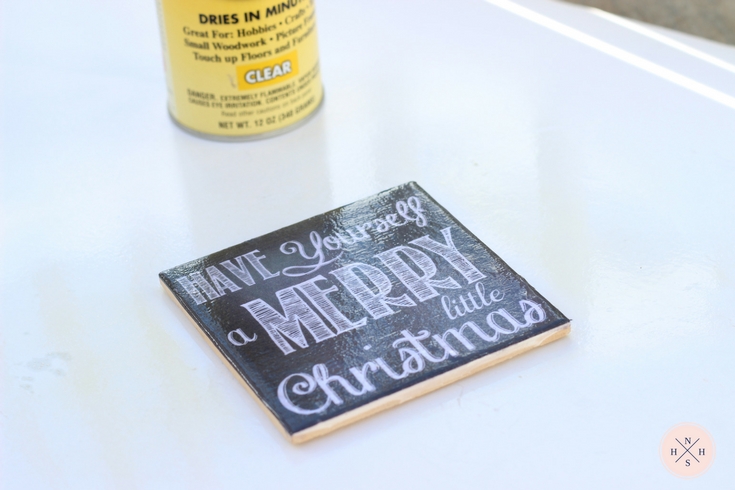
Let the tiles dry for at least 2 to 3 hours. Once they are not tacky to the touch, and you can handle them without them sticking, proceed to step 6.
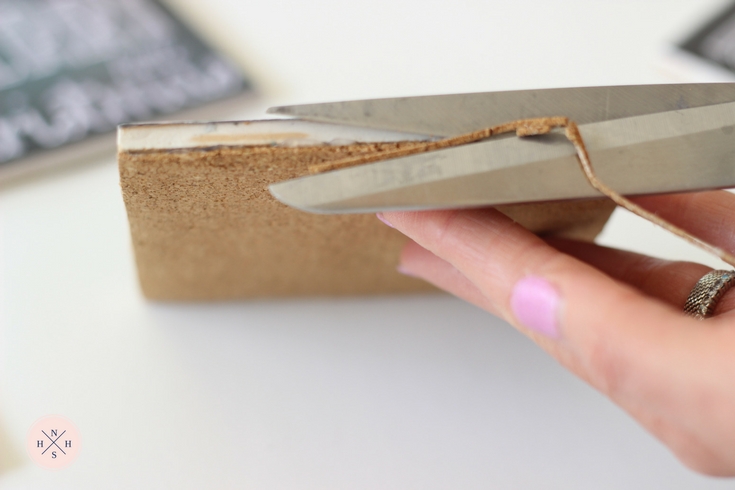
Step 6: Measure and Cut the Backing
Place the tile over the back of the cork liner and cut a piece to size.
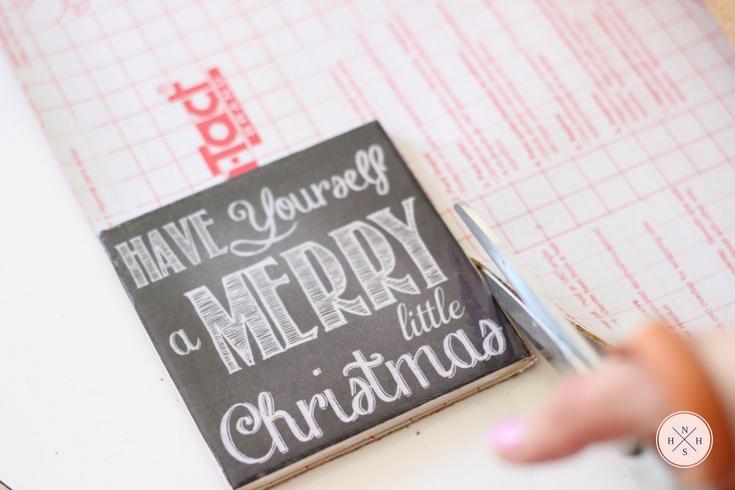
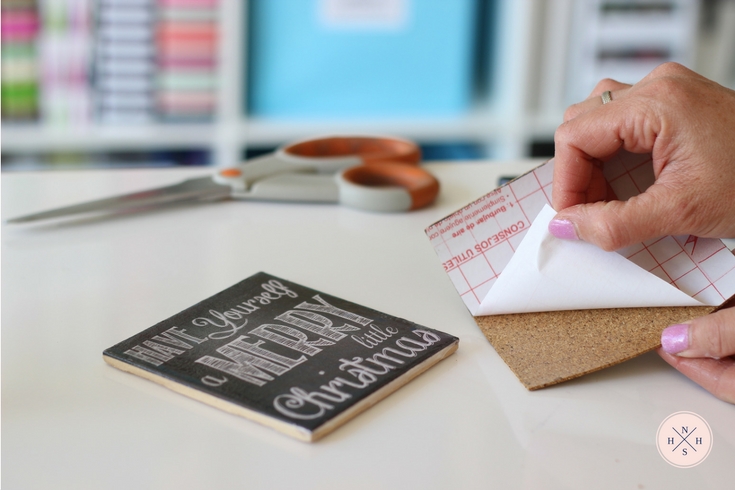
I like this particular brand of cork liner, not only because it is self-adhesive but also because the backing paper has a cutting guide grid. Peel the back of the cork square and set it aside (sticky side up).
Step 7: Hot Glue the Backing
With a high-temp hot glue gun, apply a few lines of glue along the border and center of the back of the tile. Work quickly, do not let the glue dry before you place the cork liner.
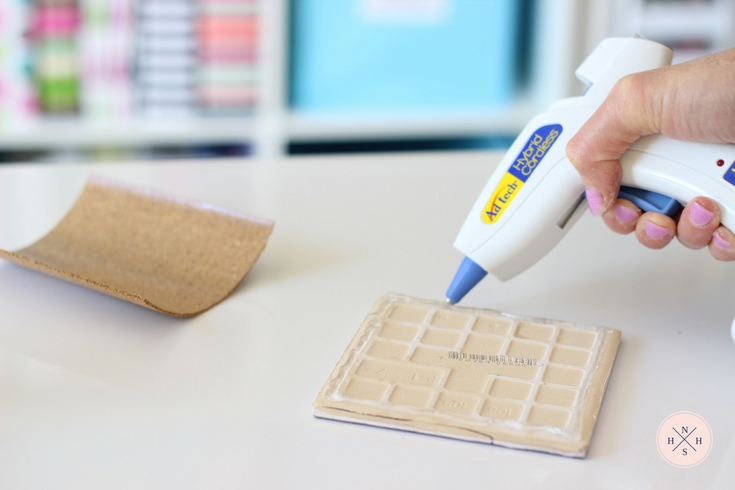
Attach the cork liner to the back of the tile and make enough pressure to ensure there are no air pockets between the tile and the liner. If the glue squeezes out, that’s even better! Clean the glue excess when its cool and dry.

If necessary, cut any excess of cork liner around the tile edges.
Let the coat of shellac cure overnight before using the coasters.
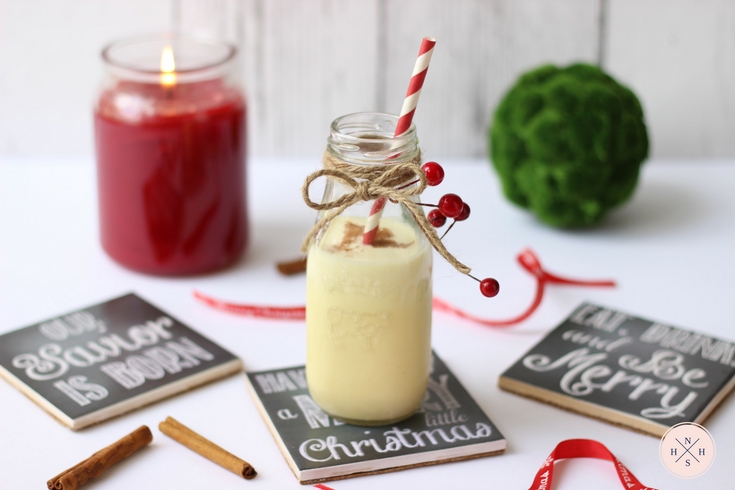
If you like to entertain during the holidays, these Christmas chalkboard art coasters are the perfect touch and will definitely be a conversation piece!
Wishing you a very Merry Christmas!
