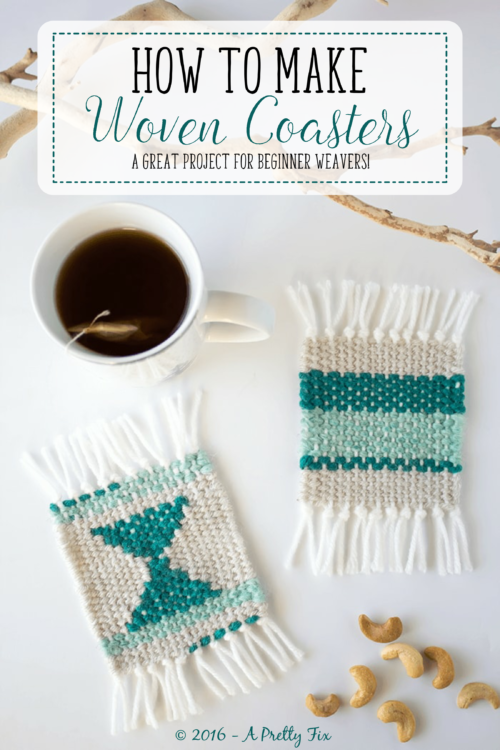
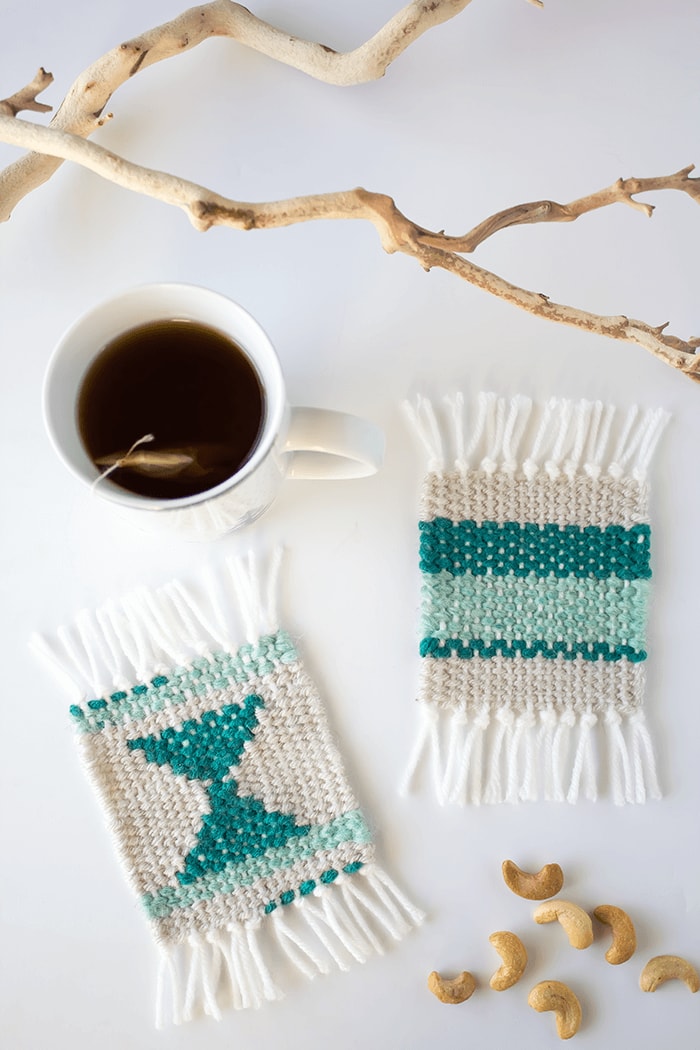
How To Make Woven Coasters
Make these simple and gorgeous woven coasters in no time! All you need is cardboard, yarn and needle to get you started. A great project for beginner weavers!
Would you like to save this?
Hi Everyone! I’m Jelica from A Pretty Fix, a blog that’s all about the wonderful world of handmade home goods and decor. I am so excited to be guest posting on Neat House. Sweet Home™. Flavia is one organized lady and I’ve learned a lot from her brilliant tips and ideas. Now, it’s my turn to give back in my own small and crafty way with this ‘how-to’ woven coaster craft.
If you are new to weaving, you have nothing to worry about. I will walk you through this DIY step by crafty step. And the best part? You don’t even need to purchase a loom.
Let’s get started!
Materials Needed
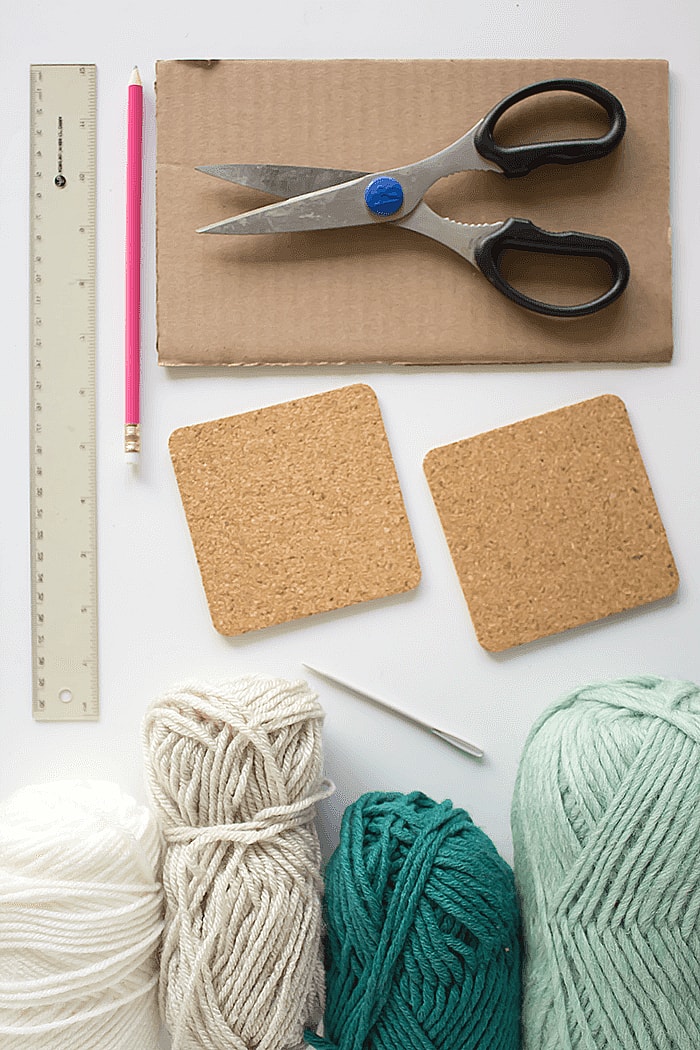
- Cardboard (to create your loom)
- Scissors
- Ruler
- Pencil
- Coasters (to assist with sizing)
- Large eye needle with blunt end
- Yarns
How to Make Your Woven Coasters – Step by Step
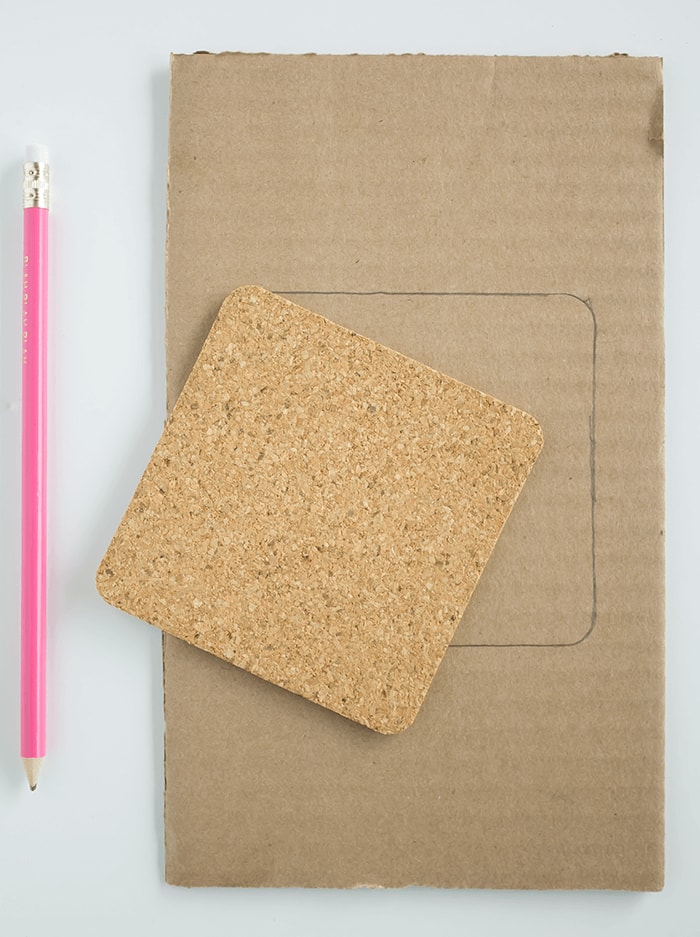
Step 1: Create Your Loom
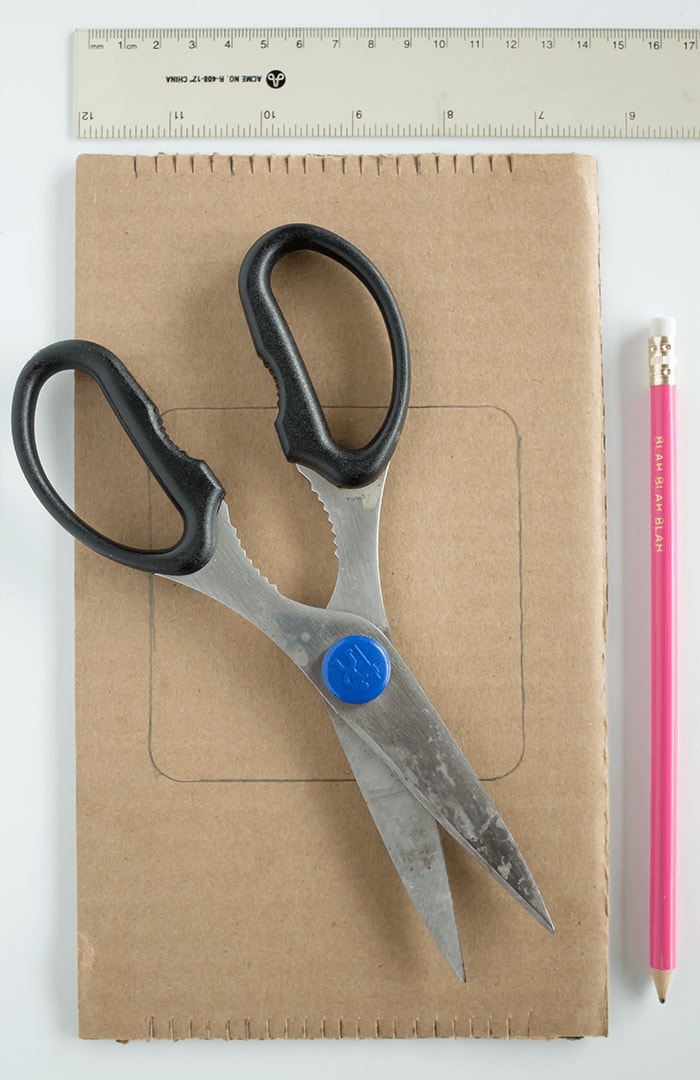
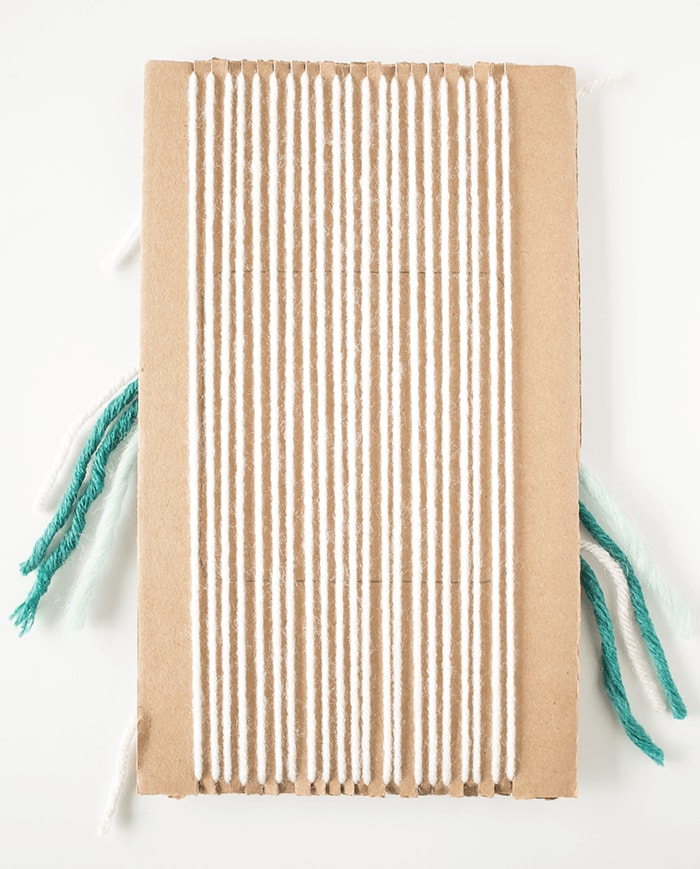
There is no need to go out and buy a weaving loom for this project. Cardboard works just as well. First, cut a piece of cardboard (approximately 10 by 5 inches). Then trace an outline of a coaster somewhere in the middle. This will act as a measuring guide.
Measure and cut slits along the top and bottom of your cardboard. Each slit is half a centimetre or 1/5 an inch apart.
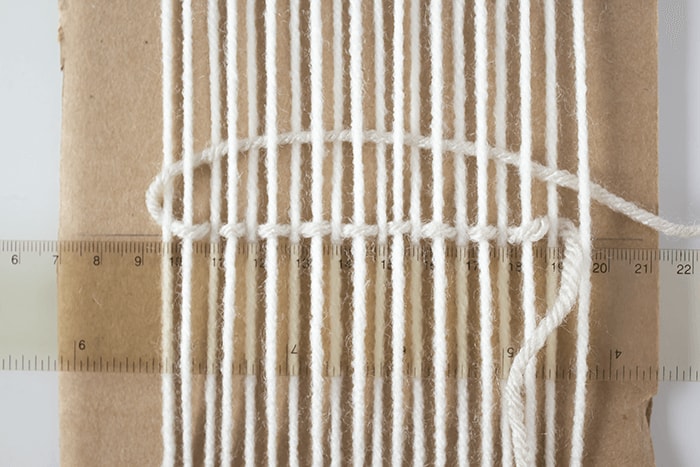
Step 2: Add ‘Warp’ To Your Loom
A weaving consists of both vertical and horizontal lines of yarn that are woven together. The ‘warp’ refers to the vertical strands and it is the first thing a weaver will do to set up the framework.
To create the warp, you will be wrapping yarn around the cardboard – so that you have vertical strands of yarn on the front and the back – and through the slits which will hold the yarn in place.
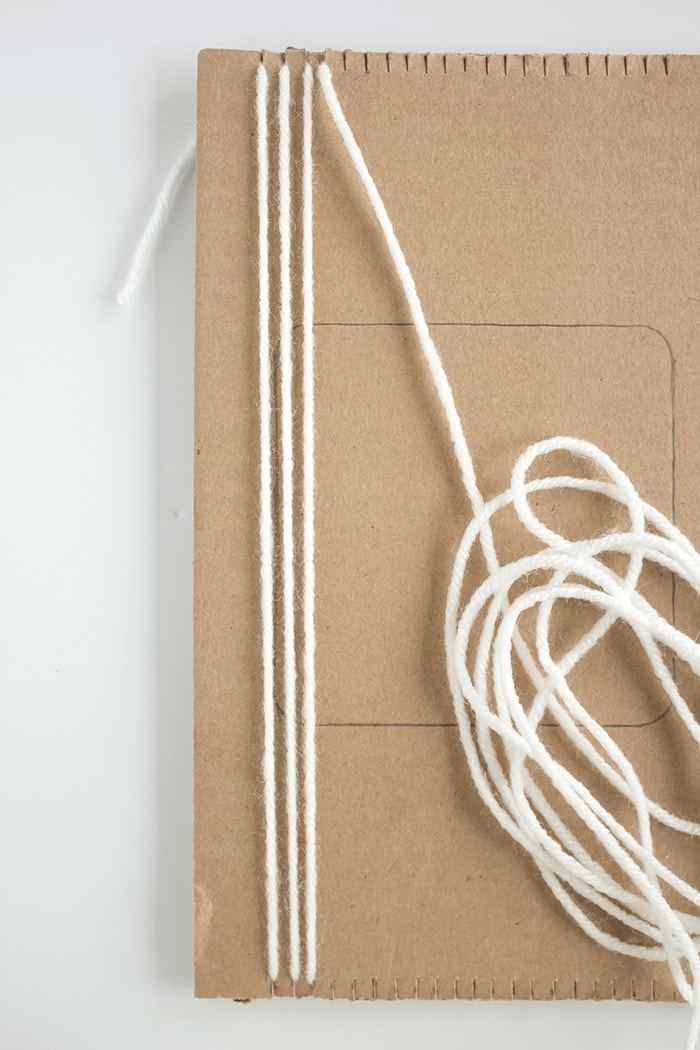
To begin, start at the top left slit, pull the yarn through, leaving about 2 inches of tail. Then pull the yarn down toward the bottom edge and through the first slit on the left side. This will create your first warp strand. Now pull the same yarn towards the backside of the cardboard and upwards until you reach the top again. Pull that yarn through the second slit along the top edge and
towards the front of the cardboard.
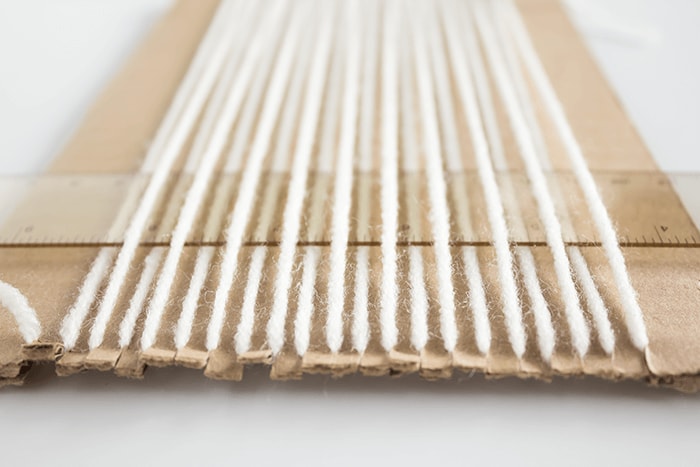
Repeat this process along the entire length of the loom, going around the cardboard, front to back, until your reach the final slit. The front and back of the loom should look the same with warp strands going up and down. This will allow you to create 2 coasters, one on the back and one on the front.
Below is the back side. Notice the tail ends that start and finish the loom.

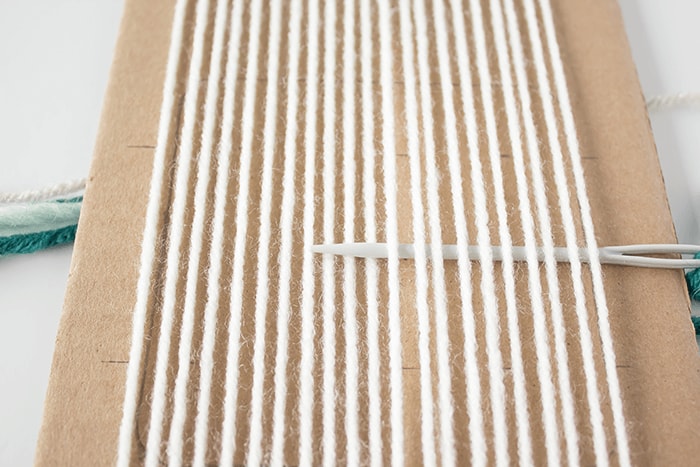
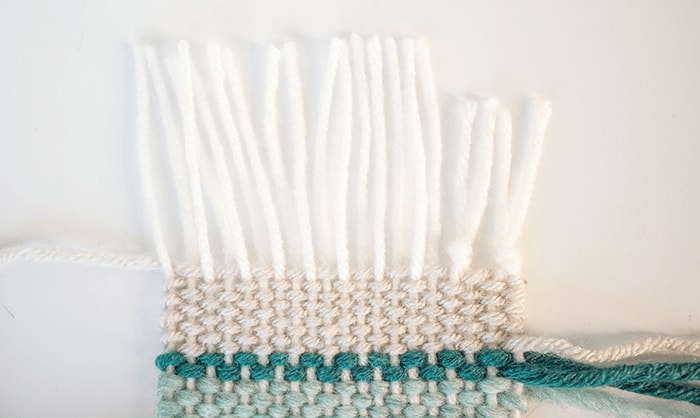
Step 3: Begin Weaving
Using the outline of the coaster tracing, place your ruler (or a thin piece of cardboard) at the base by weaving the ruler through, going over and under each warp strand. The ruler will be useful in keeping your weaving in place.
Begin your first row of weaving by feeding your threaded needle from one end of your warp towards the other end, going over and under each alternate strand.
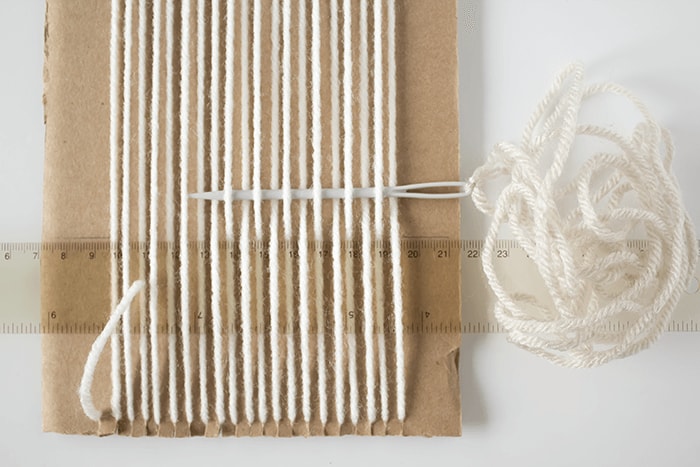
Once you reach the end, pull the yarn through, leaving about 3 inches of tail at the side you started on.
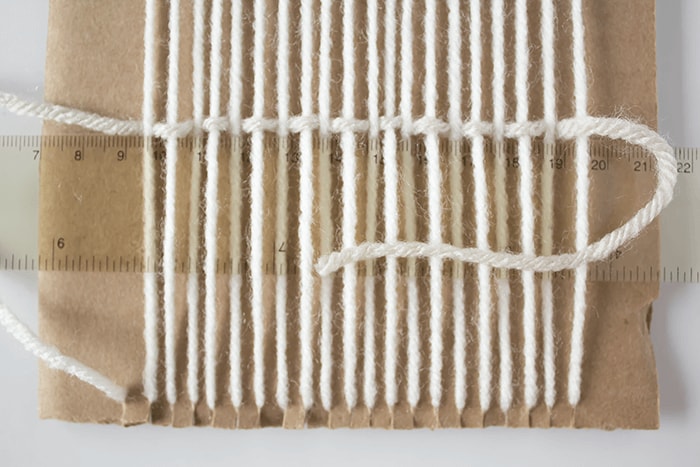
Begin weaving your second row, now from the left side and towards the right, going over and under each alternating warp strand, until you reach the end.
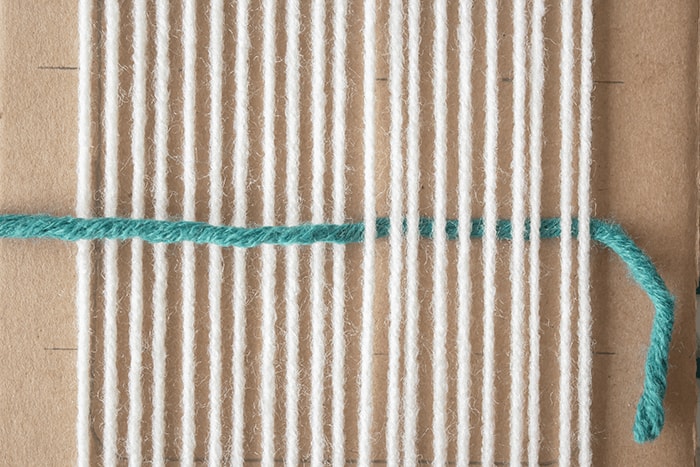
For a weaving to hold together, each row is woven differently from the row immediately below it. For example, I ended the first row with my yarn under the final strand (see picture above). To start a new row, I then began by weaving over that same strand (see picture below).
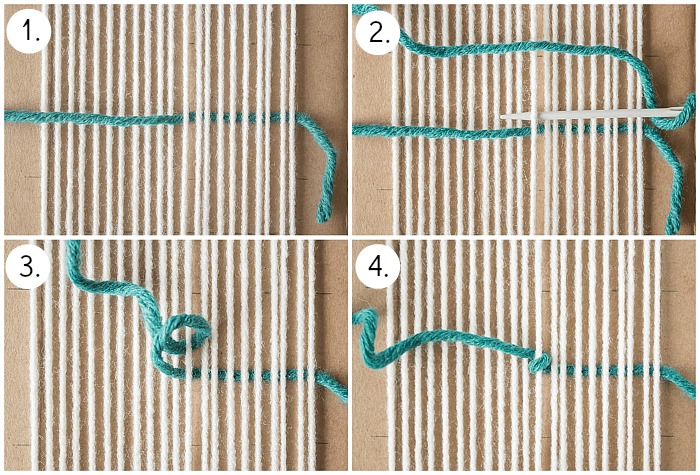
When you weave rows along a warp, unless you are careful, you may end up with the piece bowing in the middle. To prevent that from happening, avoid tightening the rows you create. A simple way to do this is by creating an arc, like the one below
Taking a kitchen fork, push the arc down towards the row below, creating two smaller arcs. Continue pushing the yarn down at different points along the arcs until they have completely leveled out.
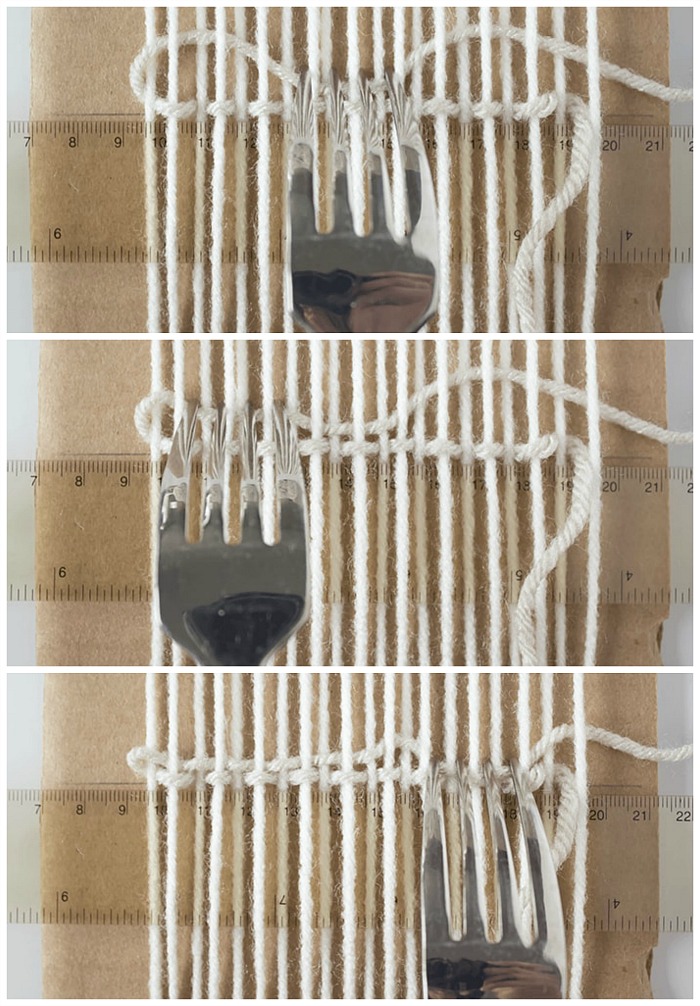
By creating arcs and pushing the yarn into place, you will create the right amount of tension in the row of weaving.
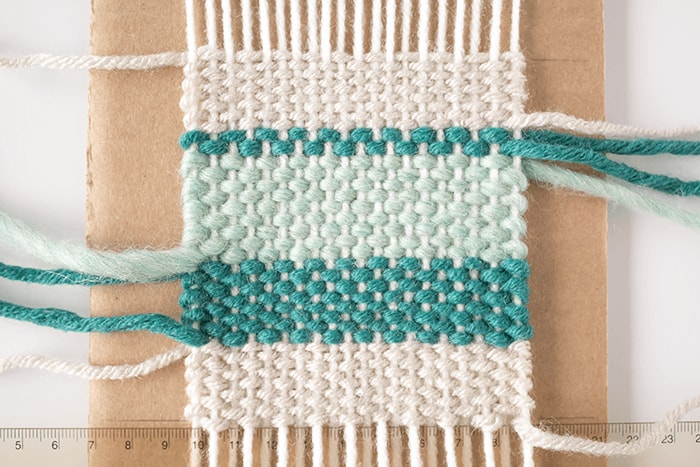
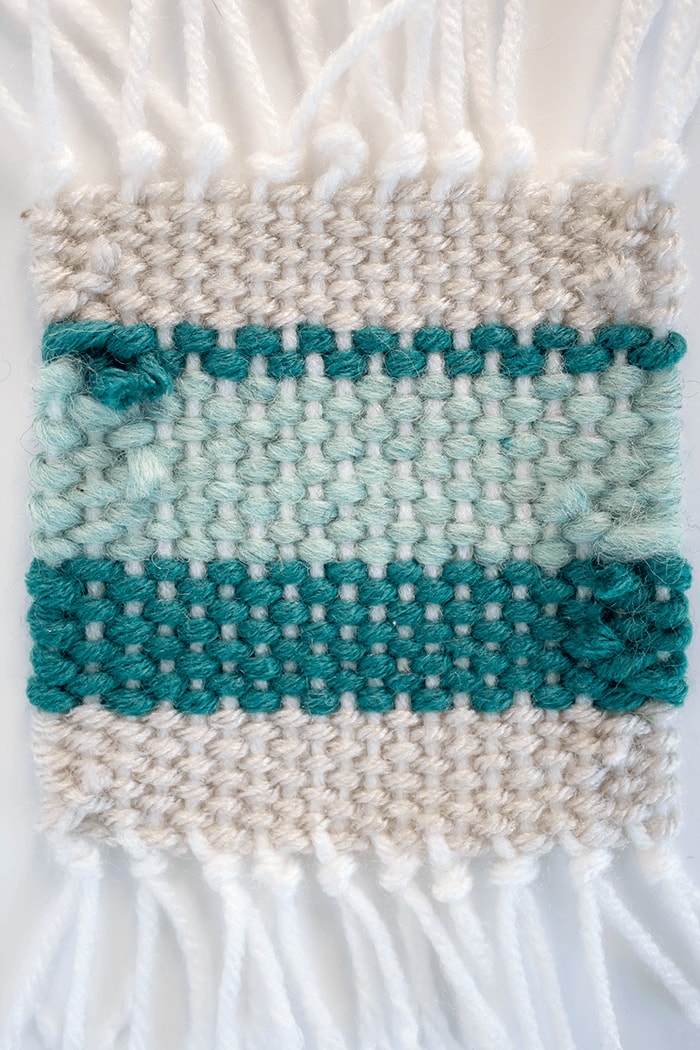
Continue working your way up the warp. When you are ready to switch colours complete your row and then snip off the yarn, leaving at least 3 inches of tail. Then thread your needle with a new colour and begin a fresh row of weaving. (I’ll show you what to do with these tail ends later on).
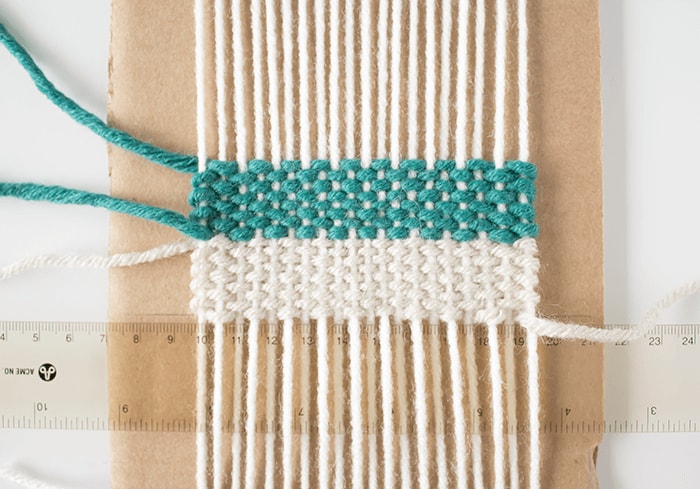
Continue changing your colours until you reach the top end of the coaster outline you created early on.
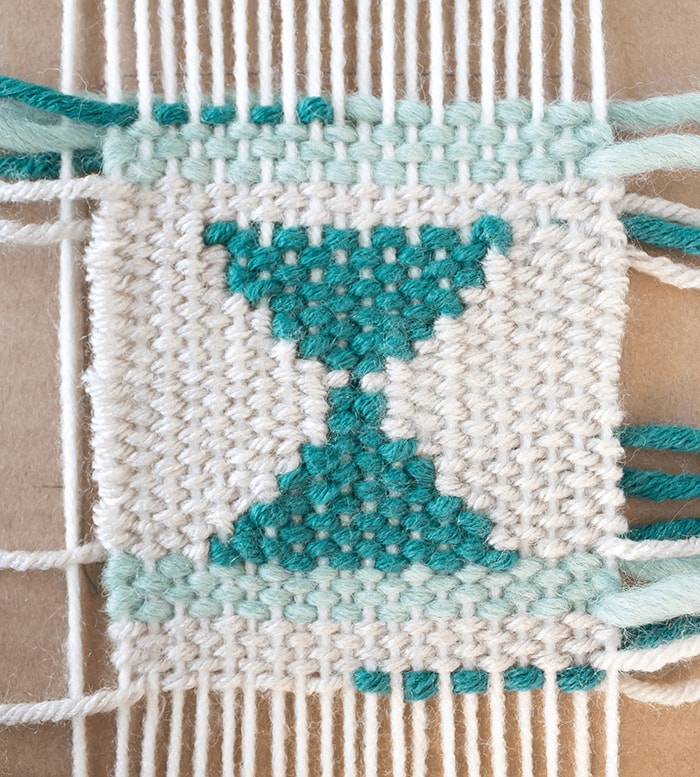
Step 4: Creating Shapes
If you want to get a little fancy with your second coaster, you can also try creating shapes. Start by flipping your cardboard loom over so that the back warp faces up.
To create your shapes, you can begin anywhere on the warp. For this coaster, there are 2 triangles; tips pointed toward the middle.

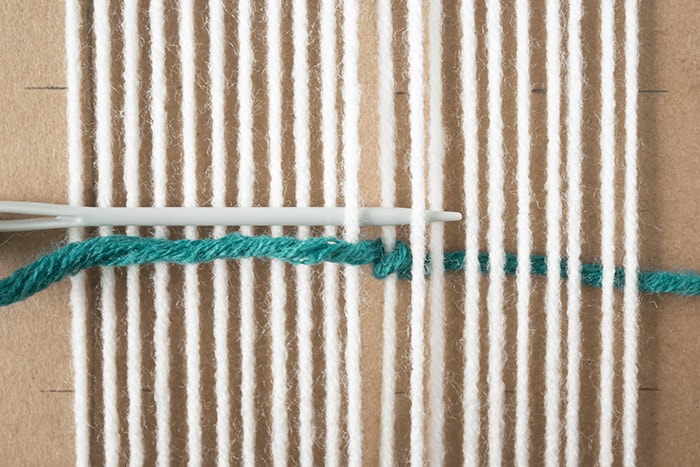
Begin in the center by guiding the needle under the warp until you reach the center strand.
Pull the needle up and over the remaining warp strands toward the left until reaching the opposite end. Pull the yarn in that direction, leaving a tail at the far end.
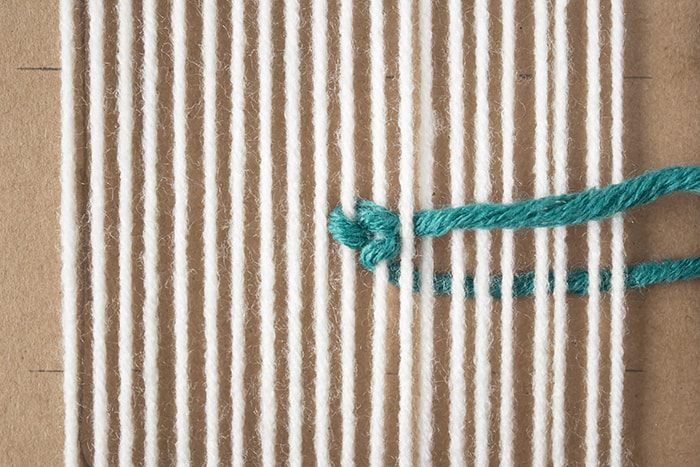
Create a knot over that middle strand by guiding the needle over and then under that strand, and then back toward the left side.
Treat this knot as if it were the first row of your shape. To create a triangle, you will be creating rows of weaving that add two additional strands of warp for each row created.
For the first row above your knot, simply incorporate an additional strand to the left and to the right of the knot, so that you have 3 strands to weave – see the picture below.
So now you have your first ‘row,’ in which you used a single warp strand to create, and a second row, in which you used 3 warp strands.
It does not look like much, but trust me, it will all begin to take shape as you create more rows. Continue weaving your triangle by adding 2 extra strands per row.
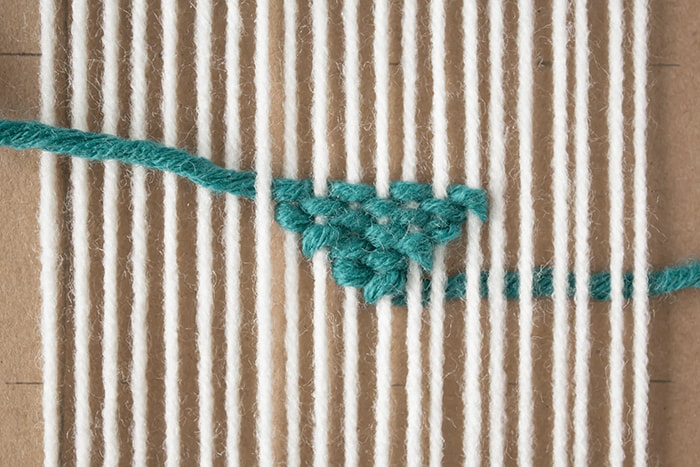
Now weave the second triangle, creating one row at a time, moving downward until the triangle is complete.
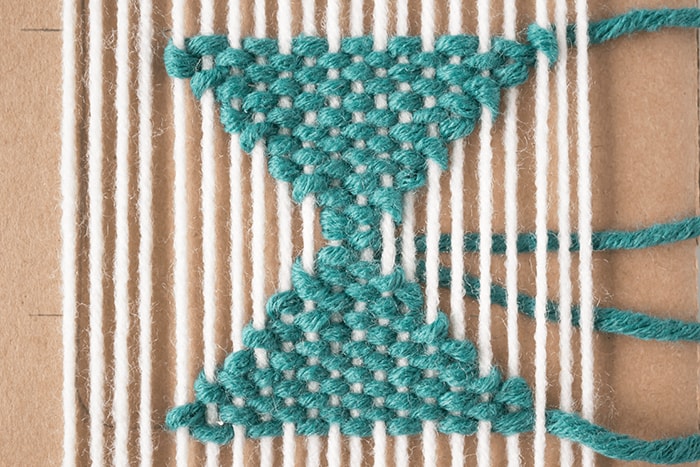
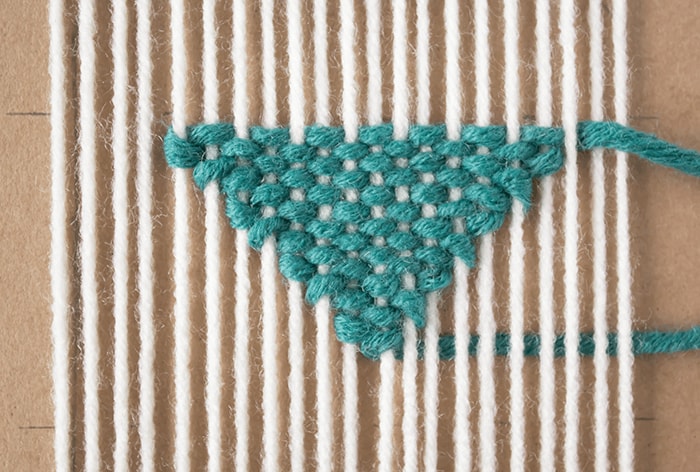
Go ahead and fill in the spaces around the triangles by weaving rows. Begin at the bottom and make your way toward the top.
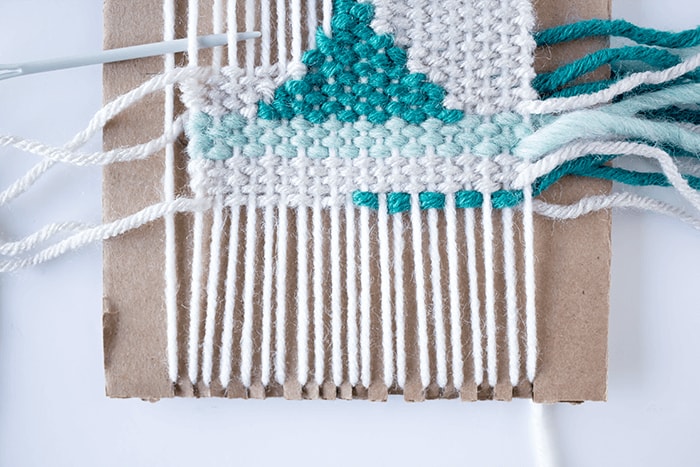
To remove your coasters, snip off the warp strands along the top and bottom edges of your loom.
Step 5: Removing Your Coasters
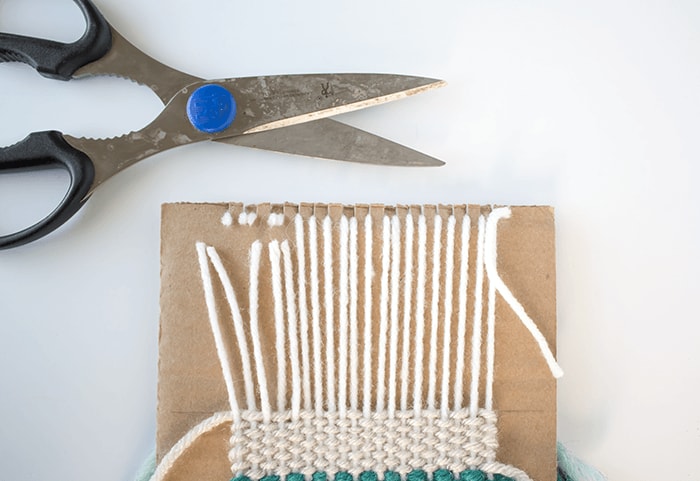
Begin tying knots along the edges, 2 warp strands at a time. The knots are an important step, as they will prevent the weaving from unraveling.
Once you’ve knotted both sides of each coaster, turn over so that the back side faces up. Taking your loose tails, weave each strand into the back and then snip off all loose ends.
Apply a bit of Mod Podge over both sides of the coasters to add some protection from stains, but also to prevent the threads woven into the back sides from coming undone. The Mod Podge will stiffen the coaster material once dried.
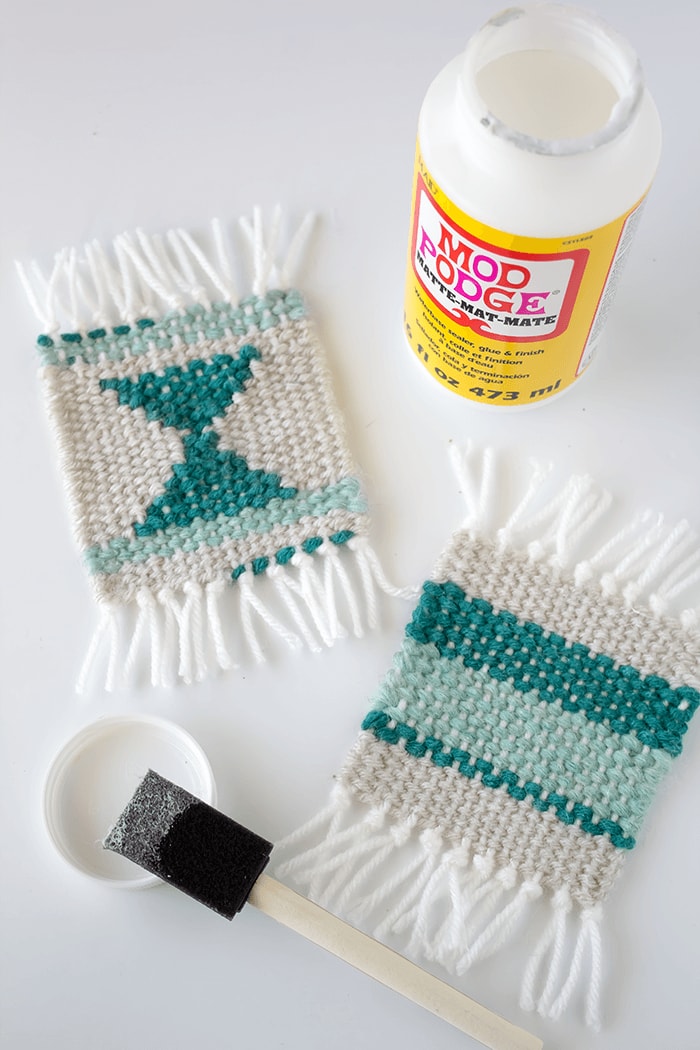
**You can always skip this part and simply dab some Mod Podge on the strands woven into the back side of each coaster. This will ensure that the tails woven into the back stay put!
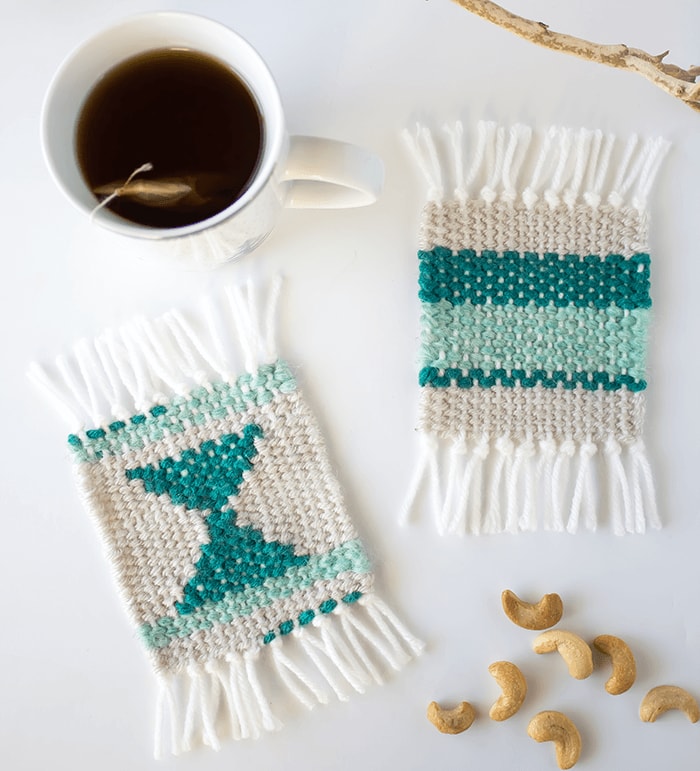
Ready For Use!
Now you’re ready to use your cute little woven coasters!
I hope you give these woven coasters a try.
Happy crafting 🙂
If you liked this tutorial, you may also enjoy some of my other crafts:
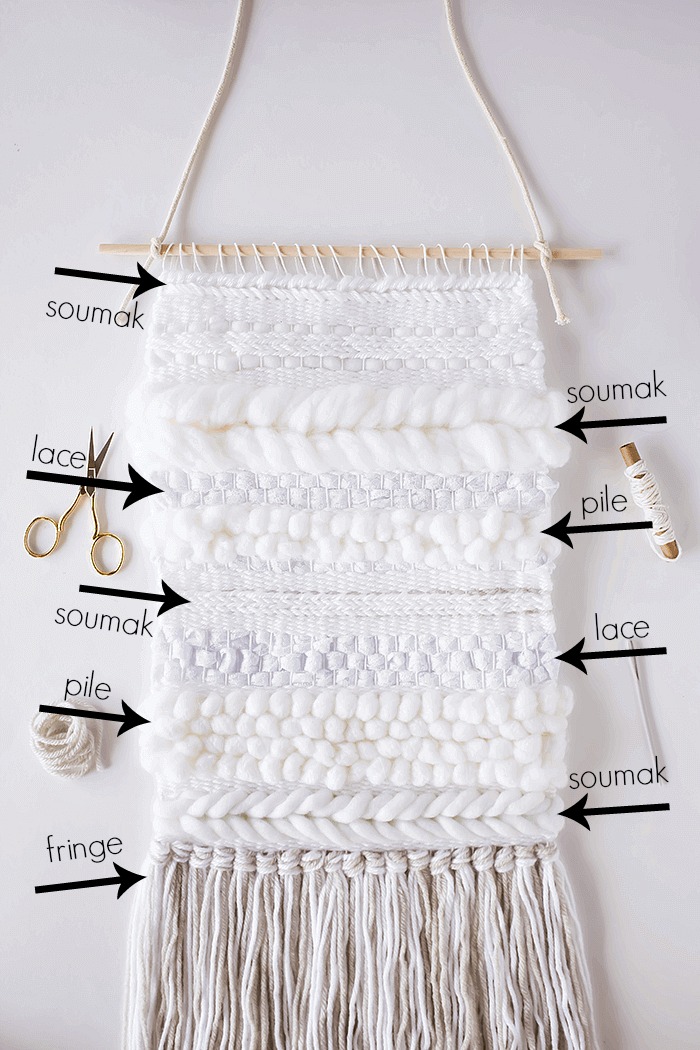
5 Ways To Add Texture To Weavings
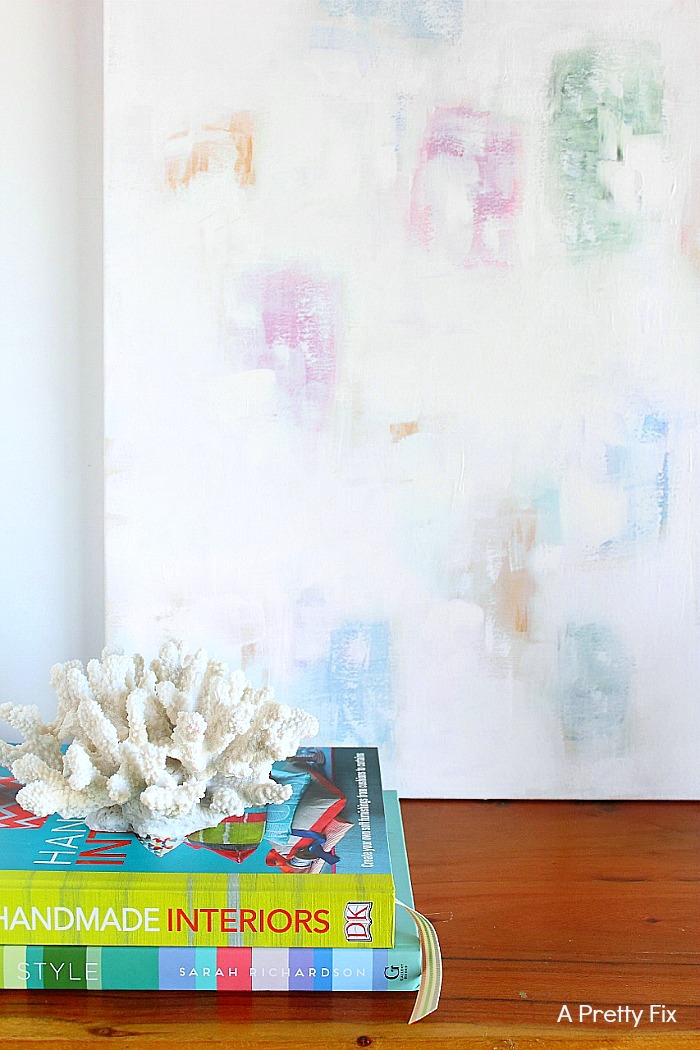
How To Create Whitewash Abstract Art
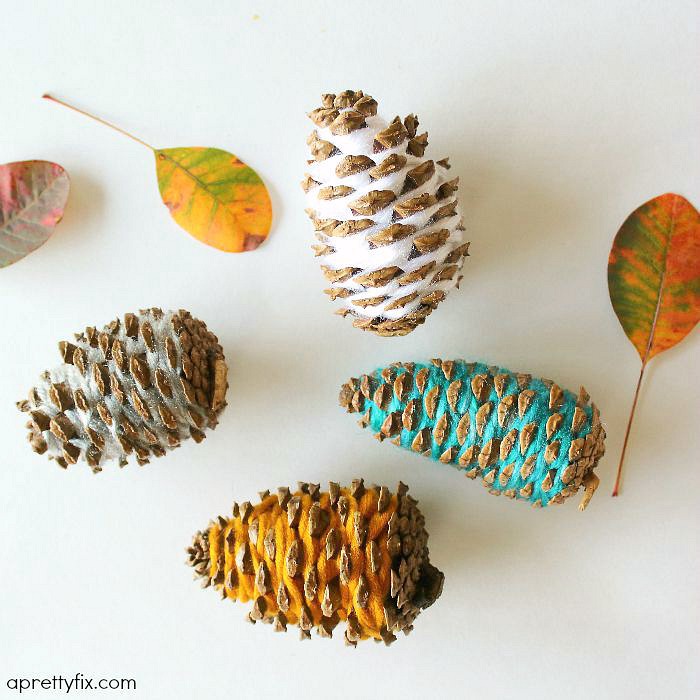
Yarn-Wrapped Pinecones
when doing shapes how do you connect the shapes with the background color so there isn’t a gap between the triangle and background.
Hi Alicia, this post was a guest post collaboration from my friend Jelica from A Pretty Fix. You can post your question HERE.. Thanks for reading!
Super .I just do that fantastic.thank u dear