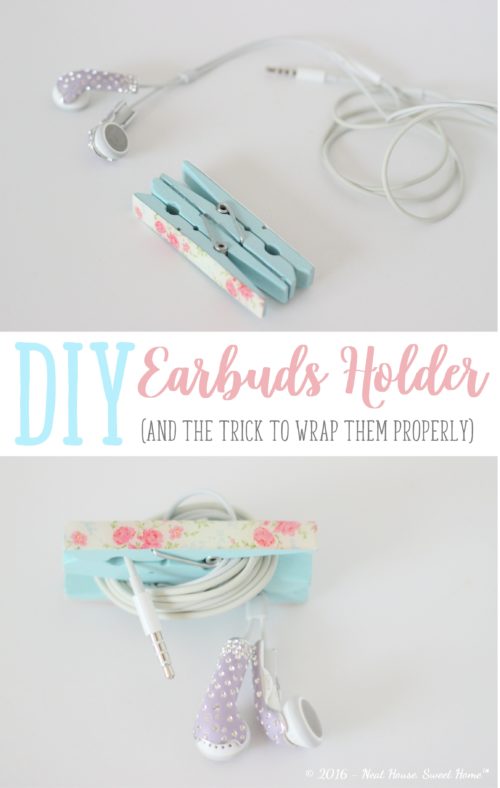
DIY Earbuds Holder
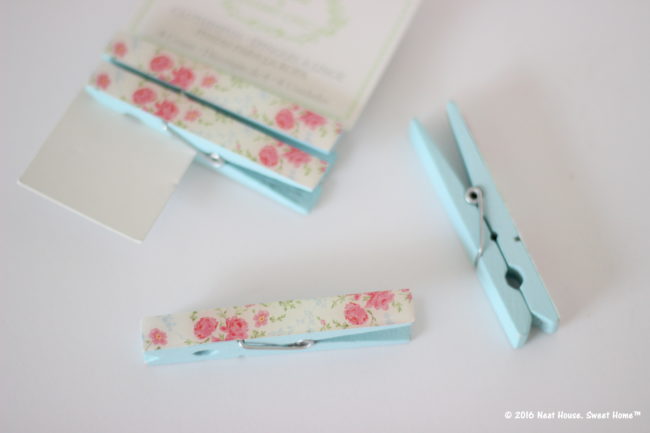
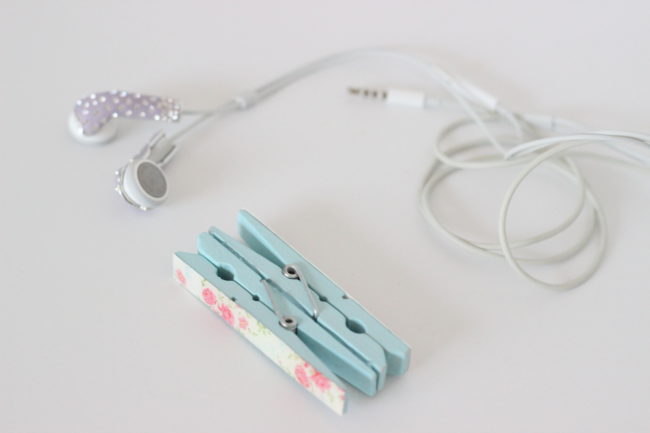
A couple of years ago, I purchased a few sets of Shabby Chic® clothespins. They are so beautiful that I kept them in their original packaging for the last four years, waiting for the right craft to come along until I saw this easy DIY earbuds holder project all over Pinterest.
Would you like to save this?
Making this earbuds holder was super easy. Especially because I already had the decorated clothespins available. But if you have plain clothespins, you just have to pretty them up with washi tape.
This post may contain affiliate links for your convenience. For more information, please read my Affiliate Disclosure.
Materials You Will Need
- Full-size wood clothespins, 3.3″ long – if they’re not decorated, you can use some blue paint and floral washi tape if you want to achieve the Shabby Chic® look.
- Hot glue gun – this is my favorite, the one and only. Hands down, the best.
- Glue sticks
- Earbuds – obvious
How to Make The Earbuds holder
Add a thin line of hot glue on the back (non decorated side) of one of the clothespins.
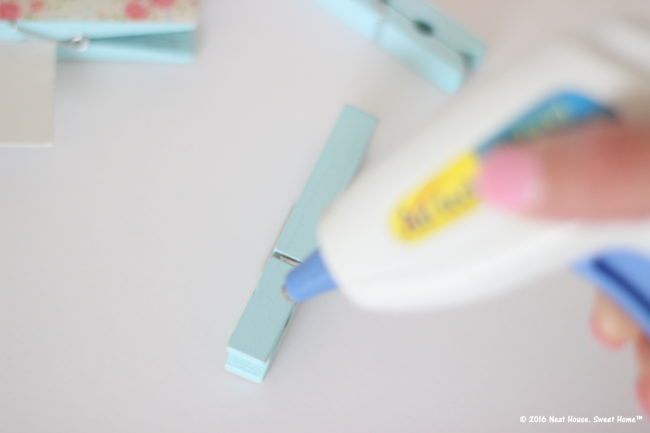
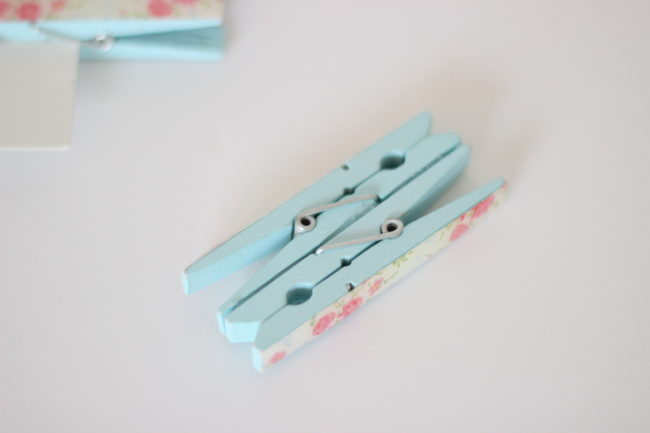
Attach clothespins together back to back. One end should be facing right and the other end should be facing left. Make enough pressure to spread glue evenly. Work quickly as hot glue dries fast.
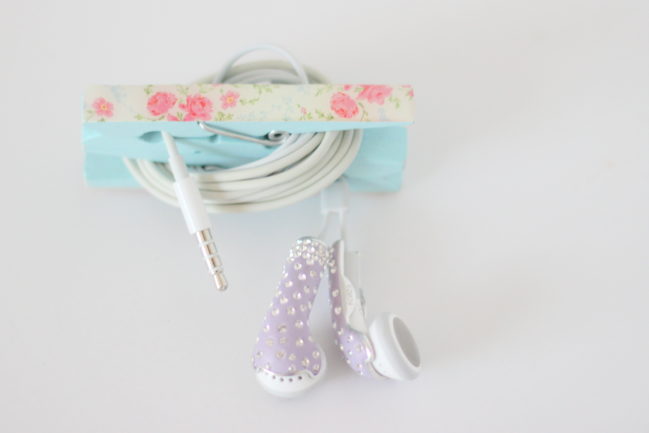
Your Earbuds Holder is done!
How to Get the Perfect Wrap Every Time
When I tried to wrap my cord around the clothespins for the first time, I started with the plug end. Once I reached the microphone, I could not make a perfect wrap because it is not flexible so, it left me with an awkward hanging end.
That hanging end beats the purpose of an untangled wire.
So, no rocket science! Here’s what you have to do to avoid that:
Start by clipping the earbuds end first. You should have enough room to center the microphone so it lays straight across both clothespins without forcing it to bend.
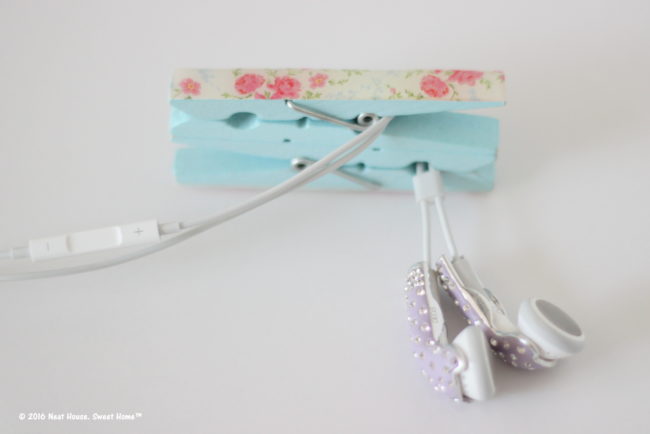
The first loop will be the wire in the front, the second loop will be the microphone (in the back), and the picture below shows you the third loop of wire again. So, the mic stays firmly in place and does not bend. If you start with the other end, you won’t know where the microphone will end up.

Keep wrapping around. Secure the other end with the top clothespin and you are done!
I was inspired by this article from The Pin Junkie to get this easy organization hack/craft done in a cinch!
Want to see where I keep my earbuds safe? Check out my Bedside Table Organization.
For more crafts and DIYs ideas, follow me on Pinterest. Pin with me!

i love this idea. i hate untangling them. this is the first time on your site and love it. thank you
Thank you! I use mine everyday when I go out for long walks 🙂
This is such a cute earbud holder, and I love how you showed the right way to wrap it. There’s nothing more frustrating than tangled earbuds! What a cute, easy craft project!
Thank you Celeste! Can’t take credit for the initial craft idea, but once you execute it, you realize that there’s more to it. Wrapping the wire is an art by itself, LOL – Have an awesome weekend, friend!