DIY Drawer Dividers for Kitchen Utensils
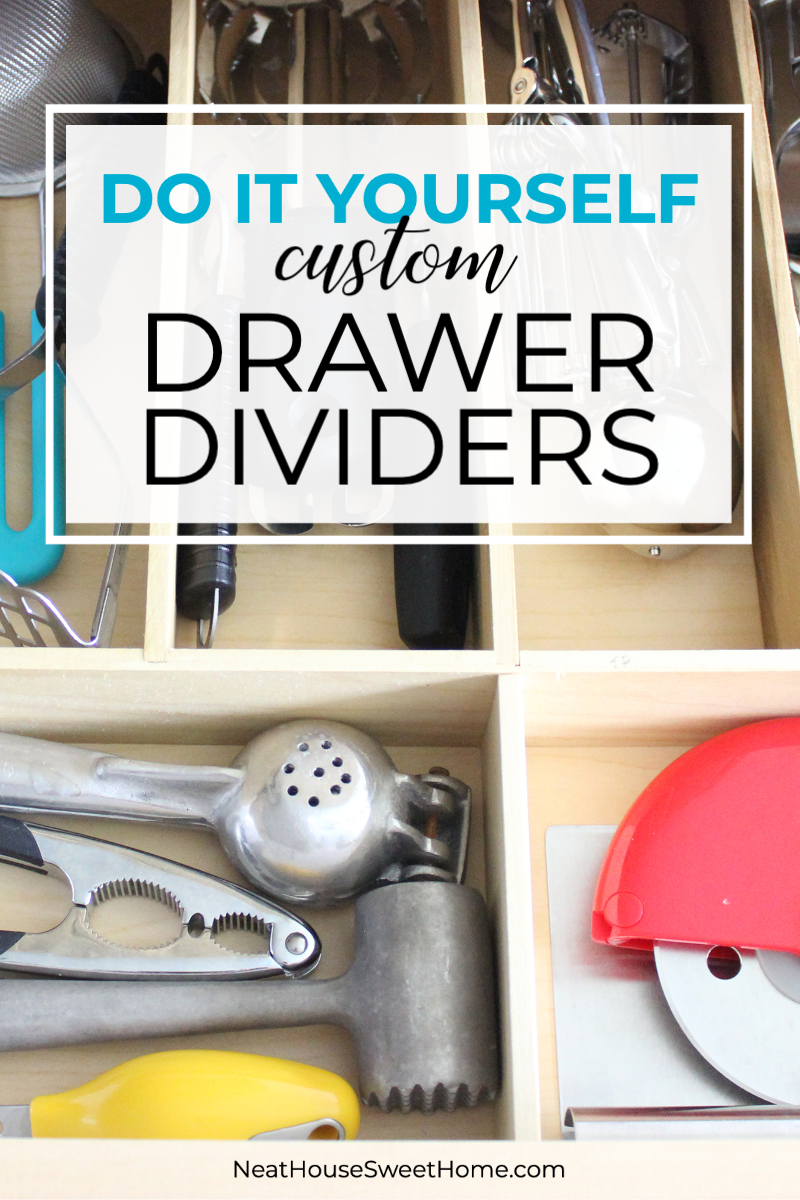
Is your kitchen utensils drawer a tangled mess? I made these wooden drawer dividers for my kitchen utensils in a day. It was a very easy, quick, and affordable project that you too can do it yourself.
I love cooking almost as much as I love organizing. But, cooking when I am pressed for time is a different story, and unfortunately, that tends to happen often. So, my utensils’ drawers pay for it when I rush trying to get dinner on the table.
Last year, I purchased a few drawer organizers at the dollar store, but I still couldn’t come up with a good configuration for my kitchen utensil drawers. So, I decided to make my own custom wooden drawer dividers.
I wanted to make custom dividers for my kitchen drawers ever since I read this tutorial from Kevin & Amanda. It seemed easy enough until I got my husband involved, and we decided to take a few extra steps.
How to Make Your Custom Wooden Drawer Dividers
List of Tools and Materials
Here is a list of what you will need to build the wooden drawer dividers:
- Poplar hobby board – 1/4 in. x 2 in. x 3 ft. – We purchased 5 and had some leftover. Calculate how many boards you will need, depending on the number of divisions you are making, and their length.
- Wood glue
- Miter saw – if you don’t have a saw, they can cut the pieces for you at the hardware store. Just remember: measure twice, cut once!
- Sandpaper – 320 grit
- Fast-drying polyurethane – I had clear semi-gloss handy, but any finish would work. This is optional.
- Paint Brush – also optional in case you decide to give it a semi-gloss finish.
1. Create a Template
Before you start making the custom wooden dividers for your drawers, remember the saying ‘Measure twice, cut once.’ So, be very thorough and take the time to decide the layout you’d like. The more time you spend in this step the more custom your drawer dividers will be.
After settling on a drawer arrangement, count how many pieces of hobby board you will need and how long each one shouold be, according to your template.
After a very needed decluttering session of kitchen utensils, I took my final count of utensils and laid them inside the drawers again and created an imaginary template. You can also use masking tape or trace thin lines with a pencil.
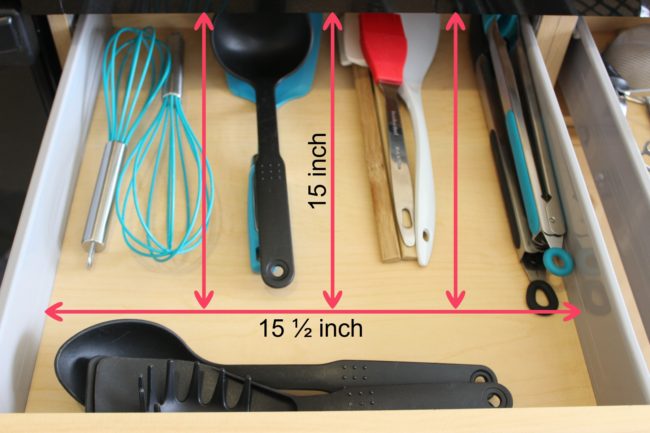
Kitchen Utensils Drawer #1
- (2) 15 1/2 inch pieces. One for the back of the drawer (arrow not depicted) and one for the front. These run from left to right.
- (3) 15-inch pieces.
Would you like to save this?
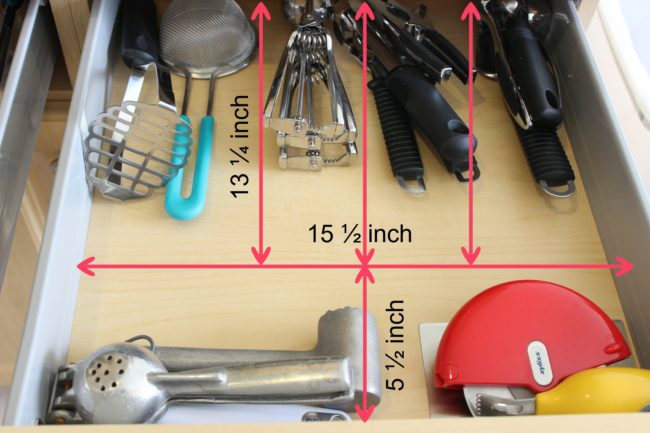
Kitchen Utensils Drawer #2
- (2) 15 1/2 inch pieces – One for the back of the drawer (measuring line not depicted), and one for the front
- (3) 13 1/4 inch pieces
- (1) 5 1/2 inch piece
2. Cut The Hobby Board
With a miter saw, cut to the right size each one of the pieces measured in Step 1.
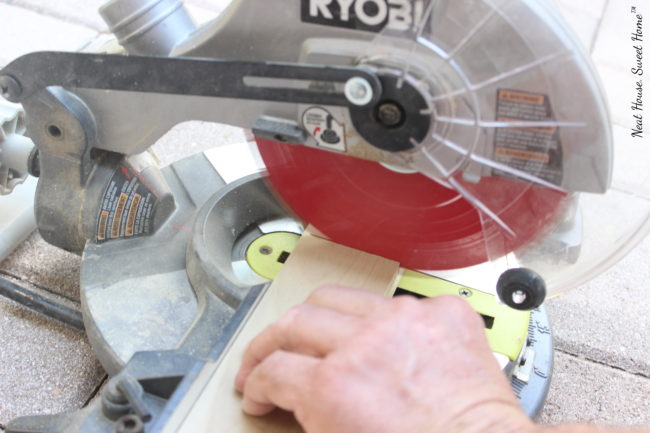
Pro Tip: we cut a groove in each separation, in order to snap the pieces into place. I thought it would reinforce the sides of the dividers. This was an extra step we did with the miter saw, however, it is not strictly necessary.
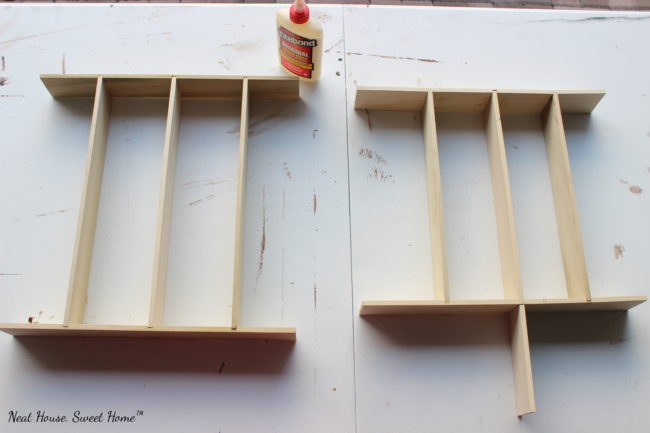
3. Glue The Pieces Together
After cutting the pieces, glue them together leaving the exact spacing and making the exact configuration as in the templates. Then, let them air dry.
The tutorial I read ended here. However, I noticed that the craft wood was leaving lots of dust and it looked unfinished. So I took two extra steps.
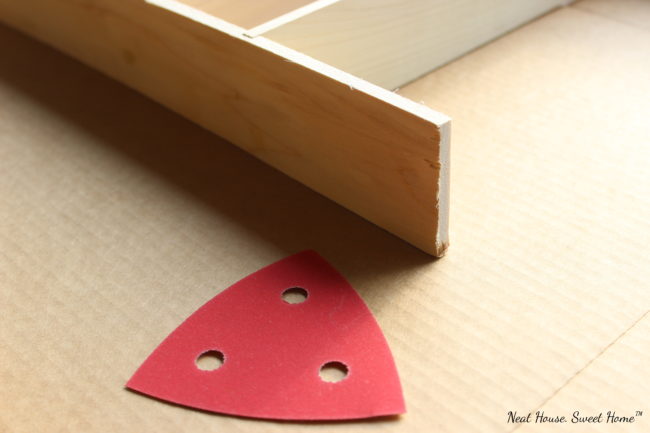
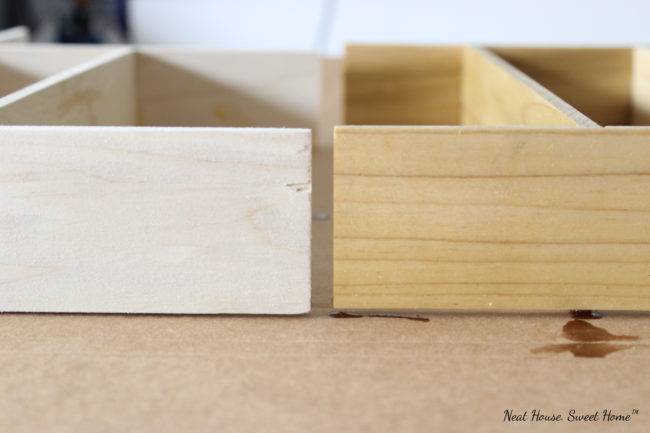
4. Sand The Wood – Optional
Hobby board is very rough (notice the edge of the end piece in the picture below). So, once the drawer dividers were completely dry, I sanded the rough edges of every piece. It took me less than 15 minutes to do it all.
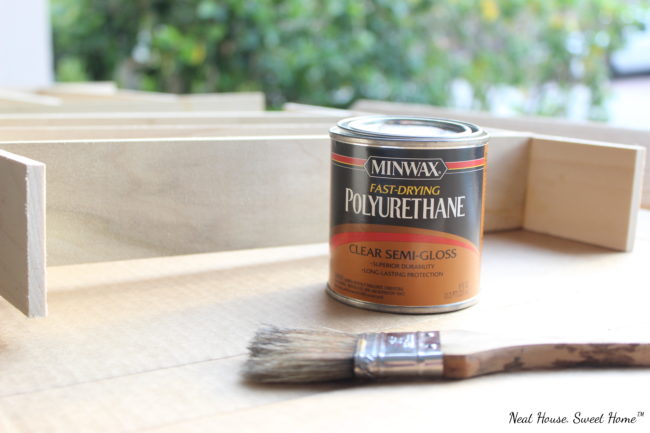
5. Add a Finish – Optional
I also sealed the drawer dividers to give them an even more custom look. One coat of fast-drying polyurethane was enough to make a difference in the dividers.
The picture below shows a comparison of a divider without sanding or finish (left), and a wooden divider sanded and finished with semi-gloss poly (right). This shows that it is definitely worth taking the two extra steps.
And here is the final product:
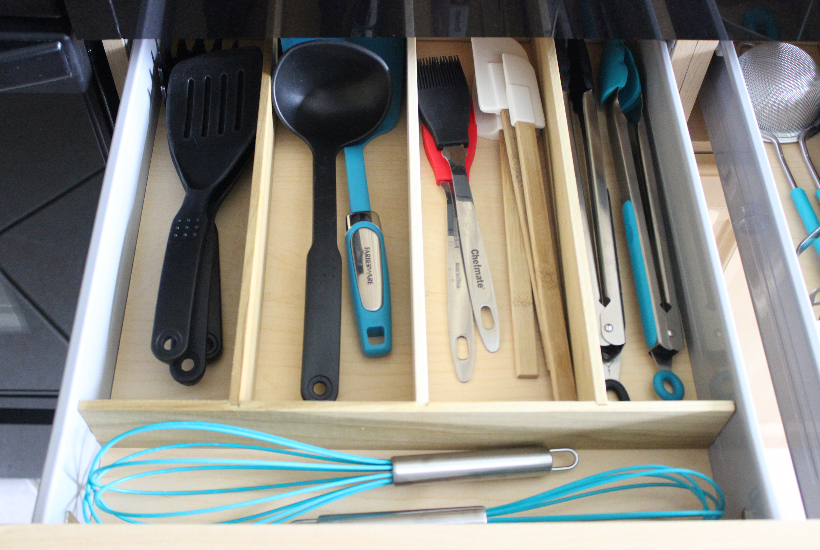
Drawer Dividers For Cooking Utensils
This drawer is immediate to the right of the stove, and I keep here all the utensils I need while cooking. I love how custom it is, and the wooden dividers look like they are built-in the drawer.
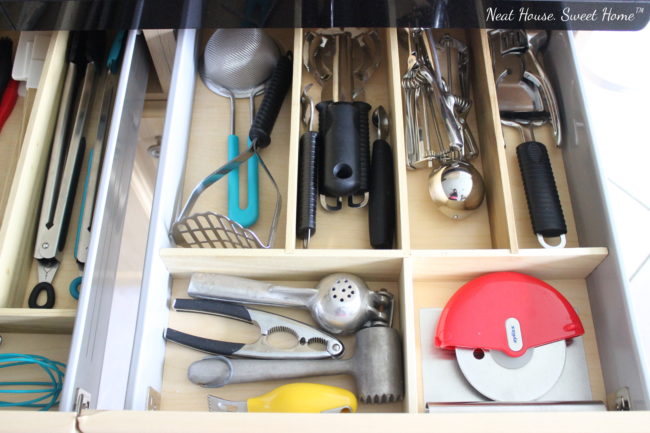
Drawer Dividers For Kitchen Gadgets
This drawer is to the right of the cooking utensils drawer highlighted above. In here, I keep gadgets and utensils needed for meal prep and some other gadgets that I don’t use too often. For example, ice cream scoops, pie server, garlic press, pizza cutter, nutcracker, mallet, etc.
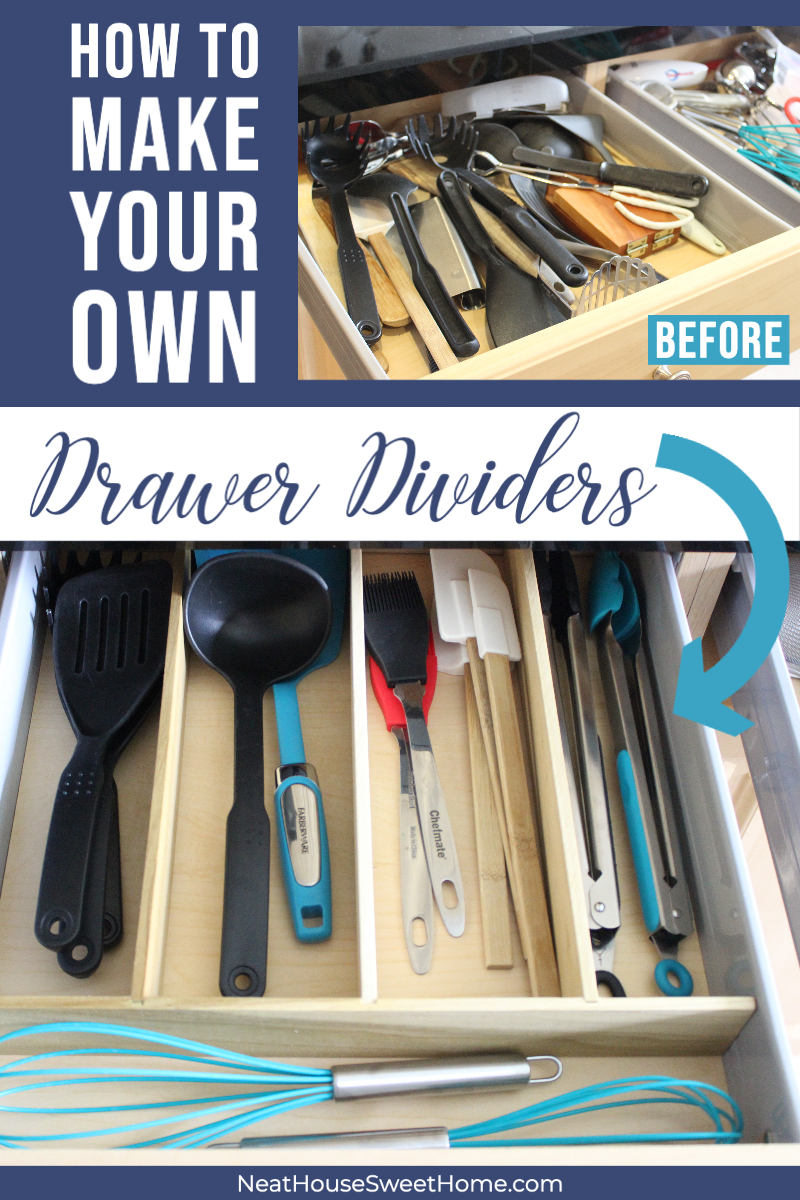
Before: Kitchen Drawers Without Dividers
What a difference from before!

Making these DIY drawer dividers was a project born from the desperate need of an organized and uncluttered utensils drawer. You too can make your own kitchen drawers look custom with this easy DIY dividers project.
Have questions, leave me a comment below!

How did you do small notches with your miter saw. I like that idea for stability but don’t know how to do it?
Hi Jayne! All you have to do is mark your notch with pencil (1/4″ wide) and bring the blade down only halfway through the wood thickness, being careful you don’t cut all the way through. Then, you will have to make the cut a few times (depending on your blade’s thickness) moving the board towards the left (or right) until you reach the 1/4″ width. Hope this helps. Thanks for stopping by!
Now I see the finished product! Looks great!
Thank you, Melissa! It was an easy Sunday project that made such a difference in my kitchen 🙂