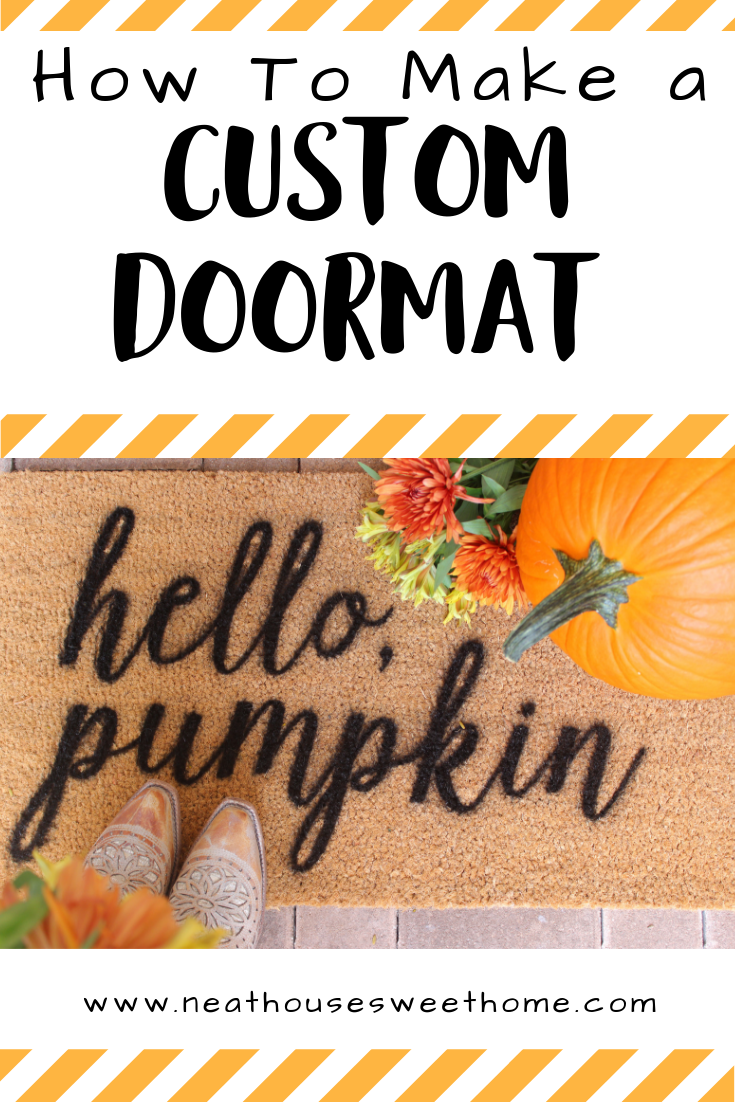
DIY ‘Hello, Pumpkin’ Doormat with Plasti Dip Craft
This is a sponsored post written by me on behalf of Plasti Dip. All opinions are 100% mine. This ‘Hello, Pumpkin’ doormat tutorial uses a stencil, and then it is painted with the new fabulous Plasti Dip Craft in Midnight Black. It’s like spray paint, but way better!
I utterly love Fall! Mostly because it’s nice to get a break in the weather after an excruciating summer in South Florida. Or maybe it’s because growing up in South America, I lived in an endless spring/summer and never got to experience a change in seasons.
But whatever the reason is, I get all giddy and excited when I can have my first pumpkin-spiced latte, go to the local pumpkin patch, go on a hayride, and start decorating my home with warm tones and pumpkins galore. Yes, those might be the real reasons.
Would you like to save this?
With that said, when I was invited to create a project with the new line Plasti Dip Craft, I didn’t hesitate to make my first fall craft of the season. This DIY doormat says, “Hello, Pumpkin,” while I was at it, I decided to give new life to some old planter pots I had sitting in the garage, too.
About Plasti Dip Craft
If you’ve never heard of Plasti Dip, it is an air-dry, specialty rubber coating. It’s peelable on most surfaces, flexible, insulating, non-slip, and durable. Their latest product line is Plasti Dip Craft, and it provides a range of coating solutions and enhancers for all kinds of DIY crafts and home improvement projects.
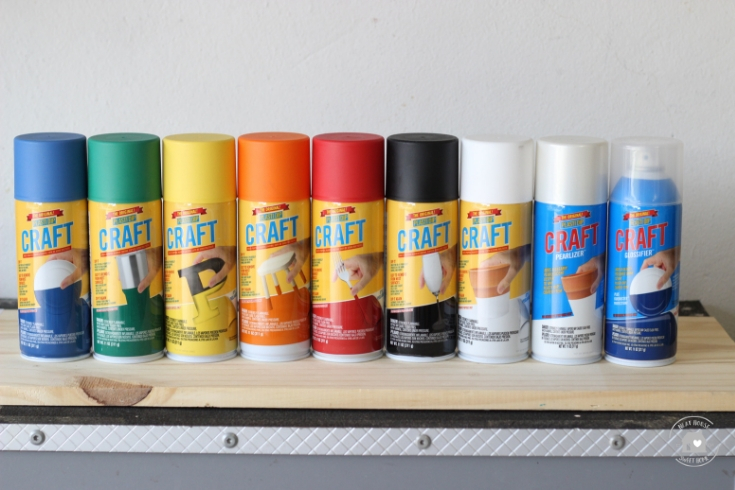
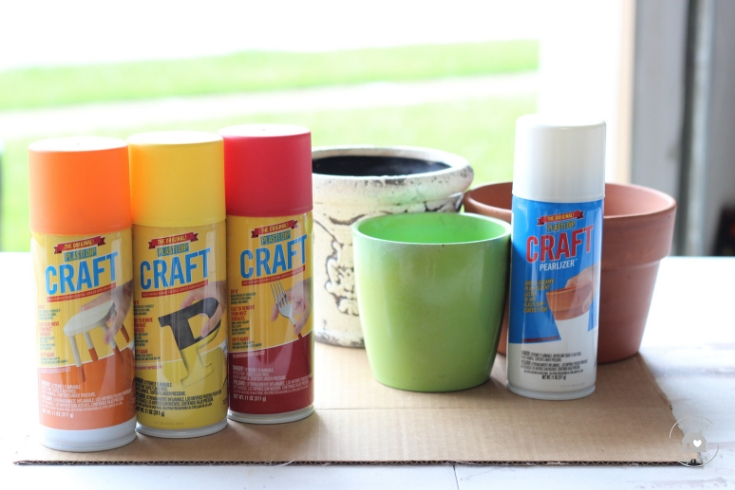
Give me an arrangement of paint in rainbow colors like these, and I will DIY anything and everything! Plasti Dip Craft comes in 7 colors and three enhancers:
- Crisp White
- Lemon Yellow
- Tin Roof Red
- Pumpkin Spice
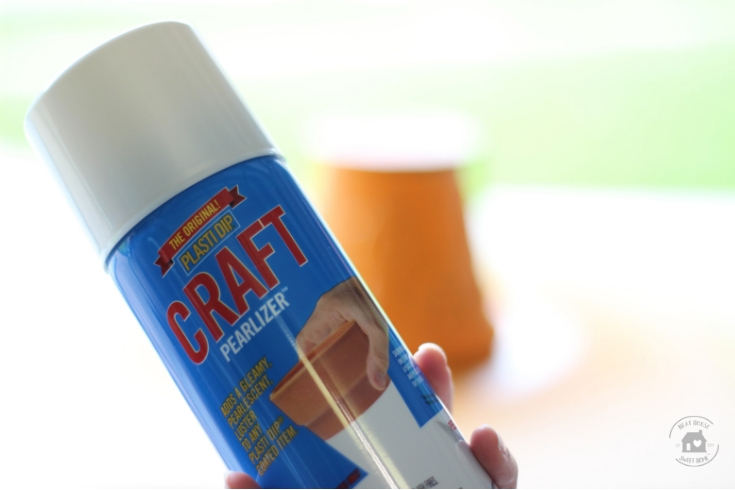
- Midnight Black (used in this DIY doormat project)
- Gulf Coast Blue
- Gator Green
- Glossifier Enhancer
- Silver Metalizer Enhancer
- White Pearlizer Enhancer
The original Plasti Dip is compatible with over 50 colors and enhancers of Plasti Dip, including a Create Your Color Kit; the possibilities are endless! You can learn more about the product on Plasti Dip’s website, shop now at Awarehousefull, find a retailernear you, or get yours at Amazon.
A Word of Caution: For decorative purposes only. WARNING: Not food safe. Items coated with Plasti Dip Craft should NEVER come in contact with consumable food or beverages or be placed in a dishwasher or microwave oven.
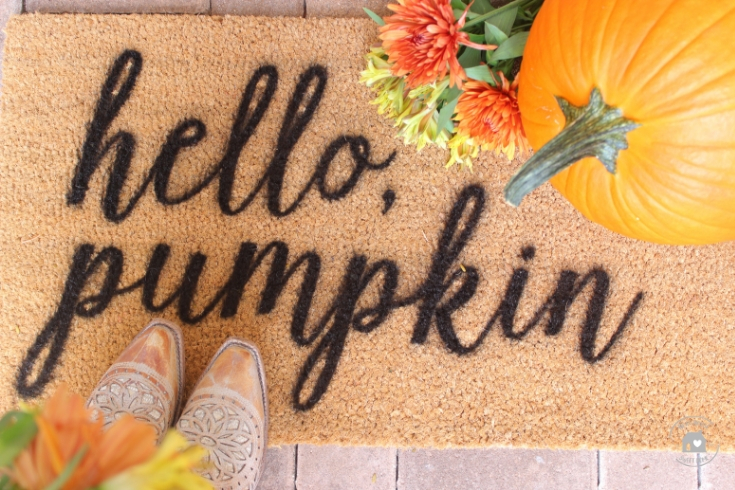
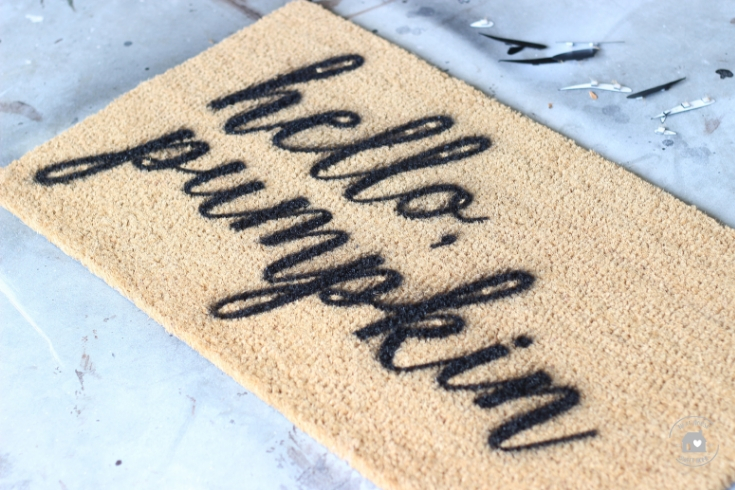
DIY Hello Pumpkin Welcome Mat
How fun is this doormat greeting you ‘Hello, pumpkin’? My neighbors haven’t seen it, but I can assure you I am going to get a few requests. If you are thinking that this DIY doormat might be difficult to pull off, especially with a script font, let me tell you, it was a breeze!
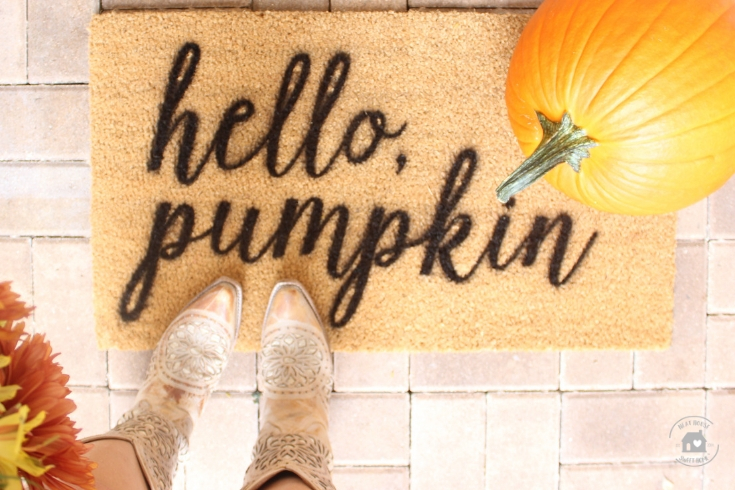
Most of the tutorials I have seen for a DIY doormat have one thing in common: the use of acrylic paint to paint the stenciled design finished off with a layer of some sort of protective sealer.
This DIY doormat is different. Plasti Dip Craft is like spray paint but way better! It’s way better because it’s an air-dry specialty rubber coating that protects against moisture, acids, abrasion, corrosion, and skidding/slipping. Which means you can skip the sealer.
1. Gather Your Tools and Materials
For our Hello Pumpkin doormat, you can either design and cut your own stencil with a die-cut machine or use any other pre-cut stencil of your choice. Here is what you will need:
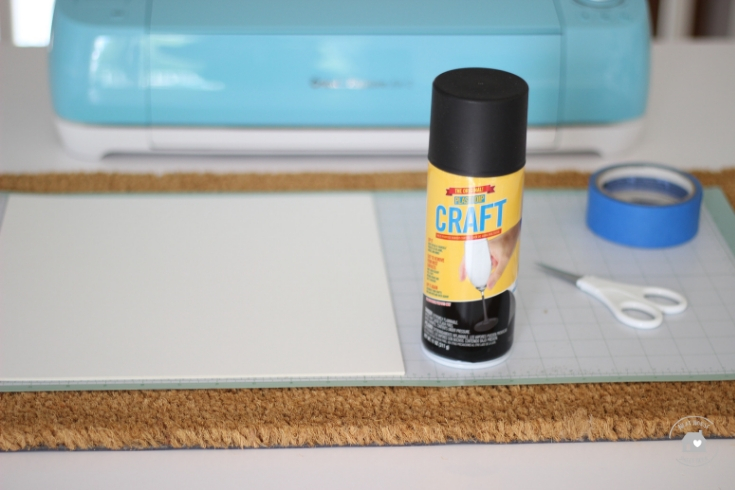
- Standard coir doormat – You can find it at any home store.
- Stencil – Pre-made or custom made on a die cut machine.
- Painter’s tape. Blue tape.
- Scissors
- Double sided sticky squares – Highly recommended
- Plasti Dip Craft in the color of your choice. I used Midnight Black.
2. Tape the Stencil On the Doormat
After I cut the stencil on the die cut machine, I taped it down on the doormat taking particular care of every inch that I did not want to be covered with paint or overspray. Make sure you tape the stencil down firmly. The coir is a tough surface to get things to stick to, so the bigger your stencil the better.
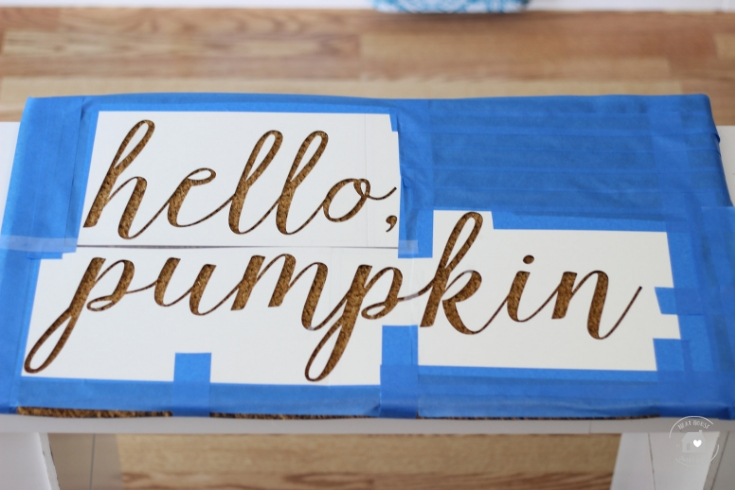
I chose to cover the rest of the doormat with the painter’s tape, but you can choose to cover it with craft paper too. But you still have to tape that craft paper down, so I skipped that step and used the blue tape.
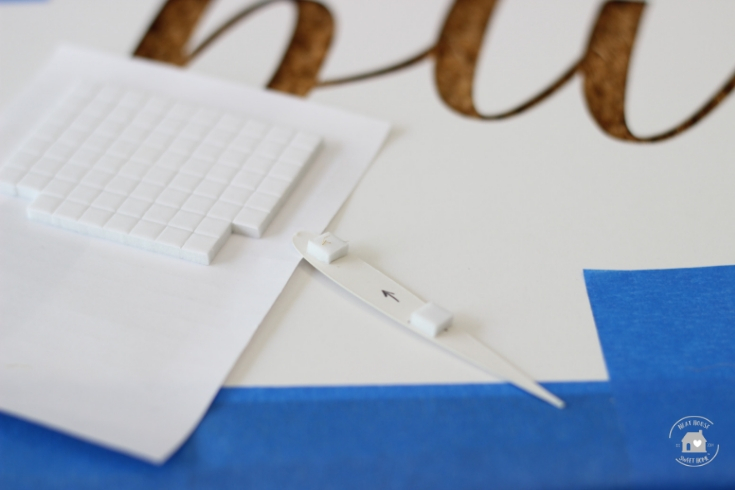
Here is a tip if you are making your own stencil: use sticky squares to stick down on the mat all the pieces that you weed out. It sticks firmly to the coir fibers and I loved the final outcome!
3. Spray the Doormat
Plasti Dip Craft must be used in a well-ventilated area, so I moved over to my garage where I get the most light and air for my crafts.

Follow the instructions on the label and you will be good to go. You must shake the can for a minute before use, and spray 8 to 10 inches away from the surface.
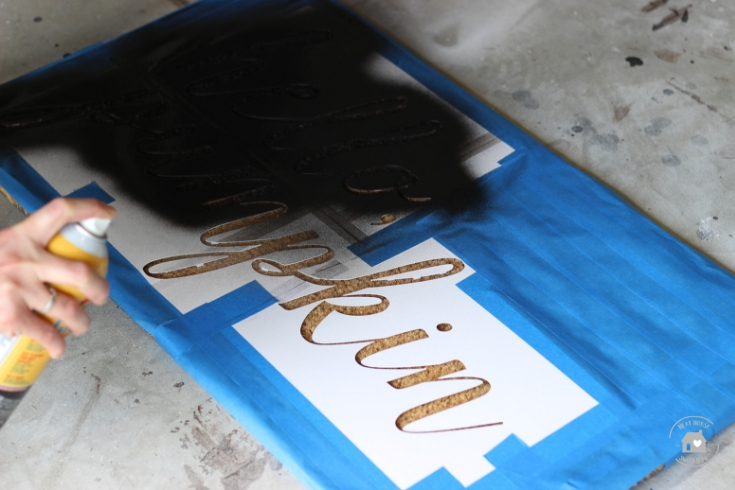
Since my stencil was just a tad lifted off the surface, I made an effort to spray the mat straight down, to avoid getting product under the stencil.
The advantage of this particular project is that you can spray in any direction in order to get into every curve of each letter, without worrying about messing up.
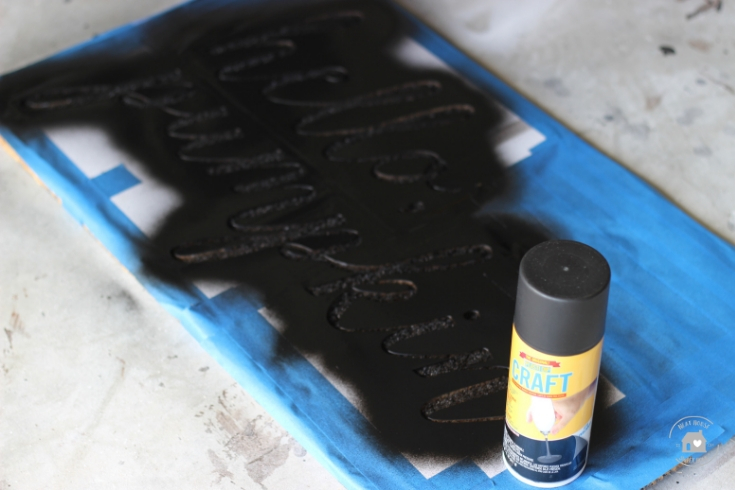
Not a chance! It’s very straightforward. I don’t think I spent more than 15 minutes spraying this doormat. One heavy coat (two or three strokes per area) was enough to cover.
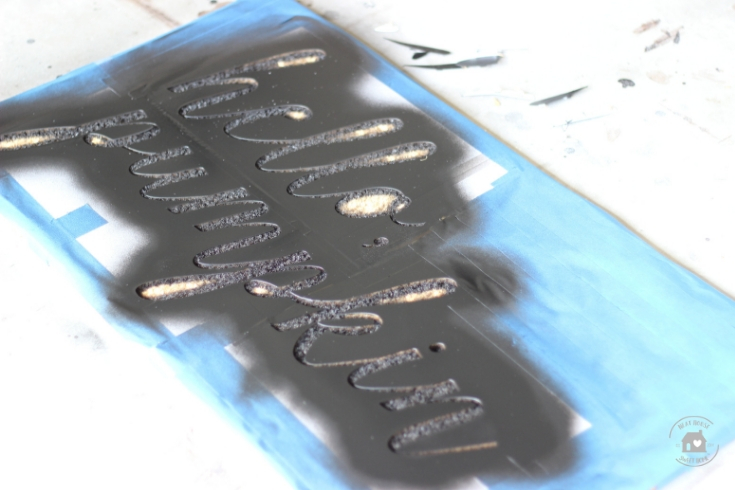
My biggest fear was to find paint under the little pieces. But the idea of spraying straight down really worked.
More Plasti Dip Craft Projects
Once I am in my garage, with my craft table set up, a cup of coffee, and some country music in the background, you can’t stop me. So, I grabbed three old planter pots and tried on three more Plasti Dip Craft colors, and the Pearlizer enhancer.
Plasti Dip recommends 3 to 4 coats for best results, but I was able to achieve a beautiful and even finish with only two coats on each pot.

TIN ROOF RED

PUMPKIN SPICE
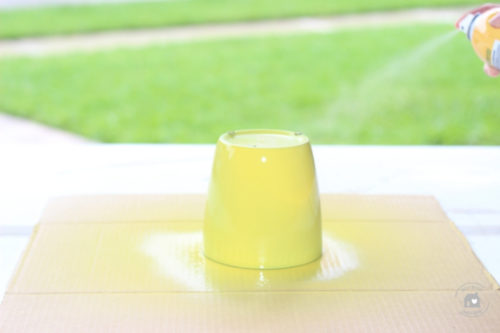
LEMON YELLOW
My favorite color is Lemon Yellow.

I put a coat of Pearlizer on the Pumpkin Spice pot.
Once the two coats of Pumpkin Spice dried, I sprayed Pearlizer over the pot.
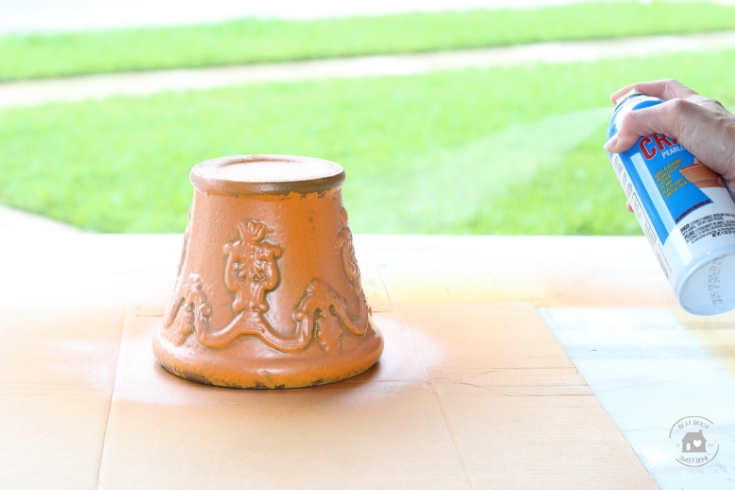
I purposely, left some of the chipped areas on the pot to still peek through the paint. The pearlescent finish is beautiful.
Plasti Dip Features
The beauty of Plasti Dip, is that it is peelable in most surfaces once dry. That means that you can fix mistakes or change up the color, while still preserving the original finish on your piece. It remains flexible and stretchy over time.
Another great feature is that it provides a comfortable, control grip and rubberized texture on the surface, so you know these pots will not be slippery when wet and will withstand the outdoors without fading or cracking.
Learn more about the product on Plasti Dip’s website, shop now at Awarehousefull , find a retailernear you, or get yours at Amazon.
I hope you try this great product for your next craft project, but I especially hope you make a Hello Pumpkin welcome mat this fall!
Love it! Pretty and practical! There are so many uses for this. Thanks for the tips!
Thank you, Melissa! It really is a very practical product and multiuse for us crafters 🙂